Building a Circuit communication device using Raspberry PI

This article intends to show the Circuit SDK’s portability and how it can be easily integrated with inexpensive hardware to build all kind of communication devices.
Circuit is a team collaboration software supporting chat, voice, video, screen share and much more. It’s available on the browser, as desktop application, iOS and Android. The free version allows up to 100 users and 3 users per conference call without any feature limitation.
For an introduction to Circuit APIs you may want to read this article.
Circuit Receptionist Kiosk
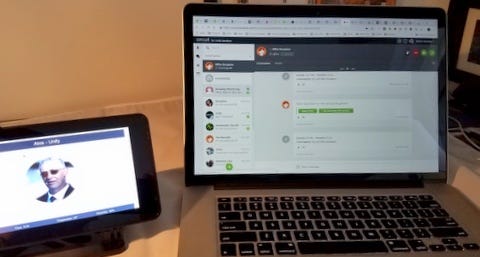
This application can be ideal for office buildings with restricted access and without a human receptionist. This is how it works:
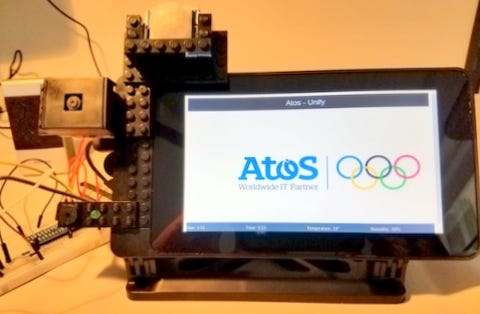
When the application starts (kiosk mode), it presents a splash screen (or idle screen) while it initializes all sensors, logs into Circuit, and updates the bottom bar with date, time, temperature and humidity.
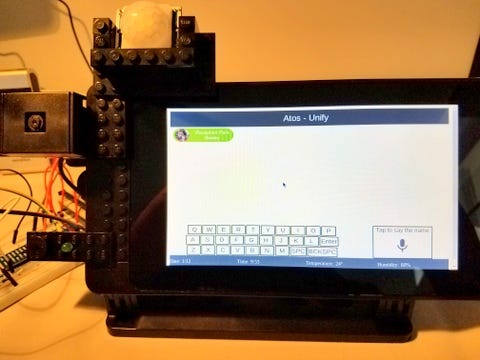
When the presence of the visitor is detected, the application shows several options such as start typing the name, speak the name, or calling the receptionist. The receptionist is actually a Circuit group conversation where any of the participants can answer the call.
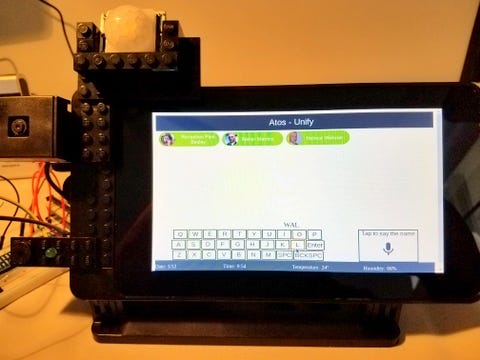
As the visitor types, a user search is requested to the back end and results are presented on the screen. For every change in the search string a new search is performed, and any previous pending search is cancelled.
Once the user search is successful the visitor taps on the user’s avatar and the application sets up a video call with the Circuit user.
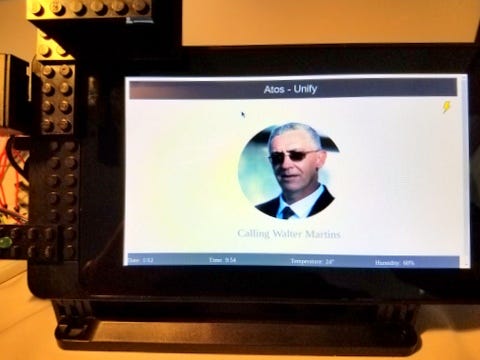
The user inside the office, is alerted of the incoming call and is allowed to answer it using just voice or video.
Once the Circuit user answers the call, video and voice communication is established.
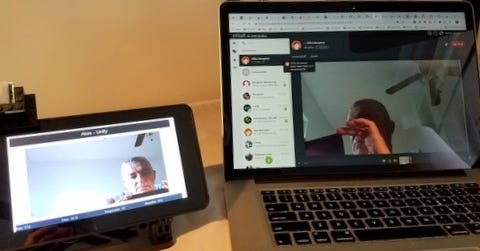
At the same time the Circuit user is prompted with two options, reject the visit and terminate the call, or allow access to the visitor. When the Circuit user clicks on the option to allow access, the device unlocks the door, and the video call is terminated.

About the hardware
Below is the list of the hardware components with a brief description. If you are already familiar with these components just refer to GitHub for the complete list.
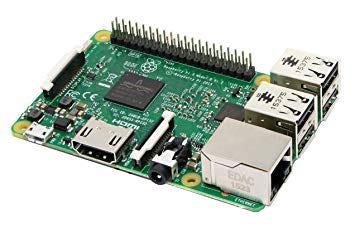
Raspberry Pi: The Raspberry Pi is a small, affordable, and amazingly capable, credit card size computer. It is developed by the Raspberry Pi Foundation, and it might be the most versatile tech ever created. At the time of these writing you can buy it for less than US$40.-

Raspberry Pi 7" Touchscreen Display: Raspberry Pi touchscreens can be easily connected using a DSI ribbon cable and be powered from the GPIO. The full color display outputs up to 800 x 480 and features a capacitive touch sensing capable of detecting 10 fingers. It costs about US$70.-
When using the touchscreen display, a suitable case to house both the Raspberry Pi and the display makes it safer to handle. There are a couple of inexpensive options out there.
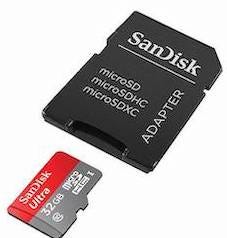
MicroSD Card: This is the persistent storage for the Raspberry Pi. Although 8Gb should be enough for this project, 16Gb is recommended. The adapter may come handy to flash Raspbian on a computer with a regular SD card reader slot.
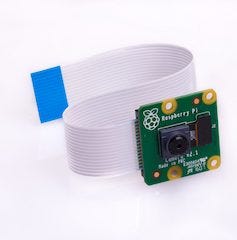
Raspberry Camera Module (V2): The Camera Module can be used to take high-definition video, as well as stills photographs. It’s easy to use for beginners, but has plenty to offer advanced users. It is connected to the Raspberry Pi using a CSI ribbon cable. In this project we will use the camera module to stream the reception feed when the call between the visitor and the Circuit user is established. You can learn more about the Raspberry Camera Module on the Raspberry Pi Foundation.
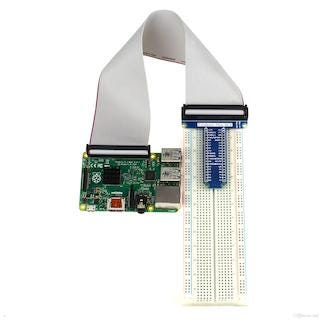
Breadboard: Although not necessary, it is very convenient to quickly setup the electronic circuit, specially if soldering is not your thing. If you use a breadboard you will find the breadboard extension for the Raspberry Pi GPIO (General Purpose Input Output) very convenient. Also some jumpers (male-male and female-male) are needed.
Speaker and Microphone: Both are needed for this project and here you may have several options. Computer speaker with a 3.5mm jack, USB speakers or microphones, headsets or any combination. You may even use a webcam with microphone if you do not count with the Raspberry Camera Module.

Infrared Motion Sensor: This sensor is used to detect the presence of the visitor and switch the user interface view accordingly. I used HC SR501 which is inexpensive and can be adjusted for sensitivity and output timing using the on board variable resistors.

Green LED: Not strictly necessary. In my project the LED flashes when the app is listening the visitor speak the name she is looking for. It also remains ON when the door is being unlocked.
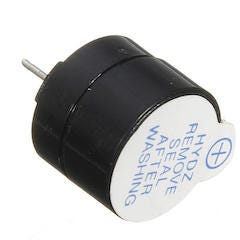
Active Buzzer: The active buzzer is a placeholder. It represents whatever relayed mechanism would be needed to unlock a door. Any real application may need different electronic components to achieve that objective.
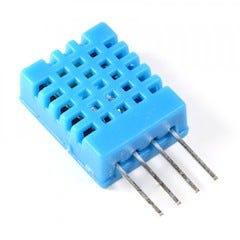
Hygrotermograph Sensor: This sensor provides information about the temperature and humidity in the room. Not very functional to this specific application but I decided to include just because… I can. I used the inexpensive DHT11. You can use any other, or none.
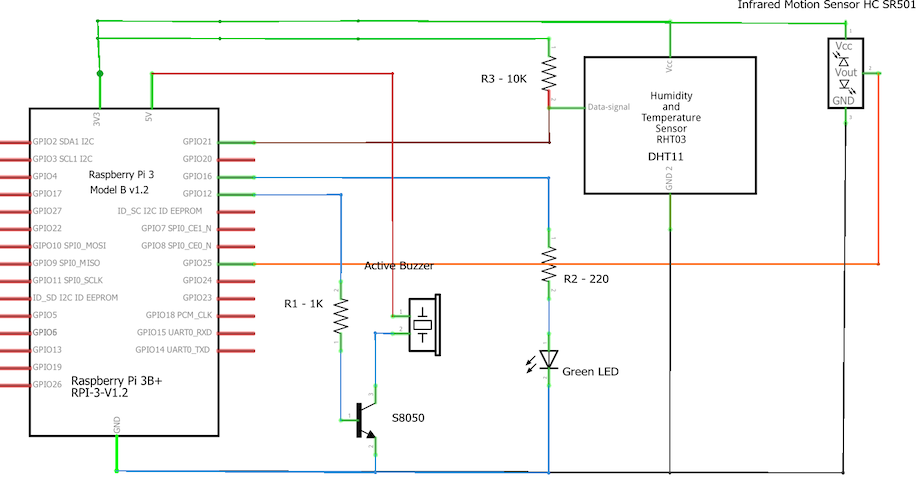
Other components: If you use all the same sensors, LED and buzzer you will need one NPN transistor (S8050) and three resistors (1KΩ, 10KΩ, and 220Ω).
Electronic Circuit Schematic Diagram: Below you can see how the components shall be connected. You may use different GPIO pins, just remember to update the code in gpioWrapper.js
About the software

Operating System: The Raspberry Pi runs Raspbian Stretch with is the latest version of the Debian Linux distribution specifically for Raspberry Pi.

Framework: The application is a nodejs process using electron to have access to Chromium WebRTC APIs needed by the Circuit SDK to established a WebRTC communication. So, it is not an actual electron desktop application… but it could have been as well.
Caution: the nodejs (and npm) versions on the Debian repository are not the latest and this project needs the latest ones, so do not use apt-get, instead follow the instructions on my GitHub repository.

Vue: Although I am more familiar with AngularJS, I decided to go with Vue to handle the user interface. Vue is very lightweight in comparison and has a quick learning curve.
BCM2835: bcm2835 library. This C library for Raspberry Pi provides access to GPIO and other IO functions on the Broadcom BCM 2835 chip. Instructions to download and build the library can be found also on my GitHub repository.

Google Cloud Services: As I mentioned before the visitor can type on the touch screen to find the Circuit user, or just speak the name. For transcription I decided to use Google Cloud Speech API. The setup is outside the scope of this article but can learn all you need to know for this application with the Google Cloud Speech Quick Start. For speech recording I used sox.
Circuit SDK usage
On the GitHub circuitKiosk repository you will find examples on how to use some of the capabilities of the Circuit platform using the Javascript SDK. You will see how to instantiate the Circuit client, set the log levels, add event handlers, log your application, search for users, and process those search results. You will also learn how to find and create Circuit conversations, send text items, and process received ones. The application also makes use of Circuit forms that are sent as text items. Forms submissions are received as text items, and you will see how to process them. In the code you will also find how to setup a video call, process call events and handle the call media by getting the remote streams from the instantiated Circuit client.
Let’s see some specific examples:
In order to instantiate a Circuit client your code will look something like this:
gistfile1.txt
Circuit.logger.setLevel(Circuit.Enums.LogLevel.Debug);
let client = Circuit.Client({
        "client_id": "your-client-id",
        "client_secret": "your-client-secret",
        "domain": "circuitsandbox.net"});
Notice on line #1 the Circuit log level is set.
Besides logging in your application into Circuit, this has to add event handlers. Circuit raises a ton of different events. For this application we are just interest in a few of them.
gistfile1.txt
     client.addEventListener('itemAdded', processItemAddedEvent);
        client.addEventListener('itemUpdated', processItemUpdatedEvent);
        client.addEventListener('callStatus',processCallStatusEvent);
        client.addEventListener('callEnded',processCallEndedEvent);
        client.addEventListener('callIncoming', processCallIncomingEvent);
        client.addEventListener('formSubmission', processFormSubmission);
        client.addEventListener('basicSearchResults', evt => {
            processSearchResults(evt.data).then(users => {
                app.setUsers(users);
            });
        });
        client.addEventListener('searchStatus', evt => {
            processSearchStatus(evt.data).then(users => {
                if (users) {
                    app.setUsers(users);
                }
            });
        });
Basically the application needs to listen for new text items for maintenance commands, call events to handle WebRTC communications, formSubmission events to accept a command for a Circuit user (i.e. unlock the door), and search results to find specific Circuit users.
Finding a Circuit user it is an asynchronous process. So the application invokes the startUserSearch API, and wait for the corresponding events with the search results for which we already set the listeners above.
gistfile1.txt
let searchId = client.startUserSearch(searchString);
Once the user is found and selected to establish a communication the one to one conversation between the user and the application needs to be find, and if it doesn’t exist, then it needs to be created. Once the conversation is known then the call can be made. However, the SDK API makeCall does all this for you. You just need to know the id of the user destination of the call.
gistfile1.txt
client.makeCall(user.userId, {audio: true, video: true}, true);
As the call is being setup Circuit will raise callStatus events that need to be handled accordingly to properly setup the user interface and, eventually when the call is answer set the audio and video elements sources with the remote streams.
gistfile1.txt
    async function setupMedia(call) {
        let remoteStreams = client.getRemoteStreams(call.callId);
        let remoteAudioStream = remoteStreams.find((s) => s.getAudioTracks().length > 0);
        document.querySelector('audio').srcObject = remoteAudioStream;
        if(call.remoteVideoStreams && call.remoteVideoStreams.length) {
            Vue.nextTick().then(() => {
                document.querySelector('video').srcObject = call.remoteVideoStreams[0].stream;
             });
        }
        sendOpenDoorForm(call.convId);
    };
Now the call is setup and both parties can talk and see each other. Note line #10, here the application will send a form to the user with two buttons, one to unlock the door, and the other to reject the visitor by terminating call. Circuit SDK makes it easy to submit a form as a text message using the addTextItem API.
gistfile1.txt
    async function sendOpenDoorForm(convId) {
        await client.addTextItem(convId, {
            content: 'Select "Open Door" or "I do not know this person"',
            form: {
                id: 'openDoorForm',
                controls: [{
                    type: Circuit.Enums.FormControlType.BUTTON,
                    name: 'openDoor',
                    options: [{
                        text: 'Open Door',
                        notification: 'Opening Door',
                        value: 'openDoor'
                    }, {
                        text: 'I do not know this person',
                        value: 'endCall',
                        notification: 'Access Denied'
                    }]
                }]
            }
        });
    };
Finally as the user chooses to unlock the door for the visitor the application will process the form result.
gistfile1.txt
    function processFormSubmission(evt) {
        logger.info(`[RENDERER] process form submission. ${evt.form.id}`);
        evt.form.data.forEach(ctrl => {
            logger.debug(`${ctrl.key}: ${ctrl.value}`);
            switch (ctrl.name) {
                case 'openDoor':
                    switch(ctrl.value) {
                        case 'openDoor':
                            openDoor();
                            break;
                        case 'endCall':
                            break;
                        default:
                            logger.error(`Unknown value in submitted form: ${ctrl.value}`);
                            return;
                    }
                    app.currentCall && client.leaveConference(app.currentCall.callId);
                    client.updateTextItem({
                        itemId: evt.itemId,
                        content: (ctrl.value === 'openDoor' ? 'Door has been opened' : 'Entrance denied'),
                        form: {
                            id: evt.form.id
                        }
                    });
                    break;
                default:
                    logger.error(`Unknown key in submitted form: ${ctrl.key}`);
                    break;
            }
        });
    };
Let’s build it
Just follow the step-by-step instructions on GitHub circuitKiosk repository README.md . Here is a short video demonstration:
As you may already know the only limitation is your imagination. All the parts are out there, get them and build something cool and you will learn a lot in the process, after all there are only two kinds of adventure in life: love and knowledge.
30s ad
☞ Raspberry Pi 3 Day Project: Retro Gaming Suite
☞ Raspberry Pi Projects : Build a Media Centre Computer
☞ Build Your Own Super Computer with Raspberry Pis
☞ PiBot: Build Your Own Raspberry Pi Powered Robot
☞ Internet of Things (IoT) Automation using Raspberry Pi 2
Suggest:
☞ Raspberry Pi 3 Model B+ Benchmarks
☞ 10 Things You Should Know about Raspberry Pi
☞ DIY Home Alarm system with a Raspberry Pi and Webcam
☞ The TOP 3 uses for a Raspberry Pi!!
☞ Top 10 Raspberry Pi Projects for Beginners in 2020
☞ DIY license plate reader with Raspberry Pi and Machine Learning