Google OAuth2 with VueJS and Vert.x

As we continue the journey we started with Vert.x + VueJS and OAuth2, this time lets dive into Google OAuth2 instead of using Keycloak. We’re going to create a little VueJS app serving together with a Vert.x backend that allows you to login with your Google credentials. We will look at two Authentication scenarios, one driven by the frontend and the other driven between frontend and backend.
For the impatient — we’re going to:
- setup your development environment by initialising the Vert.x backend
- Configure Google OAuth2 to have your Client ID and Client Secret
- reuse the Frontend from Vert.x + VueJS and OAuth2 in 5 Steps
- change the backend to utilize Google OAuth2
You can download the final project on the following GH repository:
Development Environment setup
Use the Vert.x starter page and generate your project:

Clicking Generate Project will download a ZIP file containing the freshly generated project and we go from there. To create your Vert.x project, you could also use vertx-cli-starter as an alternative.
I’m using Eclipse as IDE and I’m importing this project to my workspace. The Vert.x starter page uses my artifactId vertx-vue-oauth2 also to create the java package structure (which is a little weird), so let’s align that a bit: Rename the com.ibm.vertx-vue-oauth2 package into com.ibm.example (or whatever else you want) within the src and the test folders. I also changed the vertx.version from 3.5.4 to 3.6.0.CR1, since we will need a few brand new things in Vert.x for OAuth2 service discovery later.
Create a starter for Eclipse: touch a new file called vertx.launch and use the following code:
<?xml version="1.0" encoding="UTF-8" standalone="no"?>
<launchConfiguration type="org.eclipse.jdt.launching.localJavaApplication">
<listAttribute key="org.eclipse.debug.core.MAPPED_RESOURCE_PATHS">
<listEntry value="/vertx-vue-oauth2"/>
</listAttribute>
<listAttribute key="org.eclipse.debug.core.MAPPED_RESOURCE_TYPES">
<listEntry value="4"/>
</listAttribute>
<listAttribute key="org.eclipse.debug.ui.favoriteGroups">
<listEntry value="org.eclipse.debug.ui.launchGroup.run"/>
</listAttribute>
<booleanAttribute key="org.eclipse.jdt.launching.ATTR_USE_START_ON_FIRST_THREAD" value="true"/>
<stringAttribute key="org.eclipse.jdt.launching.CLASSPATH_PROVIDER" value="org.eclipse.m2e.launchconfig.classpathProvider"/>
<stringAttribute key="org.eclipse.jdt.launching.MAIN_TYPE" value="io.vertx.core.Launcher"/>
<stringAttribute key="org.eclipse.jdt.launching.PROGRAM_ARGUMENTS" value="run com.ibm.example.MainVerticle --redeploy="src/**/*.java" --launcher-class=io.vertx.core.Launcher -Dvertx.disableFileCaching=true -Dvertx.development=true"/>
<stringAttribute key="org.eclipse.jdt.launching.PROJECT_ATTR" value="vertx-vue-oauth2"/>
<stringAttribute key="org.eclipse.jdt.launching.SOURCE_PATH_PROVIDER" value="org.eclipse.m2e.launchconfig.sourcepathProvider"/>
</launchConfiguration>
vertx.launch
You should now have your starter vertx on your Run Configurations. Starting it should give you the following output:
Oct 31, 2018 9:22:36 PM io.vertx.core.impl.launcher.commands.Watcher
INFO: Watched paths: [/Users/tom/coding/MediumArticleProjets/vertx-vue-oauth2/./src]
Oct 31, 2018 9:22:36 PM io.vertx.core.impl.launcher.commands.Watcher
INFO: Starting the vert.x application in redeploy mode
Starting vert.x application...
271687ae-0164-4eba-b701-f2655f779bee-redeploy
HTTP server started on http://localhost:8080
Oct 31, 2018 9:22:37 PM io.vertx.core.impl.launcher.commands.VertxIsolatedDeployer
INFO: Succeeded in deploying verticle
out.log
As an alternative to Eclipse, you could also build this project from the commandline withmvn package and start/run it with the following command:
java -jar vertx-vue-oauth2-1.0.0-SNAPSHOT-fat.jar run com.ibm.example.MainVerticle
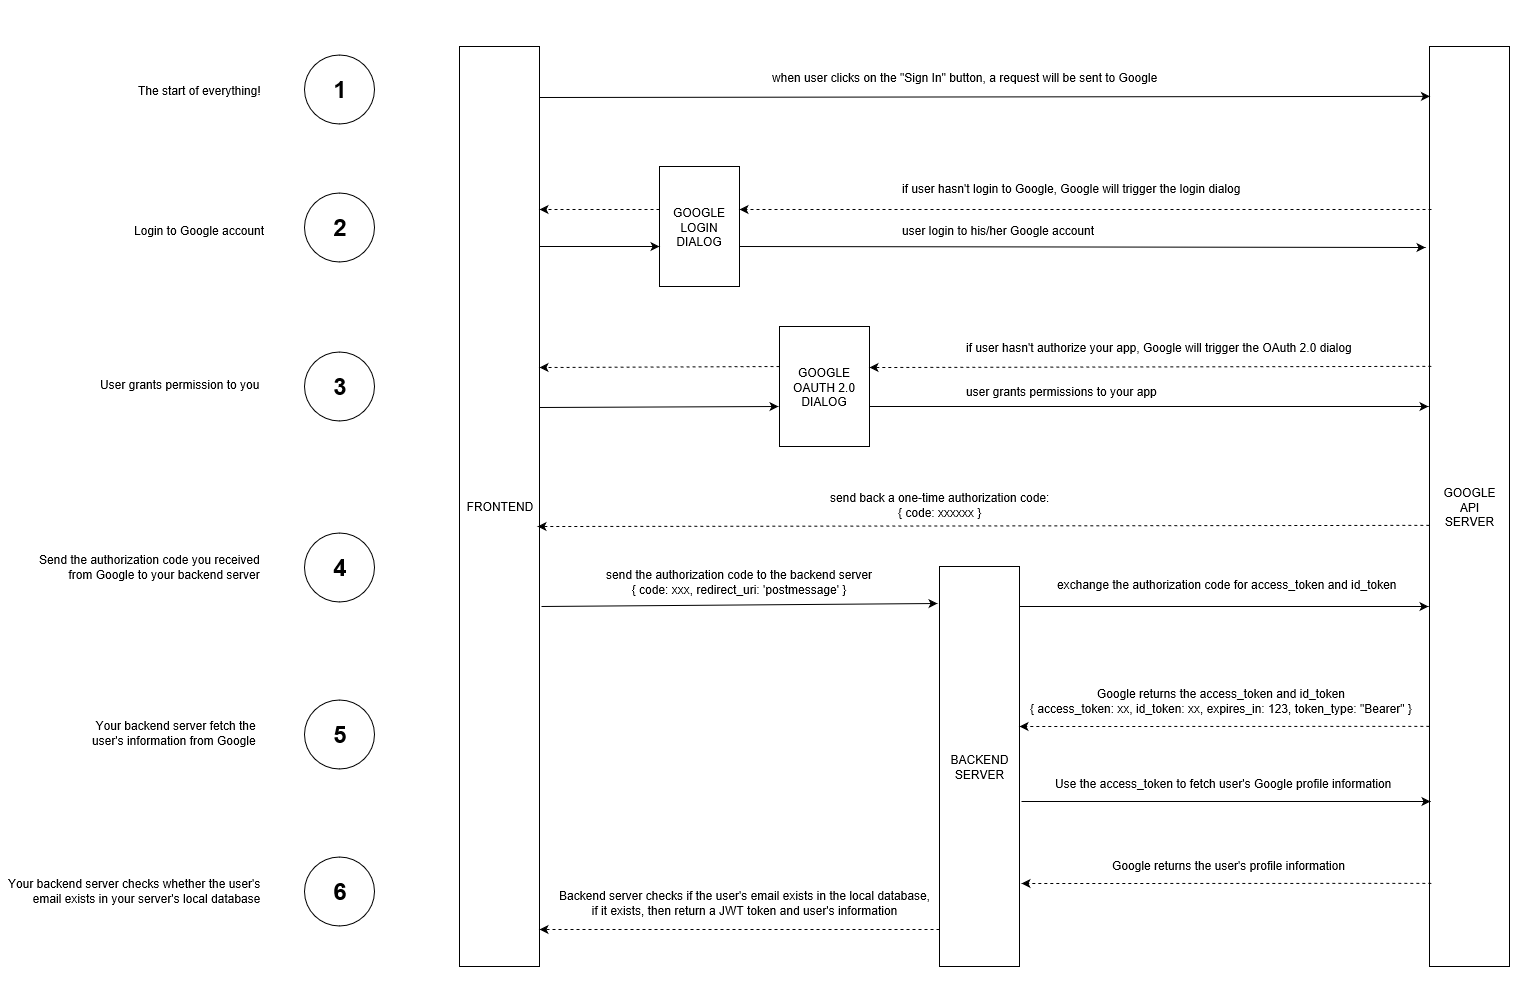
Google Sign-in Flow
The following diagram shows the Sign-in flow with Google we’re going to cover, however I’ll split this up into two scenarios:
- Scenario-1: thats the flow you see there, frontend is Vue, Backend is Vert.x, authentication is happening at some parts on both sides
- Scenario-2: We handle OAuth2 purely on the Frontend and just allow talking to the Vert.x backend when auth was successful
Configure Google OAuth2
Before we get started, we have to make sure Google is properly configured for OAuth2 for your new app. Visit the Google API Console to obtain OAuth 2.0 credentials such as a Client ID and Client Secret that are known to both Google and our application. The set of values varies based on what type of application you are building. For example, a JavaScript application does not necessarily require a secret, but our Vert.x application does.
- log into the Google Developer Console
- click the Select a Project dropdown and select New Project
- give it a project name that you want, I picked vertx-oauth2
- once the project is created (takes a few seconds), use the project selector again and pick your new project

- from the left navigator, select and open the API Library
- search for the Google+ API and click it
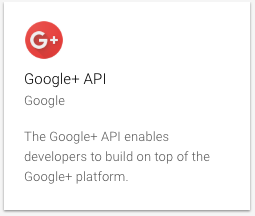
- the detail page of Google+ API opens, click on Enable button
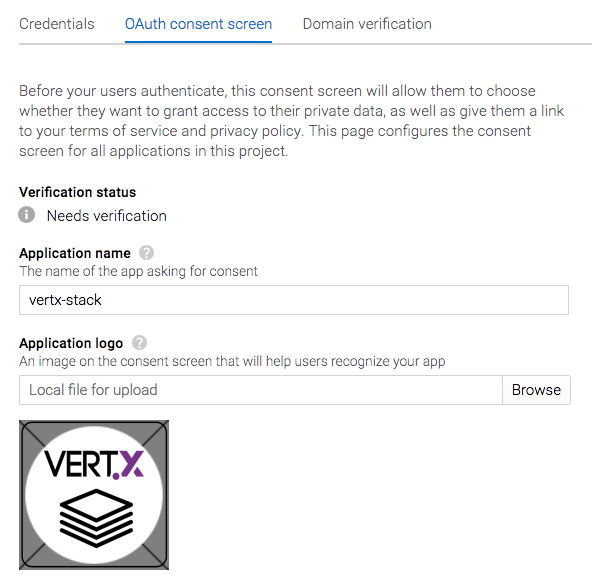
- The API Dashboard opens, click Credentials on the left Nav and switch to the OAuth Consent Screen tab — provide an application name of your choice and an optional logo. Save without Publishing
- go to the Credentials tab, click on the Create Credentials popup and select OAuth client ID — Google also offers a wizard to help you make this decision if you’d like to use Google Auth in a different context
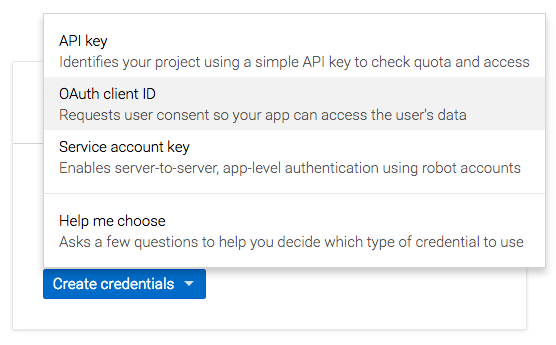
- On the next screen select Web application as Application type and give it a name — I used vertx-vue-oauth2
- put http://localhost:8081into the Authorized JavaScript origins and use http://localhost:8081/callback for the Authorized redirect URIs and click the Create button
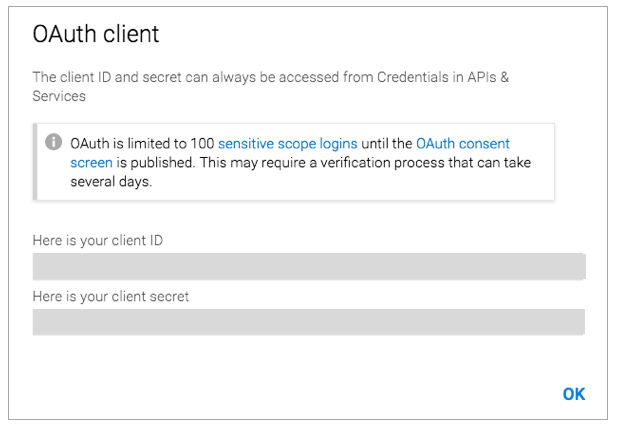
- You’re now getting a popup containing your Client ID and Client Secret — copy those values, we’ll need them on our code in a moment
Create the Frontend and the Login Page
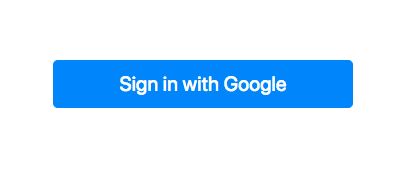
We’re going to use almost the same simple frontend like we did on this article. However the landing page got even simpler: instead of a login form it now just comes with the Sign in with Google button.
Building the frontend in src/main/frontend with yarn and yarn dev will provide this landing page of the WebUi on localhost:8081
On the frontend, we’re going to use vue-google-oauth to execute the first 3 steps of our flow diagram for both scenarios.
The signIn function allows to run the two different scenarios to do OAuth backend- and frontend-based.
 signIn: function () {
      let ctx = this;
      let useBackendScenario = true;

      // Scenario-1 (backend auth): use this code if you'd wanna handle Google OAuth on your vertx backend
      if(useBackendScenario == true) {
        Vue.googleAuth().signIn(this.onSignInSuccess, this.onSignInError)
      }
      // Scenario-2 (frontend auth): use this code if you'd wanna handle Google OAuth o VueJS
      else {
        Vue.googleAuth().directAccess()
        Vue.googleAuth().signIn(function (googleUser) {
          let user = JSON.parse(JSON.stringify(googleUser));
          localStorage.currentUser = JSON.stringify(user.w3);
          ctx.$store.dispatch('login')
          ctx.$router.replace(ctx.$route.query.redirect || '/authors')
        }, function (error) {
          console.log(error)
        })
      }
    }
Login.vue
Use the useBackendScenario propertyto select and run the scenario you want. Before you get started, its now time to add your Google OAuth2 client Id and Client Secret onto the right places.
On the frontend, open src/main.js and change this line:
Vue.use(GoogleAuth, { client_id: ‘<your google auth client id>’ })
On the backend, open MainVerticle.java and change these lines:
OpenIDConnectAuth.discover(
   vertx,
   new OAuth2ClientOptions()
   .setClientID(“<your google auth client id>”)
   .setClientSecret(“<your google auth client secret>”)
Once you’ve done so, restart backend and frontend and load the login page from http://localhost:8081/

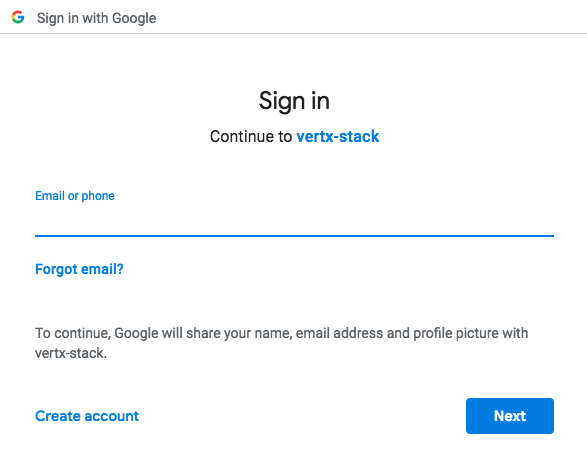
When clicking this button, Google Auth is done on a separate popup that either allows to enter the Google credentials and/or to authenticate the app:
After you have provided your Google credentials, the frontend now runs the following authentication logic:
- Scenario-1: The VueJS Login component receives the authorization code from the google login popup and calls the Vert.x backend on http://localhost:8080/auth/google. There the authorization code is used to retrieved the access_token, refresh_token, id_token and the scope, which is used to retrieve the Google user profile from https://www.googleapis.com/plus/v1/people/me. The user is returned to the frontend which uses Vuex to finally log the user into the landing page
- Scenario-2: Using the directAccess() option in vue-google-oauth, the steps from Scenario-1 are solely executed on the frontend with no additional call to the backend.
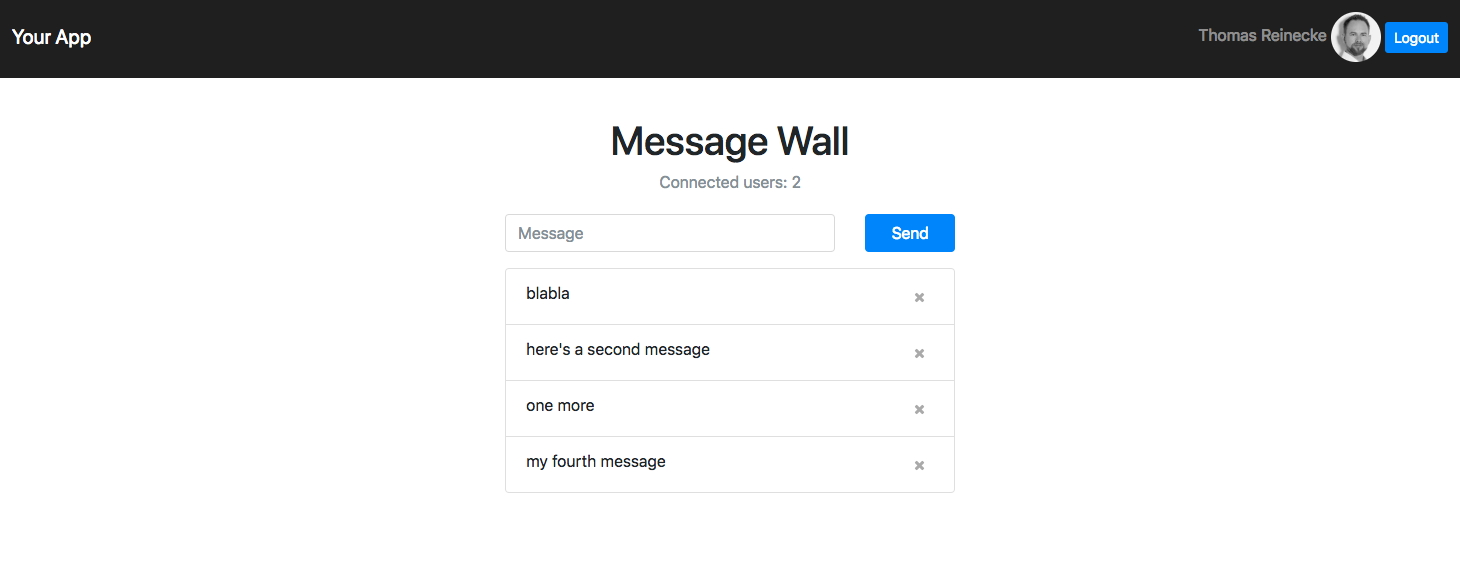
After a successful authentication, the Frontend app looks like in our last example and the Message Wall can be use to send messages to Vert.x including PubSub for auto-updates of the frontend.
How does Vert.x handle Google OAuth2 ?
We’re going to use the brand new OAuth service discovery coming with Vert.x 3.6.0.CR1 to setup the OAuth2 provider and handler for Google. Service discovery happens when the MainVerticle starts together with the backend. Make sure you put your Google OAuth2 client ID and client secret in:
  OpenIDConnectAuth.discover(
      vertx,
      new OAuth2ClientOptions()
      .setClientID("<your google auth client id>")
      .setClientSecret("<your google auth client secret>")
      .setSite("https://accounts.google.com")
      .setTokenPath("https://www.googleapis.com/oauth2/v3/token")
      .setAuthorizationPath("/o/oauth2/auth"),
      res -> {
        if (res.succeeded()) {
          // the setup call succeeded. At this moment your auth is ready to use and google signature keys
          // are loaded so tokens can be decoded and verified.

          System.out.println("Google OAUth2 setup successful !");
          googleOAuth2Provider = res.result();

          // get some information about the oauth2 flow and print it out
          OAuth2FlowType flowType = googleOAuth2Provider.getFlowType();
          System.out.println("Flow Type: "+flowType);

          // setup the oauth2 handler, make sure it calls back to the frontend app and add the "profile" authority
          googleOAuth2Handler = OAuth2AuthHandler.create(googleOAuth2Provider, "http://localhost:8081/callback");
          Set<String> authorities = new HashSet<String>();
          authorities.add("profile");
          googleOAuth2Handler.addAuthorities(authorities);
          googleOAuth2Handler.setupCallback(router.get("/callback"));

        } else {
          // the setup failed.
          System.err.println("Google OAUth2 setup failed !");
        }
      });
MainVerticle.java
When the user has logged into Google from the Frontend, Step 5 from the Flow chart is then triggered to retrieve the profile information for the Google user. This happens in this code:
  // Google auth handler, we can drive the the google auth from the backend here and request the access_token
  // and id_token based on the authorization code however in this example we handle this in the frontend
  router.route("/auth/google").produces("application/json").handler(context -> {
    System.err.println("received body ::: '"+context.getBodyAsString()+"'");
    JsonObject authRequestJson = context.getBodyAsJson();

    // use the google oauth provider to execute authentication based on the "authorization code"
    googleOAuth2Provider.authenticate(authRequestJson, ctx -> {
      if(ctx.succeeded()) {
        // we've now successfull retrieved the access_token, refresh_token, id_token and the scope
        JsonObject token = ctx.result().principal();

        // now use the access_token to retrieve the user profile, we utilize vertx HttpClient to do this REST call
        HttpClient httpClient = vertx.createHttpClient();
        final String url = "https://www.googleapis.com/plus/v1/people/me?access_token="+token.getString("access_token");
        httpClient.getAbs(url, response -> {
          if (response.statusCode() != 200) {
            // anything else than HTTP 200 comes back, reply UNAUTHORIZED to the frontend
            context.response().setStatusCode(HttpResponseStatus.UNAUTHORIZED.code()).end();
          } else {
            response.bodyHandler(b -> {
              // we've received the google user in a JSON object and we're going to reply this to the frontend
              JsonObject googleUser = b.toJsonObject();
              context.request().response().end( googleUser.encodePrettily() );
            });
          }
        }).end();
      }
      else {
        // authentication failed, reply UNAUTHORIZED to the frontend
        context.response().setStatusCode(HttpResponseStatus.UNAUTHORIZED.code()).end();
      }
    });
  });
MainVerticle.java
Briefly, this code uses the Google OAuth2 provider we created during service discovery earlier to authenticate based on the authorization code that was provided by the frontend. With that Vert.x receives the access_token (and more) which it uses to retrieve the user profile and replies this back to the frontend.
Since the user is properly authenticated with Google now and is now well known on the frontend and the backend, any desired logic could be implemented to store and manage the user on the backend — take care of GDPR compliancy when you do so.
Wrap up and future outlook
You have learned how to tie a number of great technologies together to provide authentication of a Google user for your app, based on a Vert.x backend and a VueJS frontend. This article described two flavours of authentication, one drive by the frontend, the other by a hybrid of frontend and backend. Both have their advantages in various business situations. Another scenario I did not cover (yet) is OAuth2 exclusively on the backend, which I’m thinking to cover shortly. Another thing I would change is the need for a PopUp for the Google login — I haven’t found a quick way to tell vue-google-oauth using my login page for this but I guess we should do that and get rid of it. If anybody out these has an idea on this or if you have feedback or questions in general, don’t hesitate to leave a comment or reach out to me on Twitter.
Hope you enjoy Google OAuth with your VueJS and Vert.x app. Don’t miss to check out my other technical Articles:
- Vert.x + VueJS + OAuth2 in 5 steps
- Create compelling Documentation with Github Pages
- Create a VueJS PWA on a high performance and secure NGINX infrastructure
- A rapid start on IBM Cloud with VueJS, FeathersJS, GraphQL
Thank you
30s ad
☞ Vuejs 2 + Vuex con TypeScript Nivel PRO
☞ Curso de Vuejs 2, Cognito y GraphQL
☞ Learn VueJS from Scratch: The Complete 1 Hour Crash Course!
☞ SSR con Vuejs, Vuex y Quasar Framework
☞ Curso Avanzado de Vuejs 2, Vuex y AdonisJs 4
☞ VueJS + Firebase: Desde 0 hasta una proyecto en internet
Suggest:
☞ JavaScript Programming Tutorial Full Course for Beginners
☞ Learn JavaScript - Become a Zero to Hero
☞ Javascript Project Tutorial: Budget App
☞ JavaScript for React Developers | Mosh
☞ E-Commerce JavaScript Tutorial - Shopping Cart from Scratch