How to Use FlatList | React Native FlatList Tutorial

There have been a quite a few ways to create a scrolling list in React Native, most notably they have been the ScrollView and the ListView. Each have their strengths and weaknesses. Since v0.43 of React Native we’ve had access to two new list views, the FlatList and the SectionList. Today we will take a look at how to use the FlatList component.
What is it?
What is the FlatList component? It’s an easy way to make an efficient scrolling list of data. Not only is it efficient but it’s got an incredibly simple API to work with. If you’ve used or are familiar with the ListView component it’s very similar, just better in (almost) every way. No longer do you have to format the data — you can just pass it an array of data and get to rendering right away.
Basic Usage
There are two primary props you need to know about in a FlatList and that’s data and renderItem. The first is an array of data used to create the list, typically an array of objects, and the second is the function that will take an individual element of the data array and render a component for it.
Data will come from the Random User Generator API and React Native Elements will be used for the interface.
Full source code is available on GitHub.
In the boilerplate of this tutorial the app will make a request to the Random User Generator API and store the response from that in component state. Browse the code below to get an understanding of it.
FlatListDemo.js
import React, { Component } from "react";
import { View, Text, FlatList } from "react-native";

class FlatListDemo extends Component {
  constructor(props) {
    super(props);

    this.state = {
      loading: false,
      data: [],
      page: 1,
      seed: 1,
      error: null,
      refreshing: false,
    };
  }

  componentDidMount() {
    this.makeRemoteRequest();
  }

  makeRemoteRequest = () => {
    const { page, seed } = this.state;
    const url = `https://randomuser.me/api/?seed=${seed}&page=${page}&results=20`;
    this.setState({ loading: true });
    fetch(url)
      .then(res => res.json())
      .then(res => {
        this.setState({
          data: page === 1 ? res.results : [...this.state.data, ...res.results],
          error: res.error || null,
          loading: false,
          refreshing: false
        });
      })
      .catch(error => {
        this.setState({ error, loading: false });
      });
  };

  render() {
    return (
      <View style={{ flex: 1, alignItems: "center", justifyContent: "center" }}>
        <Text>Coming soon...</Text>
      </View>
    );
  }
}

export default FlatListDemo;
With that completed you can go ahead and actually start rendering the data. To do so the first thing you want to do is import { List, ListItem } from "react-native-elements"; so you have the necessary components to render the data. The remainder of the work will take place in the render method. First the scaffolding:
FlatListDemo.js
render() {
  return (
    <List>
      <FlatList
        ...
      />
    </List>
  );
}
You now need to pass an array of data to the FlatList via the data prop. That’s available on this.state.data.
FlatListDemo.js
render() {
  return (
    <List>
      <FlatList
        data={this.state.data}
      />
    </List>
  );
}
Then you want to render the content with the renderItem prop. The function is passed a single argument, which is an object. The data you’re interested in is on the item key so you can use destructuring to access that from within the function. Then return a component using that data.
FlatListDemo.js
render() {
  return (
    <List>
      <FlatList
        data={this.state.data}
        renderItem={({ item }) => (
          <ListItem
            roundAvatar
            title={`${item.name.first} ${item.name.last}`}
            subtitle={item.email}
            avatar={{ uri: item.picture.thumbnail }}
          />
        )}
      />
    </List>
  );
}
Now with the application running, and after waiting about a second for a response from the server you should see something like this (the exact data may be slightly different).
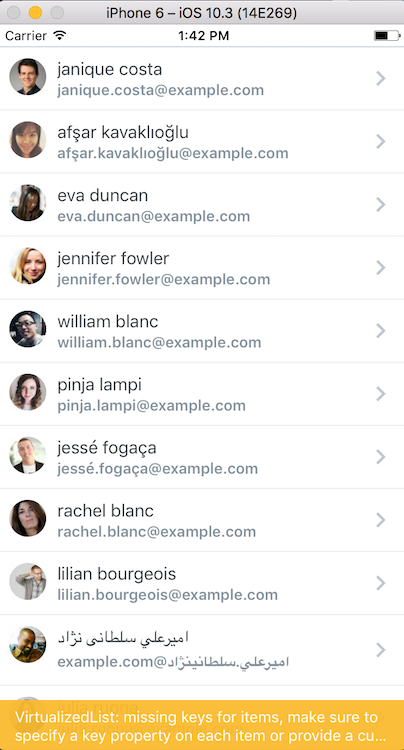
Notice that error on the bottom? That’s warning that the elements of the list are missing keys. These unique keys are what allow the VirtualizedList (which is what FlatList is built on) to track items and aids in the efficiency of the list. I won’t dive into it but just know that it’s important.
To alleviate this issue you want to choose a piece of data that is unique to each item. In this case you can use the user’s email address because that will be unique to each item. You can then use the keyExtractor prop to specify which piece of data should be used as the key.
render() {
  return (
    <List>
      <FlatList
        ...
        keyExtractor={item => item.email}
      />
    </List>
  );
}
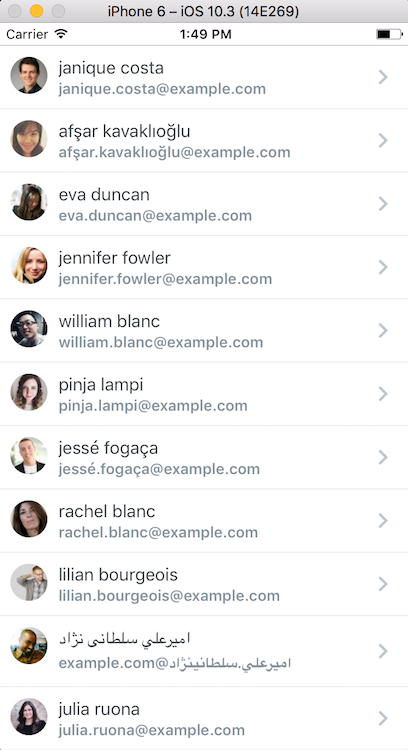
Now the warning no longer shows up.
Separator
Let’s say you don’t have separators already in your app and you want to, but you don’t want to render them at the top or bottom of the list. You could add a borderBottom on every element except the last one…or you could use the ItemSeparatorComponent prop which will take care of all the logic for you.
For this example the first thing you need to do is remove all the borders in the app.
*FlatListDemo.diff *
render() {
  return (
    <List
+      containerStyle={{ borderTopWidth: 0, borderBottomWidth: 0 }}
    >
      <FlatList
        data={this.state.data}
        renderItem={({ item }) => (
          <ListItem
            roundAvatar
            title={`${item.name.first} ${item.name.last}`}
            subtitle={item.email}
            avatar={{ uri: item.picture.thumbnail }}
+            containerStyle={{ borderBottomWidth: 0 }}
          />
        )}
        keyExtractor={item => item.email}
      />
    </List>
  );
}
You then want to create the separator component. It’s very simple but instead of being the full width of the screen it’s going to (approximately) start where the text does.
FlatListDemo.js
class FlatListDemo extends Component {
  // ...

  renderSeparator = () => {
    return (
      <View
        style={{
          height: 1,
          width: "86%",
          backgroundColor: "#CED0CE",
          marginLeft: "14%"
        }}
      />
    );
  };

  // ...
}
and then you can go ahead and use that by simply adding ItemSeparatorComponent={this.renderSeparator} to the FlatList component.
FlatListDemo.js
render() {
  return (
    <List containerStyle={{ borderTopWidth: 0, borderBottomWidth: 0 }}>
      <FlatList
        ...
        ItemSeparatorComponent={this.renderSeparator}
      />
    </List>
  );
}
Leaving you with something like this. Notice that at the top and bottom of the list a separator is not rendered.
Header
Rendering a component at the top of the list which scrolls away with the content as you scroll down the list is just as easy as adding the separator. To actually accomplish this you’ll be using the SearchBar component from React Native Elements.
First create a new function that renders the component you want in the header.
FlatListDemo.js
class FlatListDemo extends Component {
  ...

  renderHeader = () => {
    return <SearchBar placeholder="Type Here..." lightTheme round />;
  };

  ...
}
You then want to actually render that header by using the ListHeaderComponent prop on the FlatList.
FlatListDemo.js
render() {
  return (
    <List containerStyle={{ borderTopWidth: 0, borderBottomWidth: 0 }}>
      <FlatList
        ...
        ItemSeparatorComponent={this.renderSeparator}
        ListHeaderComponent={this.renderHeader}
      />
    </List>
  );
}
Leaving you with the following…
Footer
The footer is very much the same as the Header, just that it’s at the end of the list rather than the start. This footer is going to be a bit more complex than the previous example (setting it up for infinite scroll) but the same principles apply. First create a method to call for the footer and return a component.
FlatListDemo.js
render() {
  return (
    <List containerStyle={{ borderTopWidth: 0, borderBottomWidth: 0 }}>
      <FlatList
        ...
        ListHeaderComponent={this.renderHeader}
        ListFooterComponent={this.renderFooter}
      />
    </List>
  );
}
Then call that function from ListFooterComponent.

That leaves you with something like this (I’ve adjusted the code a bit to make sure you can see the ActivityIndicator).
Pull to Refresh
Infinite Scroll
Recommended Courses:
React Native: Build Your Own Mobile Apps
☞ http://bit.ly/2jQQH5U
React Native : Build Native Mobile Applications
☞ http://bit.ly/2KTiKy3
React JS - Build real world JS apps & deploy on cloud
☞ http://bit.ly/2JsGWt0
Suggest:
☞ React Native Course for Beginners [Build Mobile Apps in React Native]
☞ JavaScript for React Developers | Mosh
☞ Build a React.js application and add Authentication with Auth0
☞ Getting Closure on React Hooks
☞ React Tutorial - Learn React - React Crash Course [2019]
☞ Learn React - Full Course for Beginners - React Tutorial 2019