How to run Nuxt.js on DigitalOcean?

As you probably know, Nuxt.js is a framework for creating Universal Vue.js Applications. So the biggest advantage of Nuxt is that we can create Server Side Renderings (SSR) application and it eliminates a lot of problems with SEO, which we can have with Vue.js Single Page Applications, especially with dynamically (from API) loaded content. But if you want to use Nuxt.js with SSR, you need to have node.js environment and this is a little bigger problem. As far as we can put Vue.js SPA on almost every hosting, without any requirements, hostings with node.js are a little less popular and often require a slightly different approach.
Personally, I chose DigitalOcean for several of my projects. This is a cloud computing platform where you can create your droplets — resizable, SSD-based virtual machines.
Registration and how to get FREE credits to start on DigitalOcean
If you don’t have an account on DO, register one from this url — you will get $50for free… and I will get a small bonus too, so everyone wins! ;).
You can also visit this url: https://gitlab.com/snippets/1740855 and check promo codes to filling a “Have a Promo Code?” field. It will give you at least next $10 of free credits.
Create a new droplet
When you finish registration, log in to your account and create a new droplet. I suggest choosing Ubuntu 18.04 and the standard droplet for $5/mo — 1 GB, 1vCPU and 25GB should be enough to start. In the future you can resize your droplet very easily.


Fill in the remaining fields and wait for the droplet to be created.
Preparation of the environment
I assume that at this moment your droplet is already created and you have logged in to it by SSH. I also assume that all of the commands in the next part of this guide you will run as a no-root user, so we will use sudo (check this tutorial if you need more info). Let’s start…
Update packages list:
sudo apt-get update
Install node.js & npm:
sudo apt-get install nodejs npm
If you want to install yarn, run this commands:
curl -sS https://dl.yarnpkg.com/debian/pubkey.gpg | sudo apt-key add -
echo "deb https://dl.yarnpkg.com/debian/ stable main" | sudo tee /etc/apt/sources.list.d/yarn.list
sudo apt-get update && sudo apt-get install yarn
Now go to your home directory:
cd ~
And create directory for the project:
mkdir ./your-project-name
Undoubtedly, you have Nuxt.js project on your local computer, so copy it now to this directory. Open a new terminal window and run:
scp -r /path/to/your/local/project/* your-user-name@<droplet-ip-here>:~/your-project-name/
OK, go back to the terminal where you are connected to the droplet and check that files exist in the proper directory:
ls ./your-project-name
You should see a list of the project files.
Starting Nuxt.js
Now we have created our server with node.js and our project files. Let’s run Nuxt.js!
cd ./your-project-name
npm run build
npm run nuxt
The project should run at address: http://localhost:3000. Of course, it was only for test and we need more automatization, because you will not start your website manually every time.
We’ll use PM2 — a node.js process manager. Install it:
sudo npm install pm2 -g
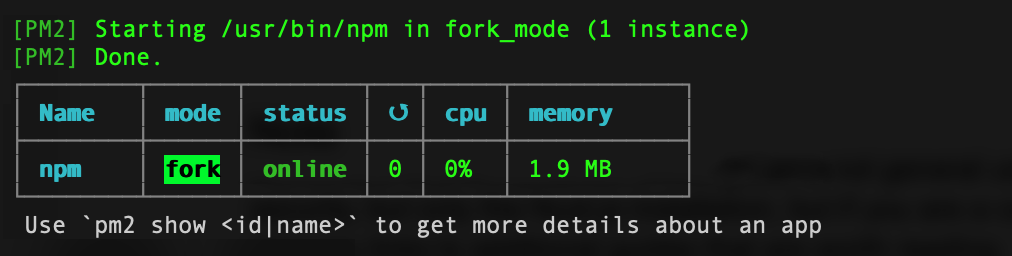
And start project by pm2 now:
pm2 start npm — start
You should see:
Run Nginx as a Proxy Server
Our Nuxt.js project is running, but it is available only on localhost of droplet. We have to tell our server now: „Hey, if someone visits my-domain.com show him a Nuxt.js project website”. We will use a Nginx server to do this:
sudo apt-get install nginx
Next we will create a basic configuration for one project, but in the future you can duplicate it and run a lot of different node.js applications and domains on one droplet.
sudo nano /etc/nginx/sites-available/your-domain.com
In this file put the following content (remember to change “your-domain.com” phrase to your real domain name):
server {
    listen 80;
    listen [::]:80;
    index index.html;
    server_name your-domain.com;

    location / {
        proxy_pass http://localhost:3000;
        proxy_http_version 1.1;
        proxy_set_header Upgrade $http_upgrade;
        proxy_set_header Connection 'upgrade';
        proxy_set_header Host $host;
        proxy_cache_bypass $http_upgrade;
    }
}
Now all of the incoming traffic to your-domain.com on default http 80 port will be redirected to localhost:3000.
Now remove existing, default configuration:
sudo rm /etc/nginx/sites-enabled/default
And link our new config file to the sites available directory:
sudo ln -sf /etc/nginx/sites-available/your-domain.com /etc/nginx/sites-enabled/your-domain.com
Finally, test a new nginx configuration and if everything is fine — restart the nginx server:
sudo nginx -t
sudo systemctl restart nginx
Next just add your domain to the droplet and enjoy your Nuxt.js project!
Note
Remember that the purpose of this guide is not a general use of DigitalOcean and droplets security, but only Nuxt.js installation. If you are a completely new user of DO, I will give you some links to additional guides that are worth reading:
☞ Nuxt.js - Vue.js on Steroids
☞ Nuxt JS with Laravel - Build API driven SSR Vue JS Apps
☞ Building Applications with VueJs, Vuex, VueRouter, and Nuxt
☞ Vue JS 2: From Beginner to Professional (includes Vuex)
Suggest:
☞ How to Install and Host Wordpress Website on Shared Web Hosting (Hindi)
☞ Host Vue JS Project on Shared Web Hosting (Hindi)
☞ Using Nuxt generate for building static web applications
☞ State of the Union for Speed Tooling (Chrome Dev Summit 2018)
☞ 40+ Online Tools & Resources For Web Developers & Designers