Deploying a React Native App for iOS

Compare this to the first time I deployed a React Native iOS app. I think it took me about 3 weeks to get it right!
To help prevent developers from spending needless agony deploying their iOS apps to the App Store, here is a list of items to consider while going through the process. The full tutorial on deploying iOS apps with React Native can be found on our mobile development tutorial — Build React Native.
Apple Developer Program
While glossing over the full details of setting up an Apple Developer account, here are some resources and things to consider:
- This blog post is a really detailed guide on the process of attaining an Apple Developer Program account. Boring stuff like creating certificates for your app to provisioning a personal device are all covered.
- Personal or Business account? Make sure you understand the pros and cons of both of these options. In short: personal is easier to get started, but if you want to transition to a business account it can be time-consuming. Remember that if you have a personal account, your full name will appear as the App Developer when people are looking at the app (apparently this isn’t as sexy as having your cool company name below the app icon, so choose wisely).
Things to Do Before Deployment
Here is the list of things you should set out to achieve before even thinking of submitting for actual release:
- Create the appropriate Apple Developer account (personal or business)
- Test out your app on an iPhone without bundling (this relies on a local Node process)
- Bundle your app and run it on an iPhone
- Submit a build and test it internally with TestFlight
- Test the app with external testers in TestFlight
- Add appropriate screenshots, etc., and submit for official release
Running on Your Device
After you’ve provisioned your device and created the necessary App ID for your app, you can run the app locally on your iPhone.
From this alone, you should be able to build and run the app on your iPhone, but what about creating a bundle?
Creating a Bundle
Note: as mentioned in one of the comments, React Native now has a way to set a Release build for your app, which will take care of the bottom for deploying to the App Store. I don’t believe it solves the use case for running a bundled version of your app without uploading to the App Store or TestFlight, though, so it may be relevant for some. See https://facebook.github.io/react-native/docs/running-on-device-ios.html.
The two ways of running your app on your phone are (1.) as a local Node process, and (2.) as a bundled file that runs completely on the phone without external dependencies. The 1st one is relatively easy to do. However, don’t let that fool you into thinking that your app is ready to be deployed. You should first create a bundle and run it on your phone to test it.
Most of the changes to our actual code take place in a single file: AppDelegate.m
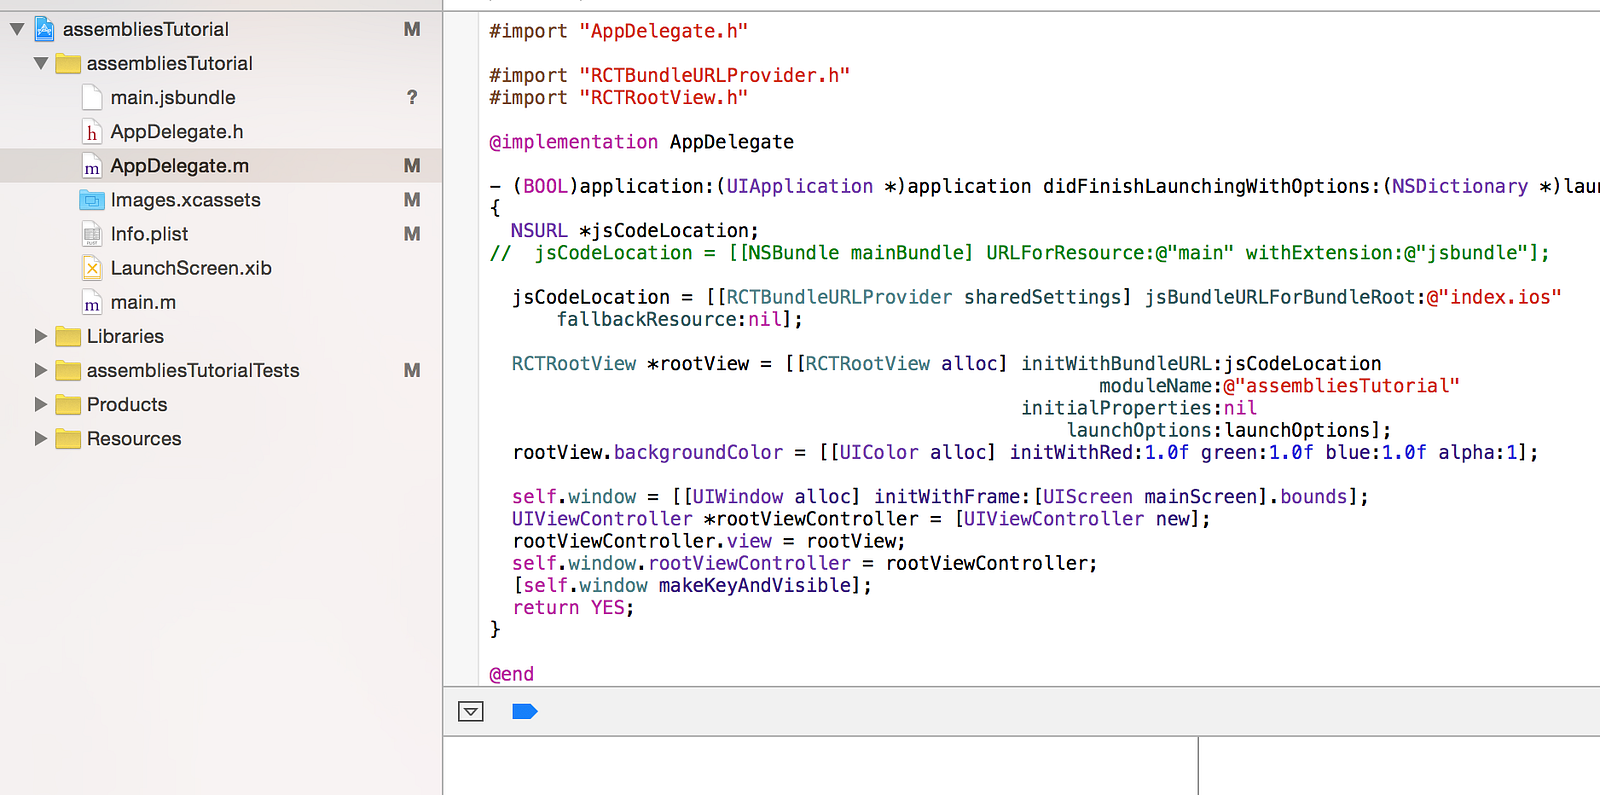
Now this is really important to understand — the line that defines jsCodeLocation determines whether your app will be run from a local Node instance or from a bundled file. The default is to run from a local Node instance. This is the line:
jsCodeLocation = [[RCTBundleURLProvider sharedSettings] jsBundleURLForBundleRoot:@"index.ios" fallbackResource:nil];
Although not extremely well documented, React Native provides a bundle command in its command line tool. This command expects the following arguments
- — entry-file the file where your app starts (index.ios.js)
- — platform the platform compiling for (ios or android)
- — dev development mode (true or false)
- — bundle-output where you want to store the final bundle (ios/main.jsbundle)
- — assets-dest where you would like the images, etc., store (ios)
While there are other arguments that the react-native bundle command accepts, these are the main ones we will be utilizing.
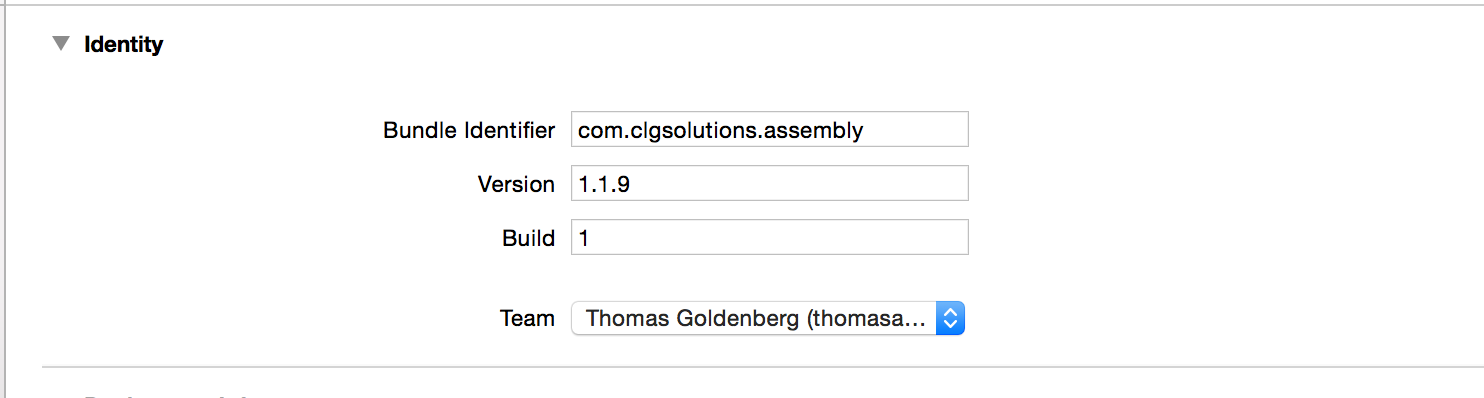
Finally, you will want to make sure that your Bundle Identifier is set to be your App ID, and select your device in the top left where the iOS version is selected.
Now run the command with arguments we specified. The command should look like this:
react-native bundle --entry-file index.ios.js --platform ios --dev false --bundle-output ios/main.jsbundle --assets-dest ios
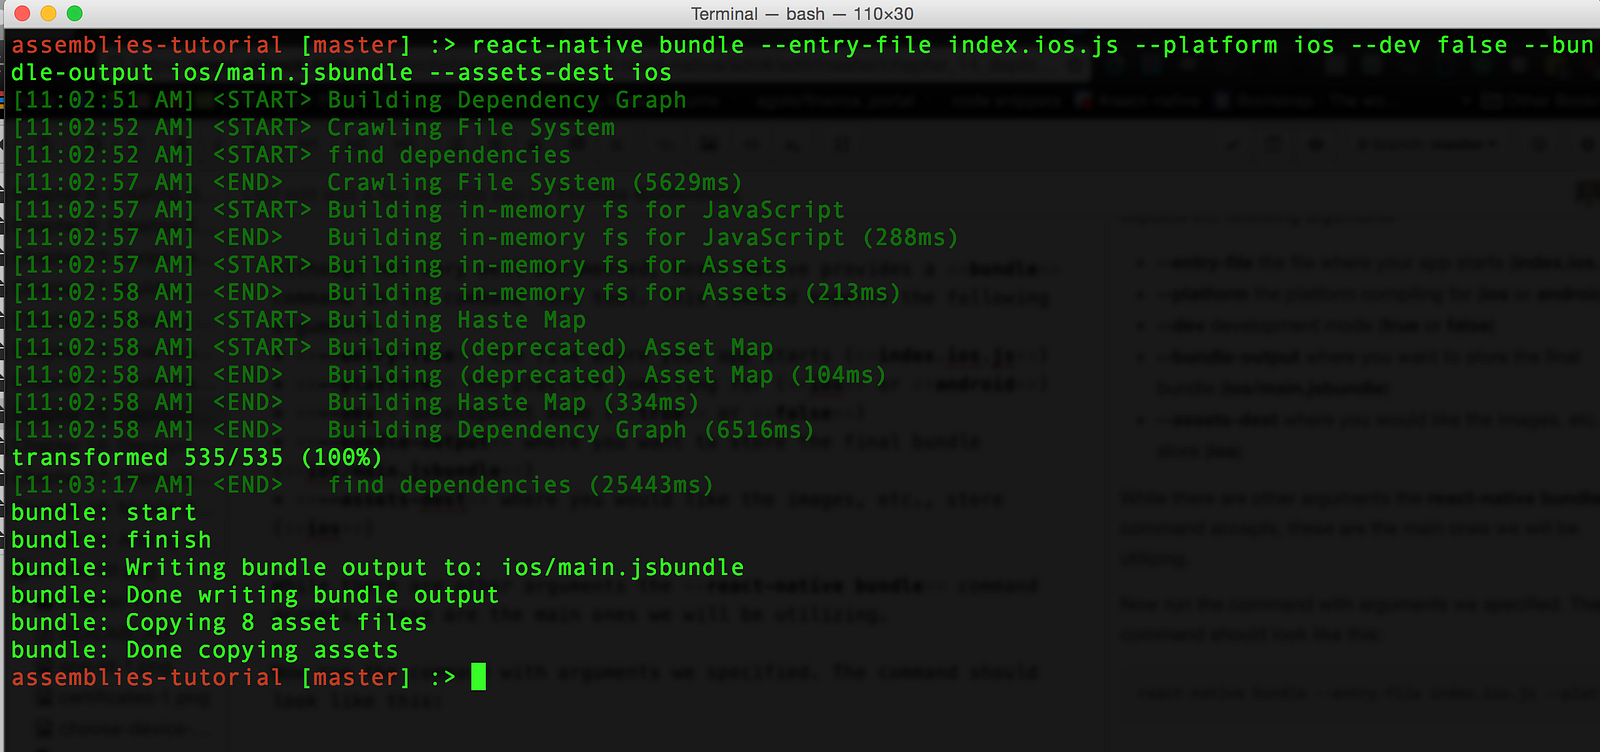
You should see output showing the app being bundled, and then a notification that it was successful. After this, we have to configure our AppDelegate.m file to run the bundled file instead of the local Node instance.
You will want to comment out the previous definition of jsCodeLocation and replace it with the following:
NSURL *jsCodeLocation;
  jsCodeLocation = [[NSBundle mainBundle] URLForResource:@"main" withExtension:@"jsbundle"];
//  jsCodeLocation = [[RCTBundleURLProvider sharedSettings] jsBundleURLForBundleRoot:@"index.ios" fallbackResource:nil];
This tells Xcode that we want to run our app from the main.jsbundle file instead of the local file directory. The app should run exactly the same, except it will say “_Loading from pre-bundled file”_when the app is refreshed. Notice that it doesn’t depend on any local Node processes as well!
Once you successfully bundle in this way and install on your device, you can test the app anywhere you go. This is also the biggest step to deployment, because you have verified that the bundle works properly. Everything else is just submitting your bundle and distributing it to other users!
In the next post we’ll talk about submitting a build to the App Store, using TestFlight, and other preparations for final submission. Stay tuned!
Recommended Courses:
Mastering Modern Web Development Using React
☞ http://bit.ly/2uDP83t
Learn React JS from scratch: Create 7 projects
☞ http://bit.ly/2pY0OZj
Learn React : The World’s Most Lucrative JavaScript Library
☞ http://bit.ly/2H2noIl
React Native: Build Your Own Mobile Apps
☞ http://bit.ly/2jQQH5U
Suggest:
☞ JavaScript for React Developers | Mosh
☞ React Native Course for Beginners [Build Mobile Apps in React Native]
☞ React Tutorial - Learn React - React Crash Course [2019]
☞ Learn React - Full Course for Beginners - React Tutorial 2019
☞ Getting Closure on React Hooks
☞ Build a React.js application and add Authentication with Auth0