Build A Real World Beautiful Web APP with Angular 8 — A to Z

No more ugly tutorials projects ! No more fictional brands examples!
Today I am going to show you how to build a real world beautiful weather app that is production ready from scratch starting from design to development all the way to deployment using Adobe XD, Angular 7 & Firebase!
Why?
I am sick and tired of developers using background red and basic ugly UI CSS to teach people things that are not production ready and I feel upset when I see thousands of beautiful but practically unusable design projects on Behance and Dribble that designers never took the time to make them useful in any way by taking an extra step to build & deploy those apps so people can benefit from them.
1 man +1 entire project +1 blog post + maybe a video tutorial soon :)
⚡️ Supercharged with all the bells and whistles 😮 🔔
- Based on the latest & greatest version of Angular v7
- Firebase Authentication and Firestore (using AngularFire Lite🔥)
- Server Side Rendered (SEO)
- 100/100 Lighthouse PWA score
- Modern CSS: Grid Layout & Flex Box
- Mobile friendly and full responsive
- 2 Modes : Dark Mode & Light Mode
- Beautiful Minimalistic Design
- Note: This tutorial is part of a series that will cover how to build this app and the long list of features listed above progressively and if you want me to notify you when a new tutorial comes up you can signup to my newsletter here. 💌
Step 1: Design
I have designed the weather app in latest version of Adobe XD. You can download the design file from here so you can see how the different layers stack up to form the final design.angular 8 tutorial
A. Branding
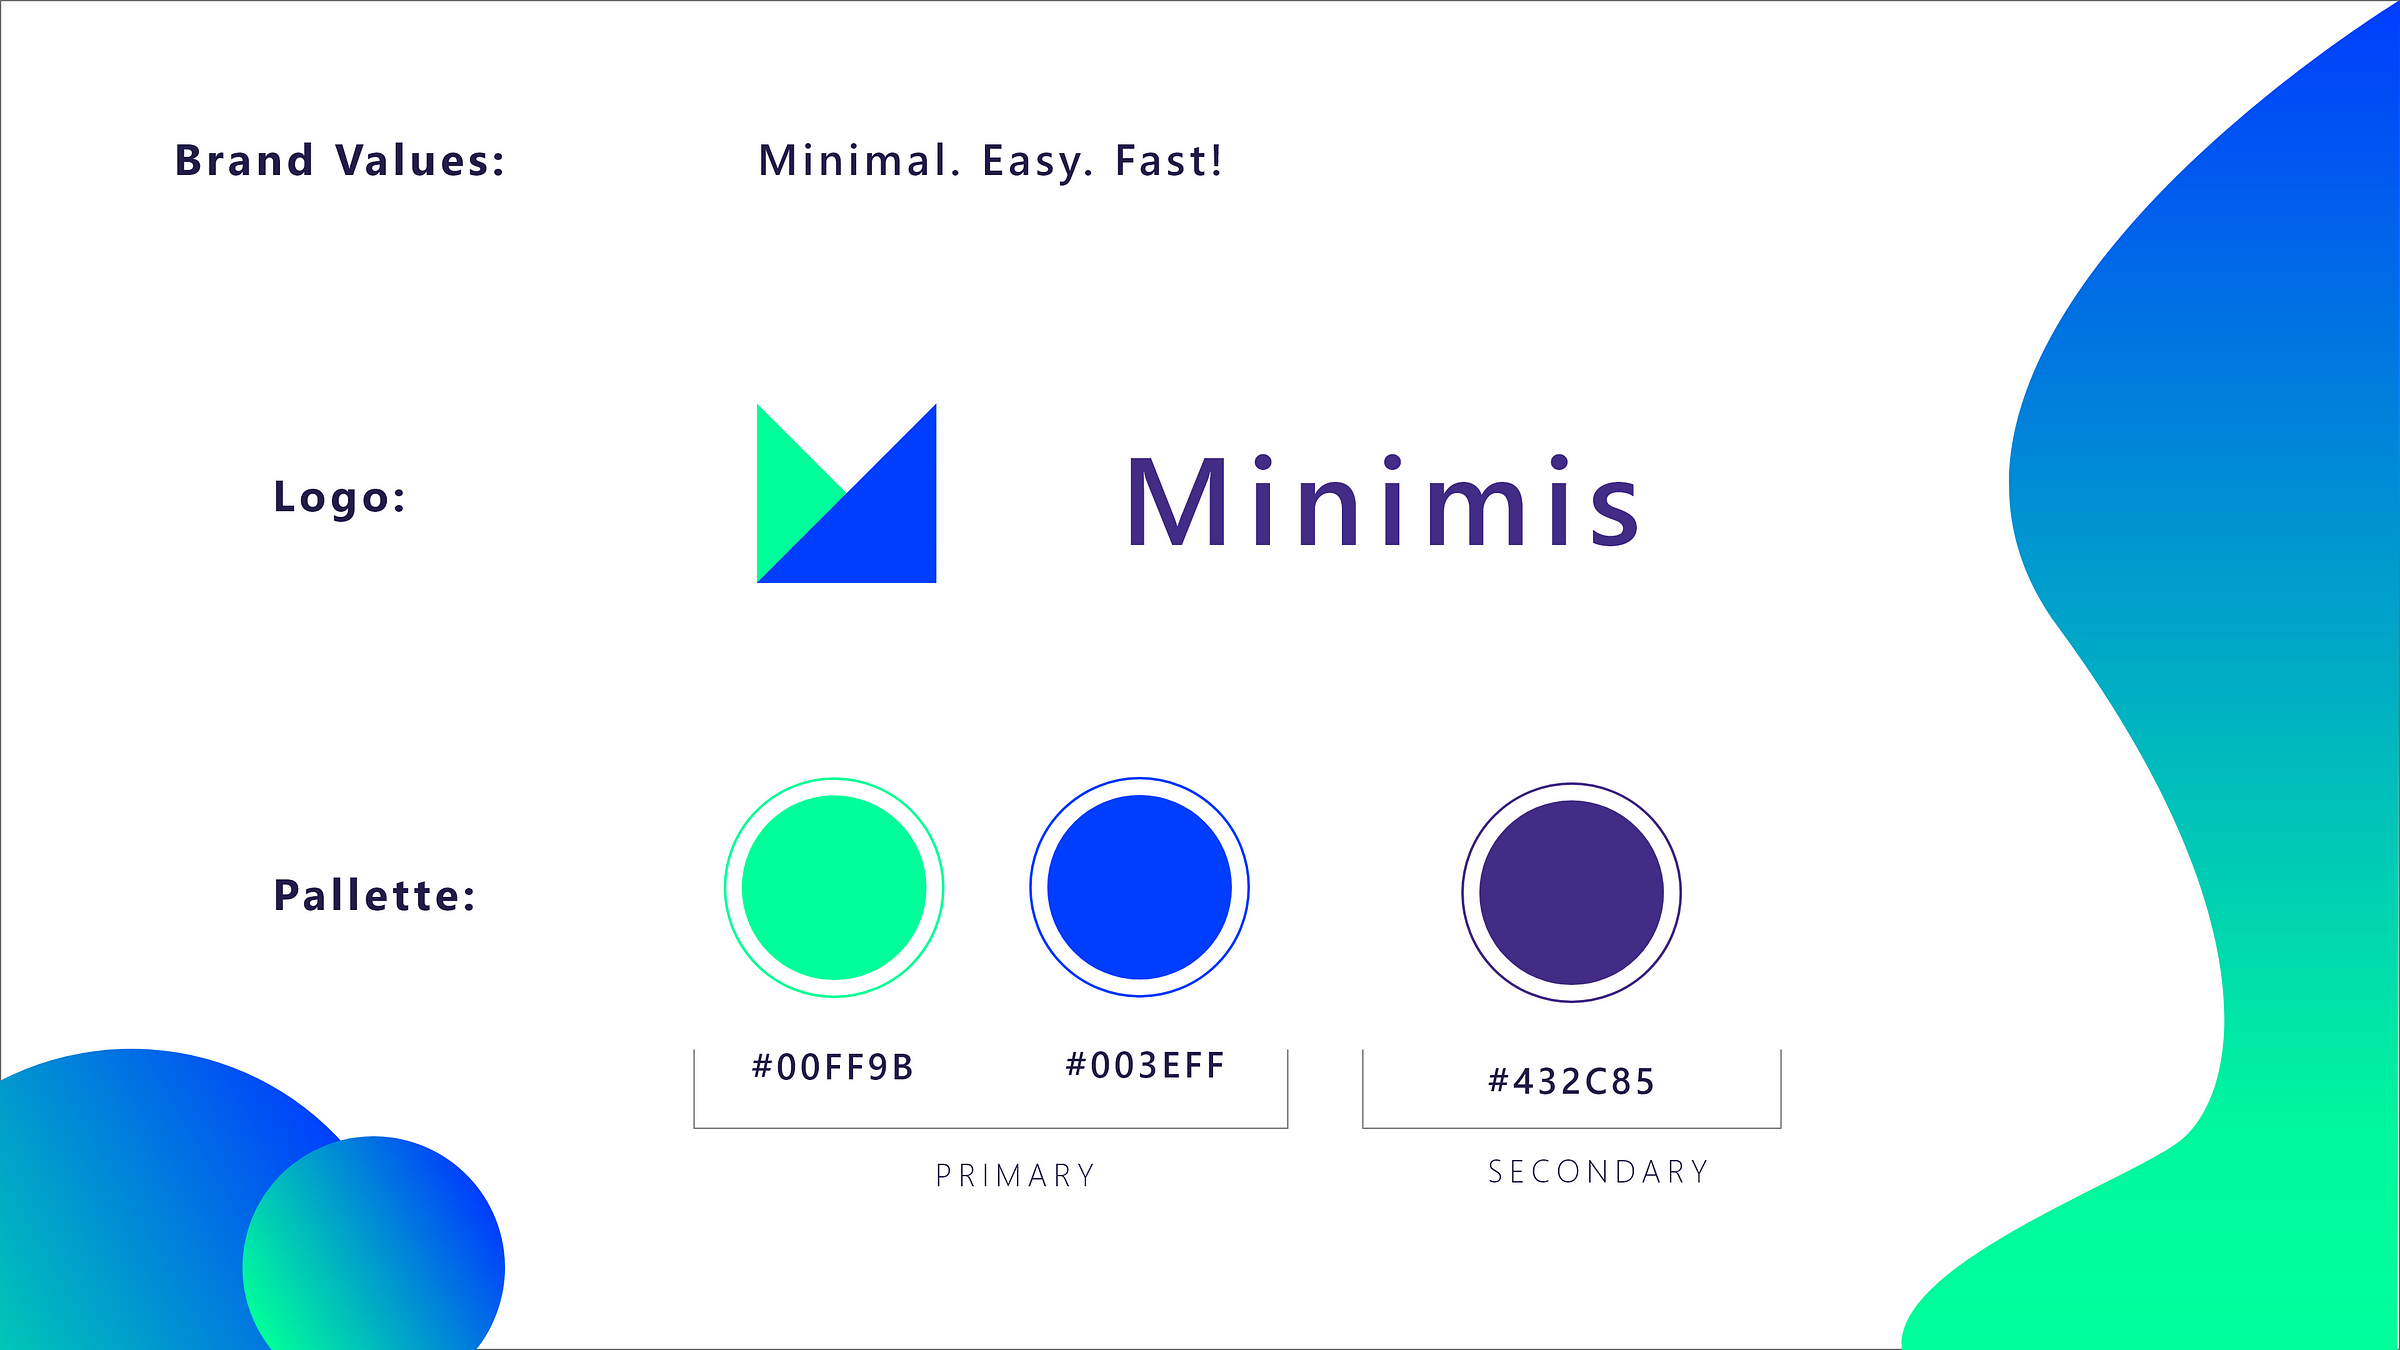
I wanted the brand to reflect it’s core values through the design and you can see it screaming: Minimalistic, Simple, Clean and Easy To Use!
- Colors:
2 saturated primary colors to give it that fresh modern look
- Typefaces:
No custom fonts in here just the stock ‘Sans Serif’ so we don’t have to load any fonts of the CDN for maximum performance.
- Logo:

Logos are not rocket science! but logo designers try hard to make you believe so! but in reality they mostly get paid for the ceremony they create and the film they produce to hypnotize the client.
Think about it for a moment the Nike logo ( a check mark shape ) designed for 35$ , Pepsi (rotating the old simple 3 colored waves logo in 2008 costed the company $1,000,000 that is one million dollars folks!)
anyways here the logo I designed a simple M shape that is upside down using two intersecting cards colored using the primary palate of the brand. Simple, effective and most importantly it costs 0$ 😄
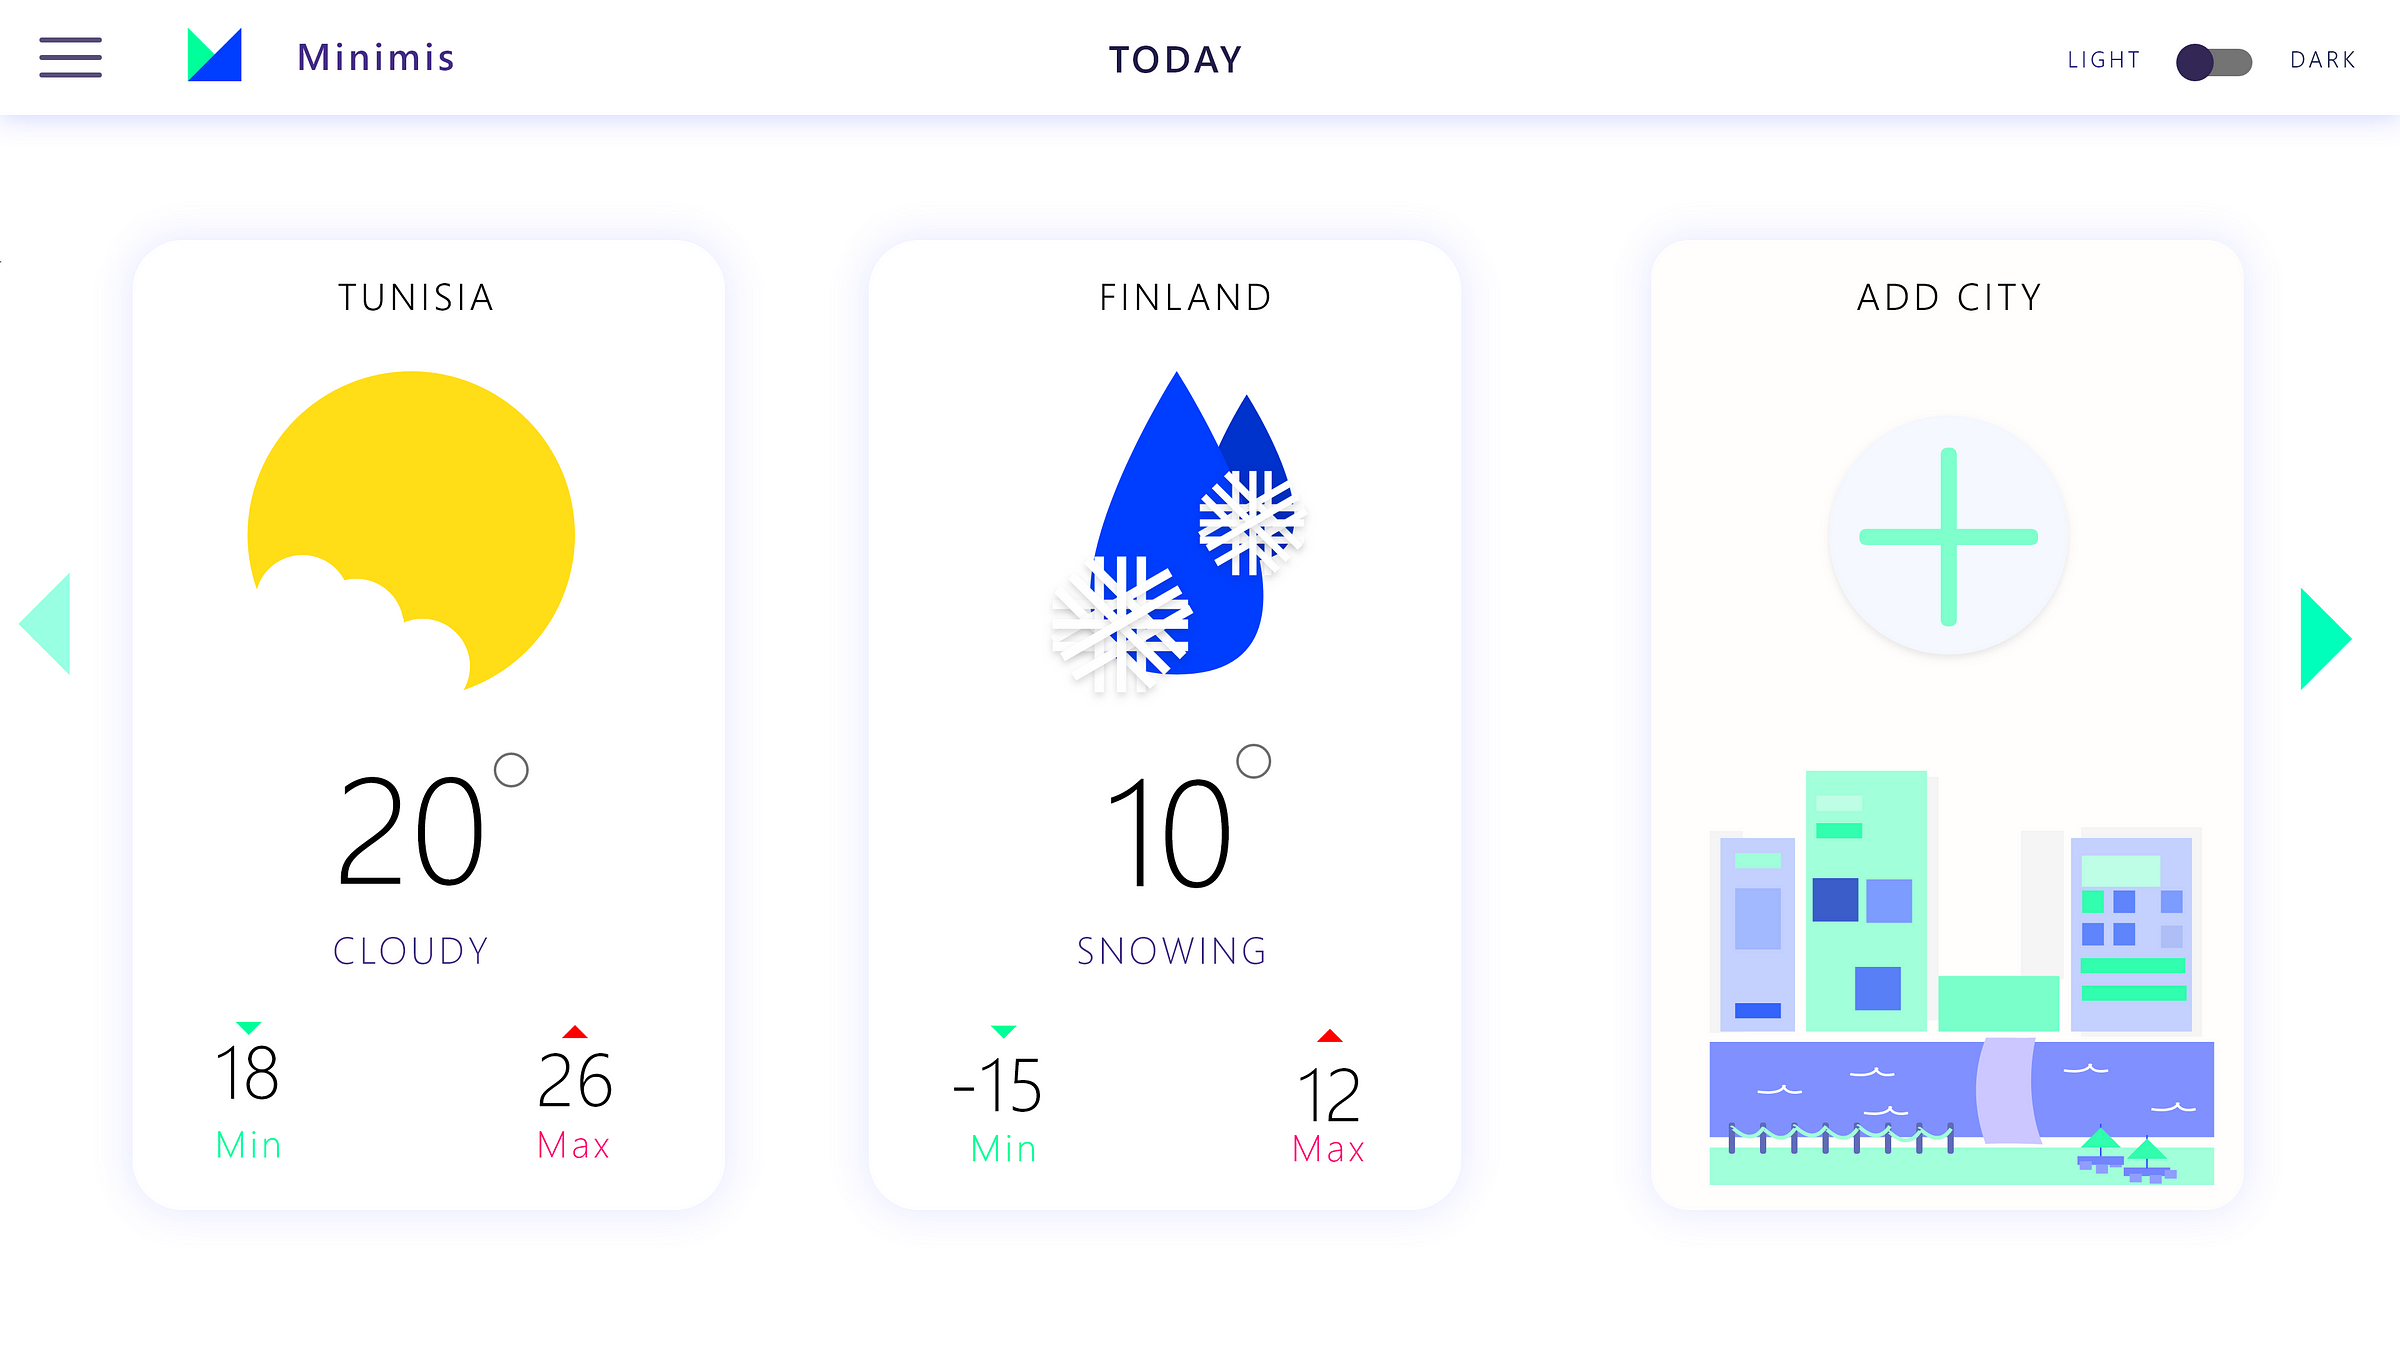
B. UI / UX
The app mainly uses cards with a soft shadow as it was pieces of papers floating. Only the most important pieces of information is displayed upfront to avoid cluttering the UI and the fluid animations give us extra points in the UX department.
- Light Mode (Default) 🌲
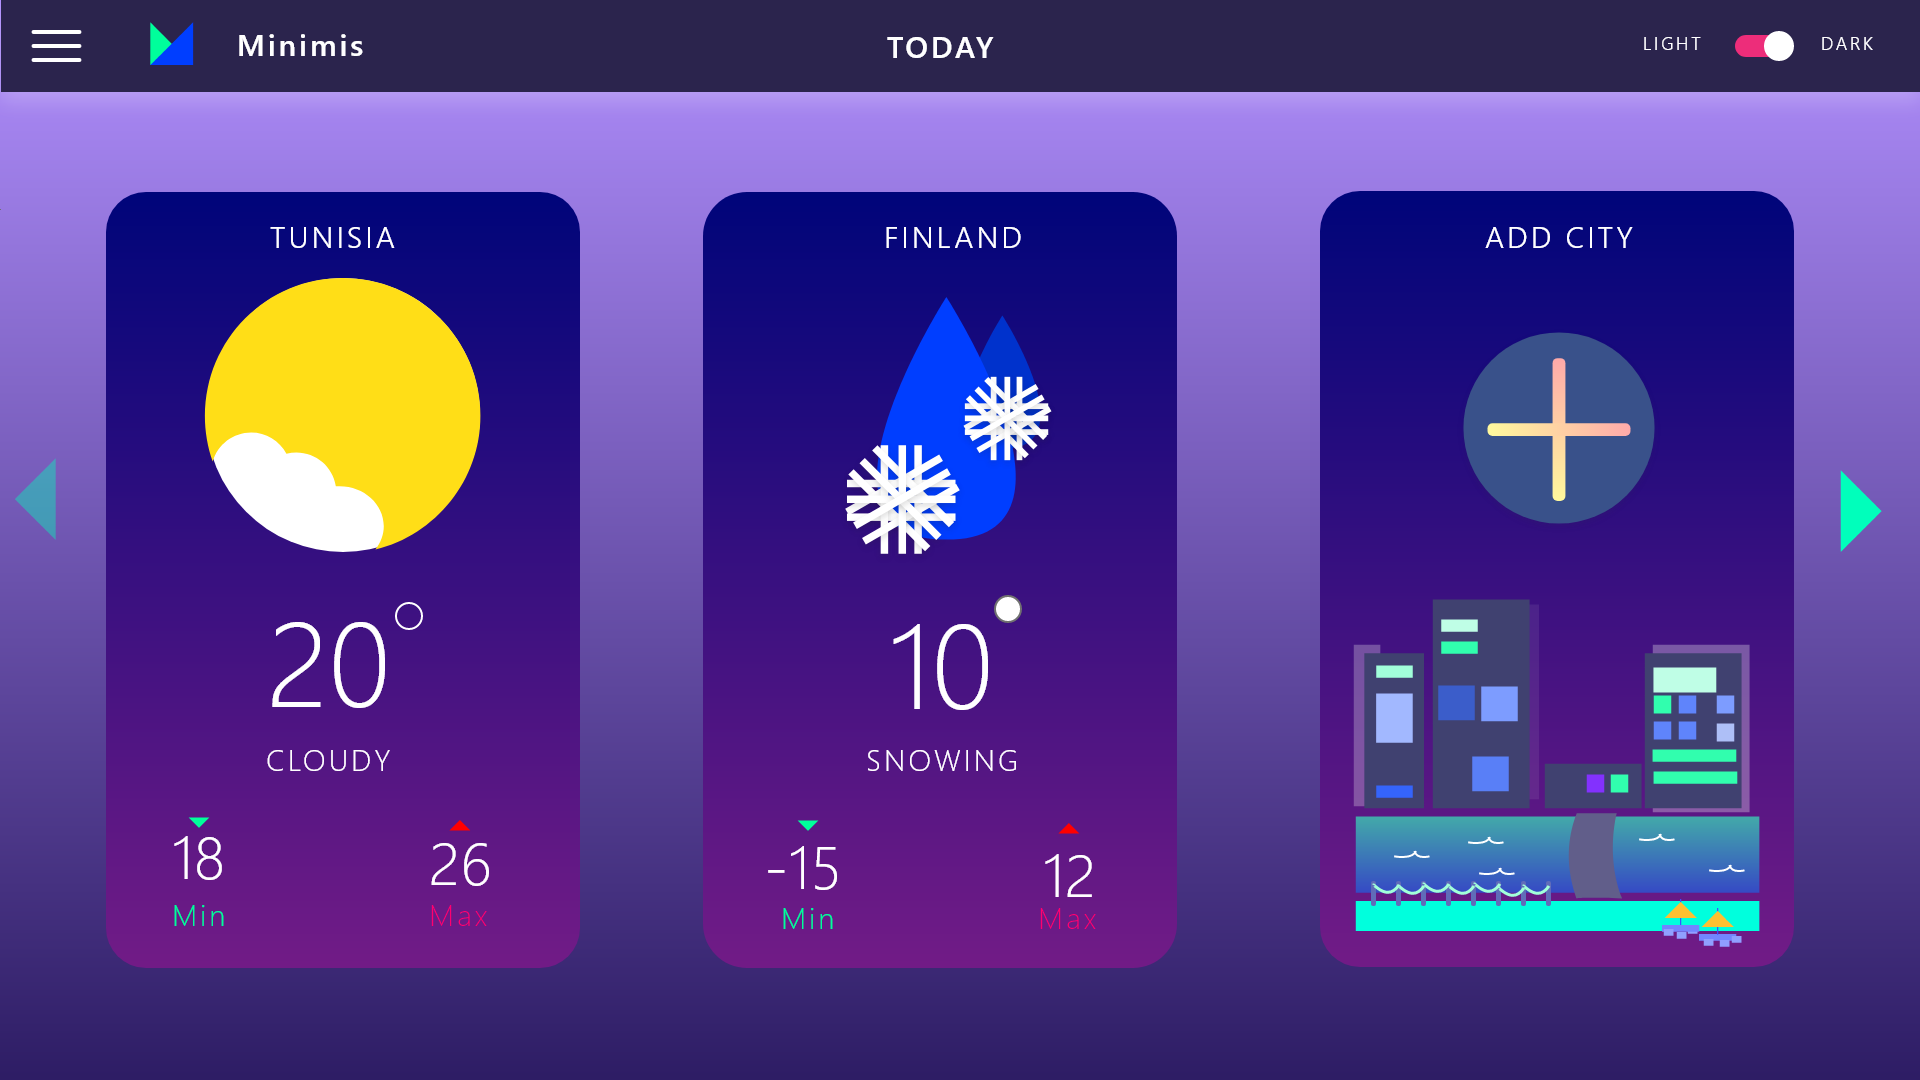
Dark Mode ❤️
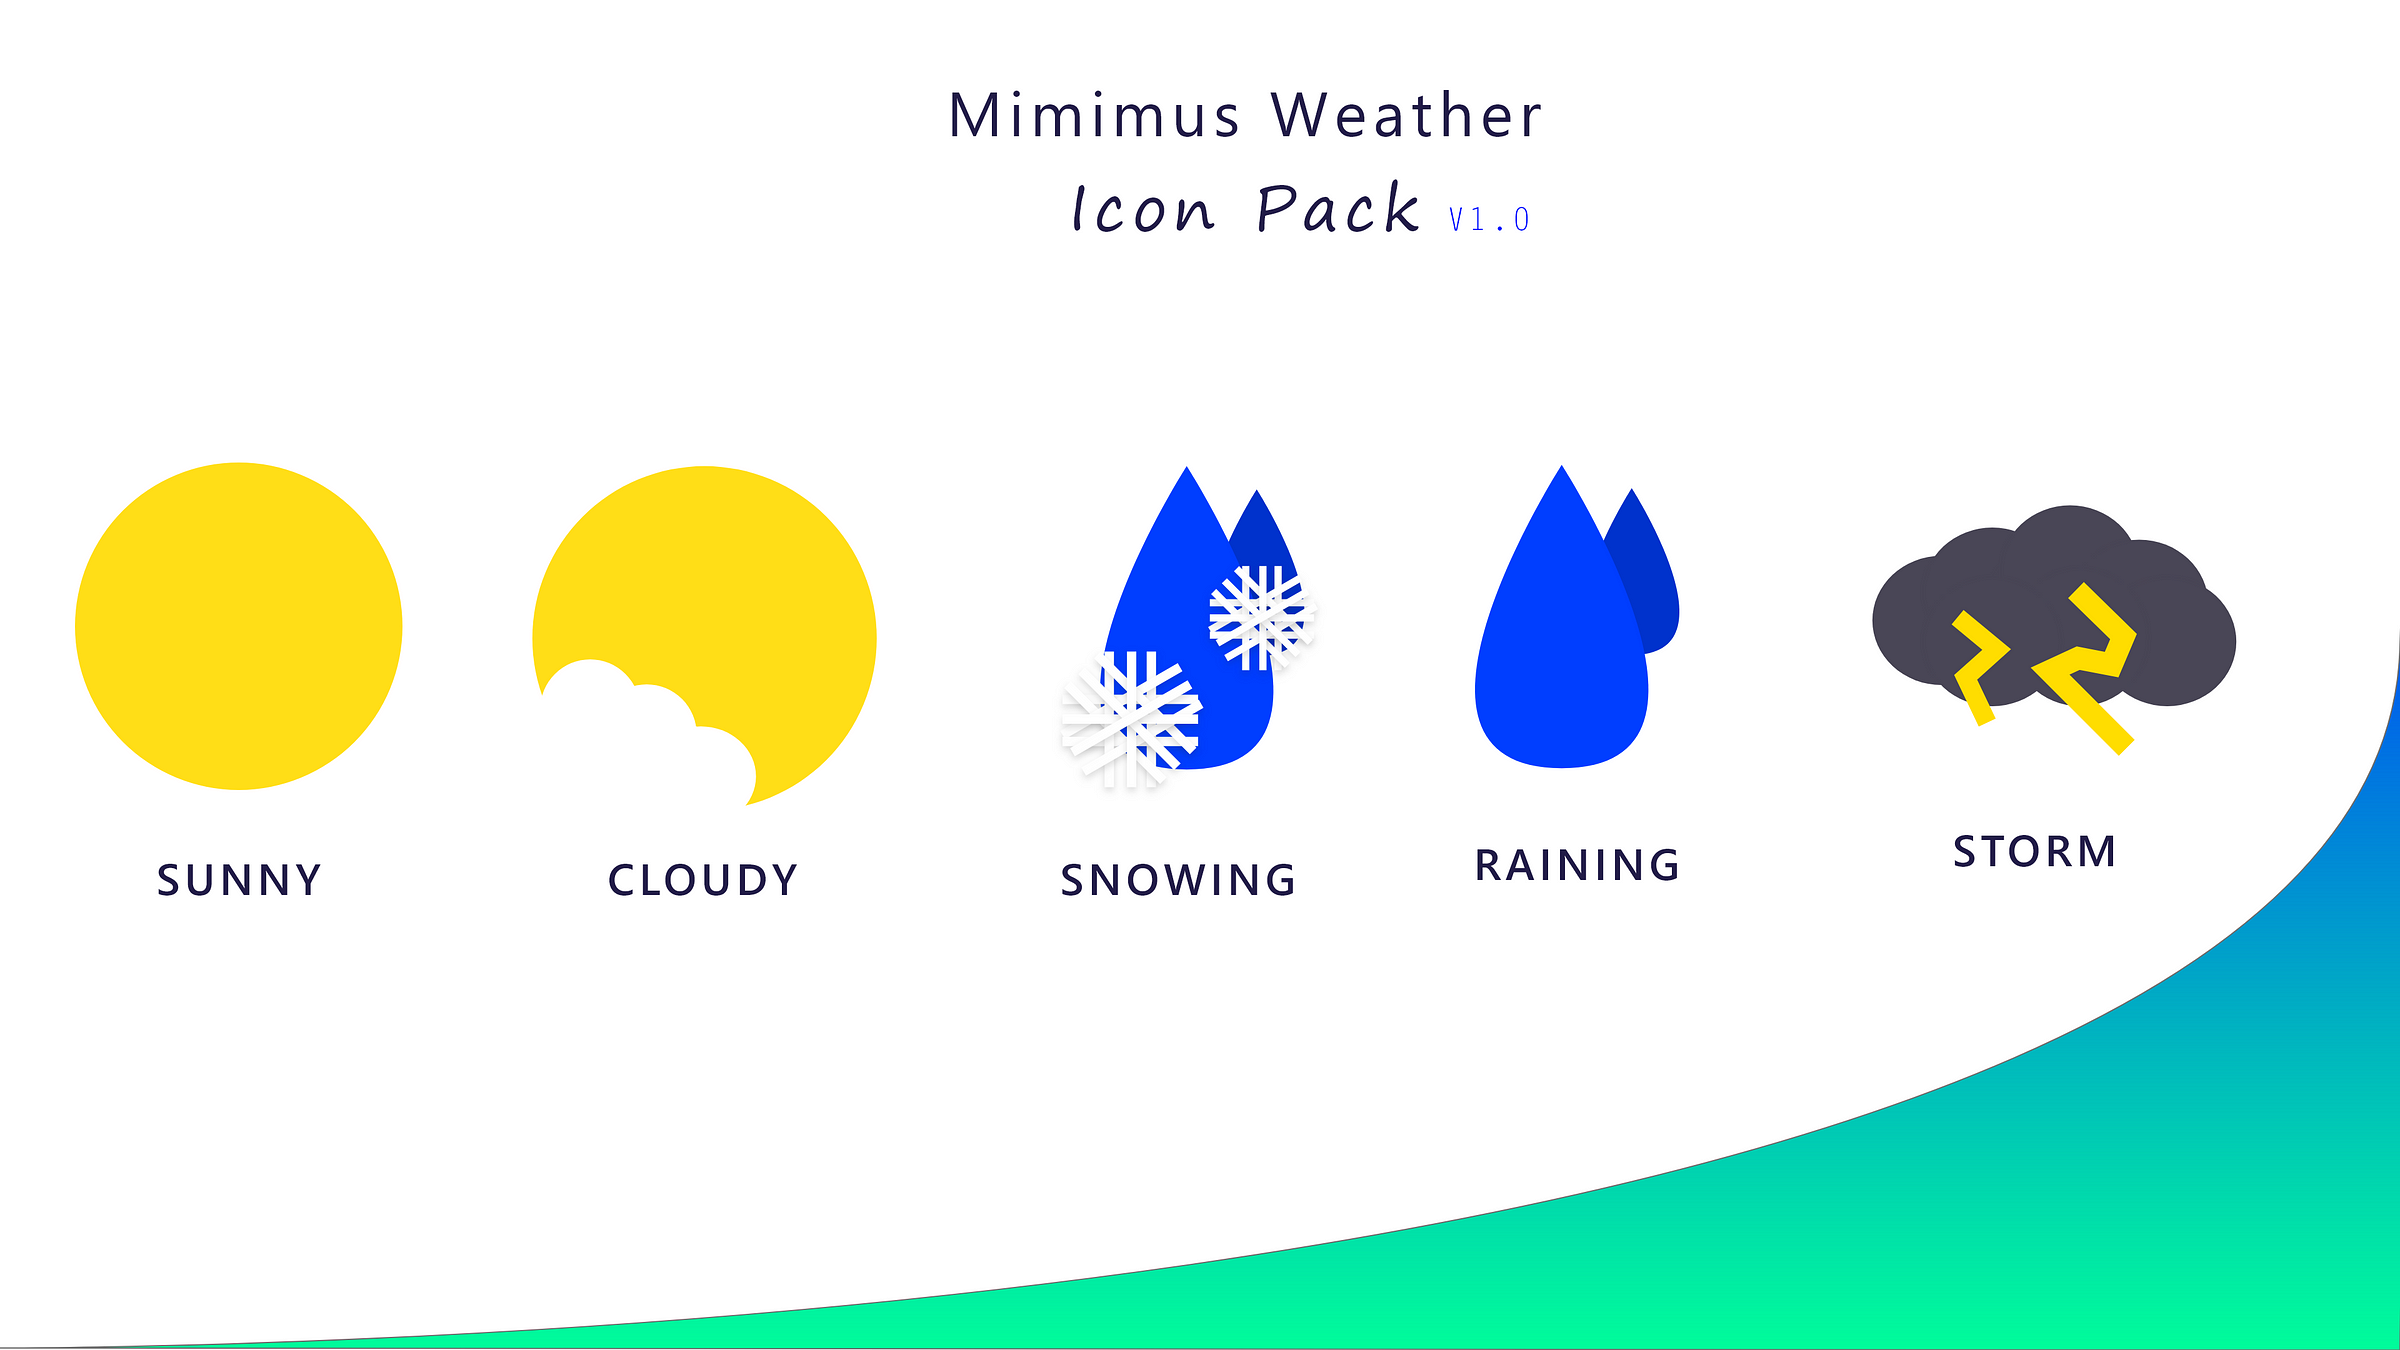
- icons:
the user must tell the weather conditions at a glance so I designed a custom pack of icons from scratch to go well with the whole website design and here is the first version of the pack
- illustrations:
We want to reduce the user efforts to guess as much as possible but in the same time fill up the empty space with a pleasing visual representation of almost everything.
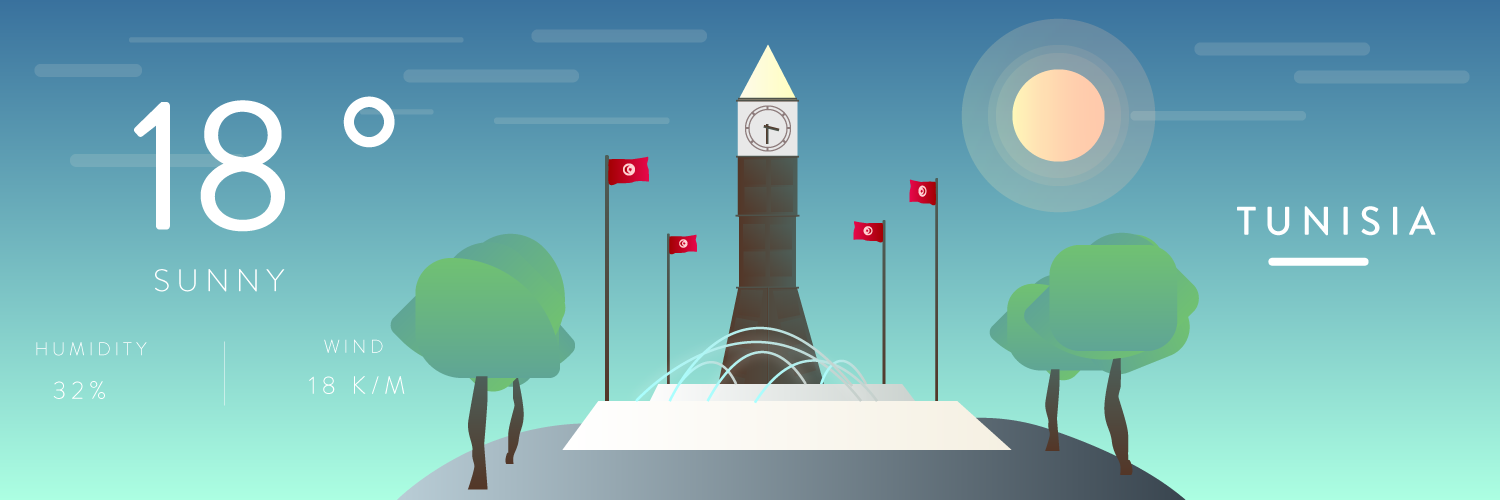
The illustrations I created should help the user identify the selected city without reading any single letter because people are lazy nowadays!
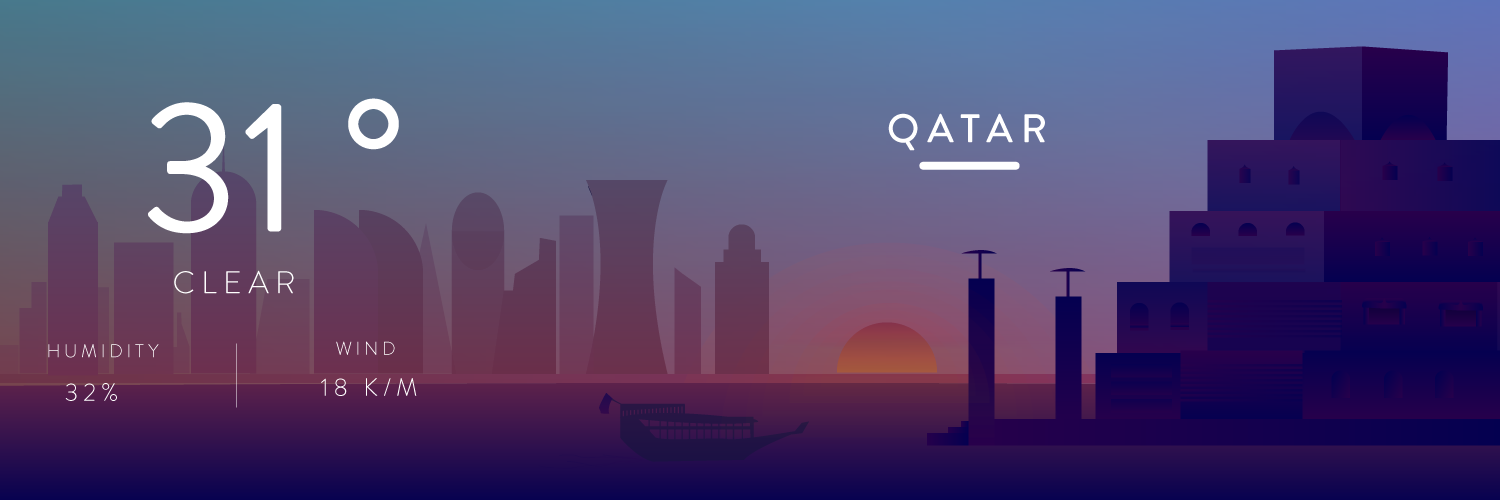
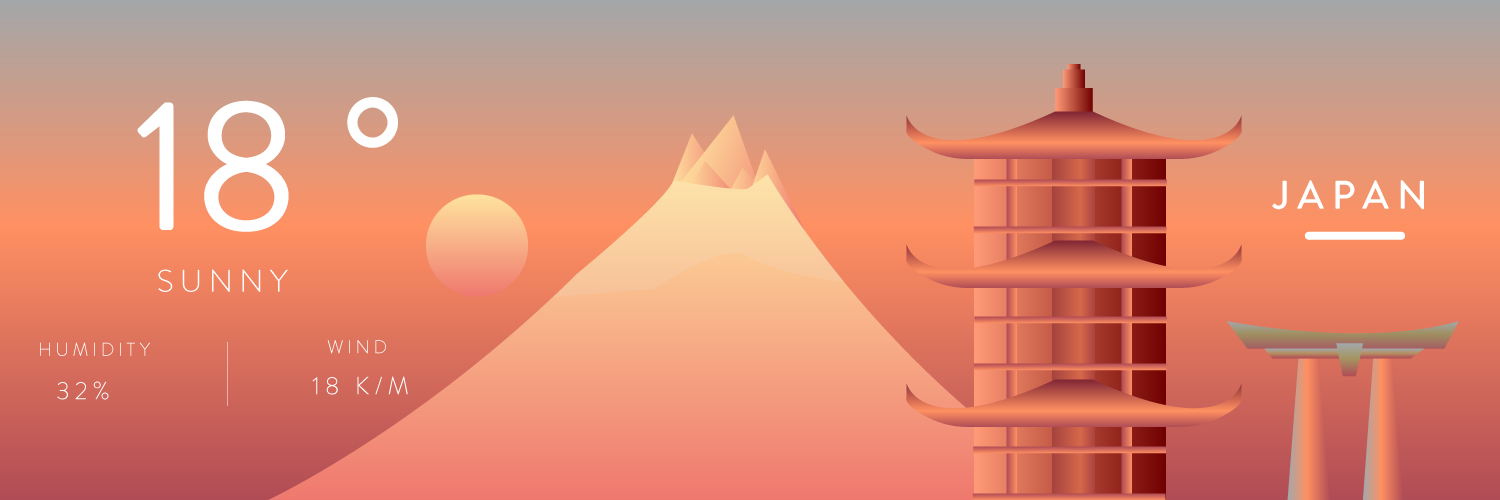
For the cities illustrations I went for a gradient flashy design style with a saturated color palette for a visually rich city details page.
I know how crazy you think I am when I processed to design an illustration for each city the users selects. Obviously, this is an insane amount of work as there is 195 countries in the world but I started with 4 illustrations for now and I kept the rest of the 191 to design throughout the years😅
- Tunisia Illustration:
2. Qatar Illustration:
3. Japan Illustration:
4. France Illustration:
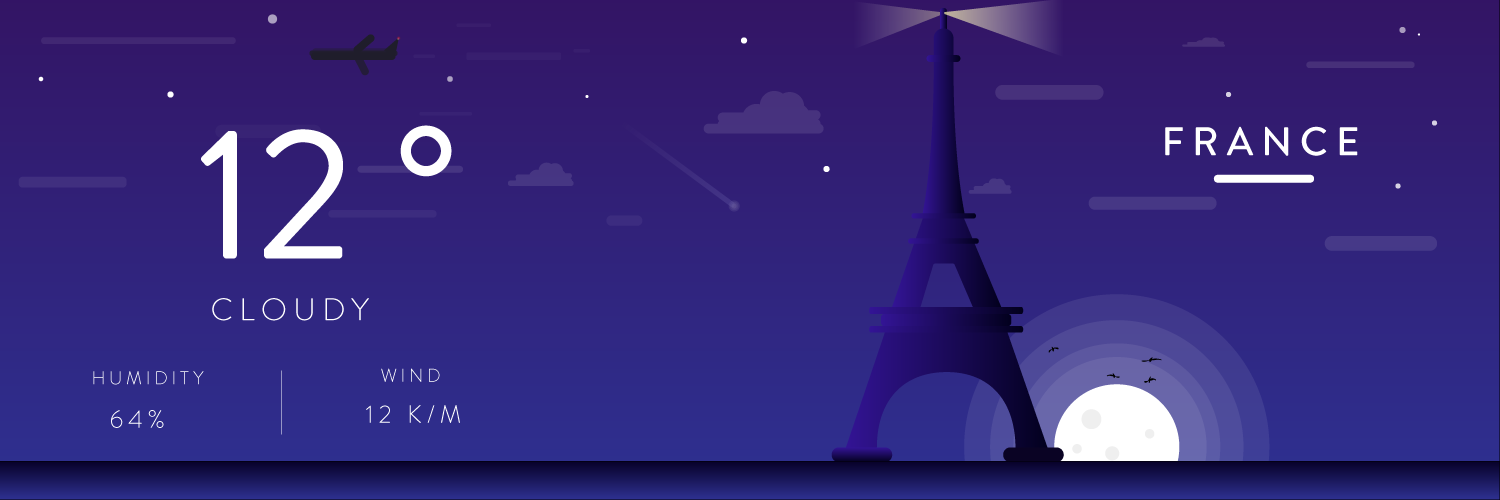
and for the complete illustrations project click here to see it on my Behance profile.
Step 2: Development

Here were most guides skip most of the early steps and assume you know everything and then they show you the result to get impressed and nothing more.
But, I am going to try my best to make everyone capable to follow this tutorial even beginners without making the tutorial insanely long and start things off with installing nodejs and the angular CLI which will generate the basic structure and scaffold our Angular 7 app.
install nodejs from the official website from here and open your command line prompt in your OS and install the Angular CLI and typescript globally using the following lines:
npm i -g typescript
npm i -g @angular/cli
after that just run the following command to generate the App using the Angular CLI and don’t forget to add the routing flag which create a good starting point for the app pagination and routing.
ng new Minimus --routing

once the CLI finishes generating your project files and installs all the dependencies it needs of NPM we are going to start the development server and open our app in the browser using the following command (-o flag is just to open a new browser tab automatically with the correct URL pointing to your app)
ng serve -o
A. Templates And Styling
But before I start want to make sure that you get the most of this tutorial so please don’t just copy and paste, read the code and then open your editor and browser side by side and type everything down in your own way because that is the only way you can learn. I typed everything myself to build this app and you should too so you can understand everything thing form start to finish.
Now back to the project where we just completed the basic setup of the app and now we are going to start writing our HTML and CSS. So open up your project in your favourite text editor and let’s dive right in Woooho!
- App Component
we are going to use the root component app.component as our navbar component and we are going to show it and hide it conditionally depending if the user is logged in or not (We will implement Authentication in Part II with Angularfire Lite in the sires).
Here I thought of using some components off the angular material library but I decided to keep the production app as light as possible by avoiding any 3rd party library unless it is really necessary like Angularfire Lite.
First things first open app.component.hml and delete all the boilerplate HTML automatically generated by the CLI and get your HTML to look like something like this:
<!-- Slide Menu-->
<aside class="side-menu__container" [ngClass]="{'side-menu__container-active': showMenu}" (click)="toggleMenu()">
<nav class="slide-menu" [ngClass]="{'slide-menu-active': showMenu}" (click)="$event.stopImmediatePropagation();">
    <section class="menu-header">
        <span class="greeting__text">Welcome Back</span>
        <div class="profile-image__container">
            <img src="https://avatars3.githubusercontent.com/u/5658460?s=460&v=4" alt="profile-image"
                 class="profile__image">
        </div>
        <div class="account-details">
            <span class="name__text">Hamed Baatour</span>
            <span class="email__text">[email protected]</span>
        </div>
    </section>
    <section class="menu-body">

    </section>
    <section class="menu-footer">

    </section>
</nav>
</aside>

<div class="root__container" >
    <header [ngClass]="{'main__header-dark': darkModeActive}" class="main__header">

        <div class="left__section">
          <svg (click)="toggleMenu()" class="hamburger__icon" id="Menu_Burger_Icon">
              <!-- hamburger icon svg code goes here-->
          </svg>

            <svg class="logo__icon">
              <!-- logo svg code goes here-->
            </svg>

        </div>

        <h3 class="date__text">Today</h3>


        <div class="mode-toggle__container">
            <span class="mode-toggle__text">Light</span>

            <label class="toggle-button__container">
                <input (click)="modeToggleSwitch()" type="checkbox" class="mode-toggle__input" />
                  <span [ngClass]="{'mode-toggle__bg-checked': darkModeActive}" class="mode-toggle__bg"></span>
                  <span [ngClass]="{'mode-toggle__circle-checked': darkModeActive}" class="mode-toggle__circle"></span>
            </label>


            <span class="mode-toggle__text">Dark</span>
        </div>

    </header>

    <!-- Main Content -->

    <!--<router-outlet></router-outlet>-->
    <main class="main__container">
        <div class="main-container__bg" [ngClass]="{'main-container__bg-dark': darkModeActive}"></div>
        <router-outlet></router-outlet>
    </main>

    <!-- Footer -->

    <footer class="main__footer">
        <small class="copyright__text">Copyright © 2018 Minimus</small>
    </footer>
</div>
Minimus - app.component.html
Bonus Tip (optional):
If you want to use Emmet (an editor plugin) as a faster way of typing HTML you can refer to the plugin cheat sheet I usually refer to.
SVG icons
To get the svg icons and the logo here is a list of gists I created on my Github profile so you can use them (copying and pasting is allowed here) :
— Styling the root component
and it’s time for some css to style our navbar, just take a quick look at the css below and look at the achieved result and then go ahead and write down your own css as it does not have to be exactly the same.
“be inspired don’t copy because everybody is an artist”
.root__container {
  width: 100vw;
  height: 100vh;
  display: grid;
  grid-template-columns: auto;
  grid-template-rows: 0.5fr auto;
  position: relative;
}

/*
================
    Header
================
*/

/*
    Slide Menu
= = = = = = = = =
*/
.side-menu__container {
  position: fixed;
  left: 0;
  top: 0;
  width: 100%;
  height: 100%;
  overflow: hidden;
  pointer-events: none;
  z-index: 25;
}

.side-menu__container-active {
  pointer-events: auto;
}

.side-menu__container::before {
  content: '';
  cursor: pointer;
  position: absolute;
  display: block;
  top: 0;
  left: 0;
  height: 100%;
  width: 100%;
  background-color: #0c1066;
  opacity: 0;
  transition: opacity 300ms linear;
  will-change: opacity;
}

.side-menu__container-active::before {
  opacity: 0.3;
}

.slide-menu {
  box-sizing: border-box;
  transform: translateX(-103%);
  position: relative;
  top: 0;
  left: 0;
  z-index: 10;
  height: 100%;
  width: 90%;
  max-width: 26rem;
  background-color: white;
  box-shadow: 0 0 2rem rgba(0, 0, 255, 0.1);
  display: grid;
  grid-template-columns: 1fr;
  grid-template-rows: 2fr 4fr 1fr;
  grid-gap: 1rem;
  transition: transform 300ms linear;
  will-change: transform;
}

.slide-menu-active {
  transform: none;
}

.menu-header {
  background: linear-gradient(to right, #00FF9B, #5f84fb);
  display: grid;
  grid-template-rows: 1fr 4fr;
  grid-template-columns: 1fr 4fr;
  grid-template-areas: "greeting greeting" "image details";
  box-sizing: border-box;
  width: 100%;
  align-content: center;
  color: white;
  box-shadow: 0 0.5rem 2rem rgba(0, 0, 255, 0.2);
}

.greeting__text {
  grid-area: greeting;
  font-size: 1.25rem;
  letter-spacing: 0.15rem;
  text-transform: uppercase;
  margin-top: 1rem;
  justify-self: center;
  align-self: center;
}

.account-details {
  grid-area: details;
  display: flex;
  flex-flow: column;
  margin-left: 1rem;
  align-self: center;
}

.name__text {
  font-size: 1.15rem;
  margin-bottom: 0.5rem;
}

.email__text {
  font-size: 0.9rem;
  letter-spacing: 0.1rem;
}

.menu-body {
  display: grid;
  width: 100%;
}

.profile-image__container {
  grid-area: image;
  margin-right: 0.5rem;
  border-radius: 50%;
  height: 4rem;
  width: 4rem;
  overflow: hidden;
  display: flex;
  justify-content: center;
  align-items: center;
  background-color: white;
  align-self: center;
  margin-left: 2rem;
}

.profile__image {
  max-width: 4rem;
}

/*Header*/
.main__header {
  width: 100%;
  display: grid;
  grid-template-columns: 1fr 1fr 0.25fr;
  grid-template-rows: 1fr;
  box-shadow: 0 0 2rem rgba(0, 0, 255, 0.1);
  height: 4rem;
  margin: 0;
  align-items: center;
  transition: background-color 500ms linear;
  animation: 1s ease-in-out 0ms 1 fadein;
}

.main__header-dark {
  background-color: #2B244D;
  color: white;
}

.toggle-button__container {
  cursor: pointer;
  position: relative;
  margin: 0 0.5rem;
}

.mode-toggle__input {
  -webkit-appearance: none;
  -moz-appearance: none;
}

.mode-toggle__bg {
  height: 1rem;
  width: 2rem;
  border-radius: 0.5rem;
  background-color: rgba(0, 0, 0, 0.5);
  display: inline-block;
  transition: background-color 300ms linear;
}

.mode-toggle__circle {
  height: 1.30rem;
  width: 1.30rem;
  background-color: #2B244D;
  position: absolute;
  top: -0.2rem;
  border-radius: 50%;
  box-shadow: 0 0 0 rgba(0, 0, 255, 0.5);
  transition: left 300ms linear;
  left: 0.1rem;
}

.mode-toggle__circle-checked {
  background-color: white;
  left: 1.75rem;
}

.mode-toggle__bg-checked {
  background-color: #FF0070;
}

.mode-toggle__text {
  font-size: 0.75rem;
  text-transform: uppercase;
  letter-spacing: 0.1rem;
}

/*Content*/
.left__section {
  display: grid;
  grid-template-rows: 1fr;
  grid-template-columns: 1fr 1fr;
  max-width: 5rem;
}

.date__text {
  text-transform: uppercase;
  letter-spacing: 0.1rem;
  display: inline;
  margin: 0.5rem 0;
}

/*SVGs*/
.hamburger__icon {
  position: relative;
  z-index: 35;
  height: 1rem;
  padding: 0.5rem 1.5rem;
  margin-right: 1rem;
  cursor: pointer;
}

.logo__icon {
  height: 2rem;
  margin-left: 1rem;
}

.logo__text {
  fill: #2B244D;
}

.logo__text-dark {
  fill: #ffff;
}

.hamburger__icon__fill {
  fill: #2B244D;
}

.hamburger__icon__fill-dark {
  fill: #ffff;
}

/*
================
    Body
================
*/

.main-container__bg {
  height: 100%;
  width: 100%;
  position: absolute;
  top: 0;
  left: 0;
  z-index: -2;
  opacity: 0;
  background: white;
  transition: opacity 300ms linear;
}

.main-container__bg-dark {
  opacity: 1;
  background: linear-gradient(to bottom, #B290FF, #2E1D65);
  transition: opacity 300ms linear;
}

/*
================-
    Footer
================
*/
.main__footer {
  background: transparent;
  position: absolute;
  bottom: 1rem;
  left: 1.5rem;
  z-index: 100;
}

.copyright__text {
  letter-spacing: 0.1rem;
  color: white;
}

@media only screen and (max-width: 300px) {
  .slide-menu {
    width: 100%;
  }
}
Minimus - app.component.css
CSS explanation:
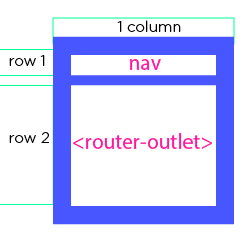
- Layout:
display: grid;
grid-template-columns: auto;
grid-template-rows: 0.5fr auto;
here I am basically using CSS grid layout to divide the page in order to have one small top row for the nav bar and a much larger second row to contain our router outlet which is the main content of the page. Think about it like this small diagram:
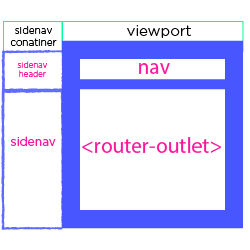
- sidenav
.side-menu__conatiner {
position: fixed;
left: 0;
top: 0 }
places the sidenav container at the top left of the viewport
.side-menu__container::before {...}
used to fade the background with a blue tint when the sidebar slides in
will-change: opacity;
is used to inform the browser ahead of time that the entire background opacity will change so we can achieve a better rendering performance you can read more here.
.slide-menu { transform: translateX(-103%); }
this should pull the side-menu out of the view port and when we click the hamburger menu we should add a .slide-menu-active class which will reset the transform css property and endup sliding the menu from the left of the viewport:
.slide-menu-active { transform: none; }
- mode toggle

a small UI element trick that I want to cover is how I styled is the theme toggle button. Basically I set the appearance css property of a standard checkbox input to none just to completely remove any default styling of the input (this is different from display: none which completely hides the element) and then I used two different classes for the toggle button background and the circle to change the color and the position of the circle depending on a boolean variable stored on the component using the built in ngClass directive in Angular which let you toggle css classes easily.
- Home Component
this is the home component where we show the different weather cards of the user’s favourite cities and from there he can click on the add city card which route him to the add city component to add a new city to his home page.
first we need to generate this component using the CLI using the following command:
ng g c home
the HTML markup has nothing more than a container and two other components for now but we will dynamically add cards depending on the user favourite cities in the upcoming parts of the tutorial:
<div class="main__container">

  <app-weather-card></app-weather-card>
  <app-add-card></app-add-card>

</div>
- Weather Card Component
Here is used the ngSwitch directive to check for the weather conditions and change
<section class="weather__card" (click)="openDetails()" [ngClass]="{'weather__card-dark': darkMode}">
  <!-- TODO: make the city name dynamic -->
  <span class="city-name__text">Paris</span>
    <div class="weather-icon__container" [ngSwitch]="true">

      <svg *ngSwitchCase="condition === 'Clouds'">
        </svg>

        <svg *ngSwitchCase="condition === 'Rain' || condition === 'Drizzle'">
        </svg>

        <svg *ngSwitchCase="condition === 'Storm'">
        </svg>


        <svg *ngSwitchCase="condition === 'Sunny' || condition === 'Clear'">
        </svg>

      <svg  *ngSwitchCase="condition === 'Fog'"></svg>
    </div>
    <div class="temperature-text__container">
        <span class="temperature__text">{{ currentTemp }}</span>
        <span class="temperature-metric__text">°</span>
        <span class="weather-condition__text">{{ condition }}</span>
    </div>
    <section class="min-max__container">
        <div class="min__container">
            <svg class="min-arrow__icon" viewBox="188.5 807 21 21">
                <path fill="#00ff9b" d="M209.5 817.5h-21L199 828z" data-name="Min Arrow"/>
            </svg>

            <span class="min-temperature__text">{{ minTemp }}</span>
            <span class="min__text">Min</span>
        </div>
        <div class="max__container">
            <svg class="max-arrow__icon" viewBox="449.5 820 21 21">
                <path fill="red" d="M449.5 830.5h21L460 820z" data-name="Max Arrow"/>
            </svg>
            <span class="max-temperature__text">{{ maxTemp }}</span>
            <span class="max__text">Max</span>
        </div>
    </section>
</section>
Miminus - weather-card.component.html
and now to some CSS styling of the component:
/*
====================
Weather Card Styling
====================
*/
.weather__card {
  display: grid;
  grid-template-columns: 1fr;
  grid-template-rows: 1fr 1fr 1fr;
  box-shadow: 0 0 2rem rgba(0, 0, 255, 0.1);
  justify-items: center;
  padding: 2rem;
  margin: 2rem;
  width: 19rem;
  height: 30rem;
  cursor: pointer;
  background-color: white;
  border-radius: 1.75rem;
  animation: 1.25s ease-in-out 0ms 1 fadein;
}

.weather__card-dark {
  background: linear-gradient(to bottom, #711B86, #00057A);
  color: white;
}

.city-name__text {
  text-transform: uppercase;
  font-size: 1.4rem;
  letter-spacing: 0.1rem;
  margin-bottom: 1rem;
}

.temperature__text {
  align-self: end;
  width: 100%;
  font-size: 4rem;
  font-weight: 100;
  letter-spacing: 0.1rem;
}

.temperature-metric__text {
  text-align: start;
  font-size: 3rem;
}

.min-max__container {
  display: grid;
  grid-template-rows: 1fr;
  grid-template-columns: 1fr 1fr;
  align-items: center;
}

.min__container, .max__container {
  margin: 1rem 3rem;
  display: grid;
  grid-template-columns: 1fr;
  grid-template-rows: 1fr 1fr;
}

.min-arrow__icon, .max-arrow__icon {
  height: 1.25rem;
  margin: auto;
}

.max-arrow__icon {
  margin-bottom: -0.05rem;
}

.weather-condition__text {
  display: block;
  font-size: 1rem;
  text-transform: uppercase;
  letter-spacing: 0.1rem;
  text-align: center;
}

.max__text {
  color: #FF0070;
}

.min__text {
  color: #00FF9B;
}

.max__text, .min__text {
  font-size: 1rem;
  text-align: center;
}

.max-temperature__text, .min-temperature__text {
  text-align: center;
  font-size: 2rem;
}

.weather-icon__container {
  width: 10rem;
  margin-bottom: 2rem;
  display: flex;
  justify-content: center;
}

.weather-icon__container > svg {
  width: 10rem;
}
Minimus - weather-card.component.css
DarkMode
In the CSS you can notice that I added two classes for most UI elements and the reason for this is we want to add extra css classes for the dark theme with -dark suffix so we can toggle them afterwards using again the ngClass directive based on the theme toggle button state.
- Add Card Component
Here is the add card component I have added a div wrapper that has a conditional dark mode ngClass directive like most of the UI element and I have added a the Angular router routerLink attribute to navigate the user to the add city page when the card is clicked
<div class="add__card" routerLink="/add" [ngClass]="{'add__card-dark': darkMode}">
  <div class="header__container">
  <span class="card__title">Add city</span>
  </div>
  <div class="body__container">
    <svg class="add__icon"></svg>
    <svg class="city__illustration"></svg>
  </div>
  </div>
Minimus - add-card.component.html
in terms of CSS again nothing complicated here as the main card uses also gird layout to create 2 rows to evenly space its content. don’t forget also to add the box-shadow property to add some light drop shadow to the card.
.add__card {
  background-color: #ffffff;
  box-shadow: 0 0 2rem rgba(0, 0, 255, 0.1);
  display: grid;
  grid-template-columns: 1fr;
  grid-template-rows: 1fr 1fr;
  padding: 2rem;
  margin: 2rem;
  width: 19rem;
  height: 30rem;
  justify-items: center;
  cursor: pointer;
  border-radius: 1.75rem;
  animation: 1.25s ease-in-out 0ms 1 fadein;
  color: #443282;
}

.add__card-dark {
  background: linear-gradient(to bottom, #711B86, #00057A);
  color: white;
}

.card__title {
  text-transform: uppercase;
  letter-spacing: 0.1rem;
}

.city__illustration {
  width: 20rem;
}

.body__container {
  align-self: end;
  display: flex;
  justify-content: space-between;
  align-items: center;
  flex-flow: column;
}

.add__icon {
  width: 10rem;
  margin-bottom: 1.15rem;
}
Minimus - add-card.component.css
- Details Component
Here I injected the weather service to retrieve the weather data (more on that later) and set each day name, temperature and weather condition in a separate public variable that I can access in the template to display it:
import {Component, OnDestroy, OnInit} from '@angular/core';
import {ActivatedRoute} from '@angular/router';
import {WeatherService} from '../../services/weather/weather.service';
import {Subscription} from 'rxjs';

@Component({
  selector: 'app-details',
  templateUrl: './details.component.html',
  styleUrls: ['./details.component.css']
})
export class DetailsComponent implements OnInit, OnDestroy {

  city: string;
  state: string;
  temp: number;
  hum: number;
  wind: number;

  today: string;

  day1Name: string;
  day1State: string;
  day1Temp: number;


  day2Name: string;
  day2State: string;
  day2Temp: number;

  day3Name: string;
  day3State: string;
  day3Temp: number;

  day4Name: string;
  day4State: string;
  day4Temp: number;

  day5Name: string;
  day5State: string;
  day5Temp: number;

  sub1: Subscription;
  sub2: Subscription;
  sub3: Subscription;
  sub4: Subscription;
  sub5: Subscription;

  constructor(public activeRouter: ActivatedRoute, public weather: WeatherService) {
  }

  ngOnInit() {

    const todayNumberInWeek = new Date().getDay();
    const days = ['Sun', 'Mon', 'Tue', 'Wed', 'Thu', 'Fri', 'Sat'];
    this.today = days[todayNumberInWeek];

    this.activeRouter.paramMap.subscribe((route: any) => {

      this.city = route.params.city;
      this.sub1 = this.weather.getWeatherState(this.city).subscribe((state) => this.state = state);
      this.sub2 = this.weather.getCurrentTemp(this.city).subscribe((temperature) => this.temp = temperature);
      this.sub3 = this.weather.getCurrentHum(this.city).subscribe((humidity) => this.hum = humidity);
      this.sub4 = this.weather.getCurrentWind(this.city).subscribe((windspeed) => this.wind = windspeed);
      this.sub5 = this.weather.getForecast(this.city).subscribe((data: any) => {
        console.log(data);
        for (let i = 0; i < data.length; i++) {
          const date = new Date(data[i].dt_txt).getDay();
          console.log(days[date]);
          if (((date === todayNumberInWeek + 1) || (todayNumberInWeek === 6 && date === 0)) && !this.day1Name) {
            this.day1Name = days[date];
            this.day1State = data[i].weather[0].main;
            this.day1Temp = Math.round(data[i].main.temp);

          } else if (!!this.day1Name && !this.day2Name && days[date] !== this.day1Name) {
            this.day2Name = days[date];
            this.day2State = data[i].weather[0].main;
            this.day2Temp = Math.round(data[i].main.temp);

          } else if (!!this.day2Name && !this.day3Name && days[date] !== this.day2Name) {
            this.day3Name = days[date];
            this.day3State = data[i].weather[0].main;
            this.day3Temp = Math.round(data[i].main.temp);

          } else if (!!this.day3Name && !this.day4Name && days[date] !== this.day3Name) {
            this.day4Name = days[date];
            this.day4State = data[i].weather[0].main;
            this.day4Temp = Math.round(data[i].main.temp);

          } else if (!!this.day4Name && !this.day5Name && days[date] !== this.day4Name) {
            this.day5Name = days[date];
            this.day5State = data[i].weather[0].main;
            this.day5Temp = Math.round(data[i].main.temp);

          }
        }
      });

    });

  }

  ngOnDestroy() {
    this.sub1.unsubscribe();
    this.sub2.unsubscribe();
    this.sub3.unsubscribe();
    this.sub4.unsubscribe();
    this.sub5.unsubscribe();
  }

}
Minimus - details.component.ts
Obviously there are a lot of filtering and modification done to the data from the weather service so in the next part will move some of the logic to a service.
Please do not forget also to unsubscribe from each subscription in the ngOnDestroy life cycle hook of the component to avoid memory leaks.
The details component have a lot of svgs which made the HTML very long so here is the full component template including the svg icons so I don’t have to include it here.
with the CSS I have followed the dark mode styling for now:
.details-page__wrapper-dark {
  background: linear-gradient(#FC7DB8, #495CFC);
  height: 100%;
  width: 100%;
  display: flex;
  justify-content: center;
  align-items: center;
  position: relative;
  overflow: hidden;
}

.background-gradient__circle {
  position: absolute;
  top: 50%;
  right: 0;
  transform: translateY(-50%);
  z-index: 1;
  height: 120%;
}

.main-weather__card-dark {
  background-color: white;
  height: 85%;
  width: 60%;
  border-radius: 1rem;
  position: relative;
  z-index: 3;
  display: grid;
  grid-template-columns: 1fr;
  grid-template-rows: 0.5fr 1.25fr;
  justify-items: center;
}

.card-header__container-dark {
  width: 100%;
  max-height: 20rem;
  position: relative;
  z-index: 1;
}

.back__button {
  position: absolute;
  top: 2rem;
  left: 2.25rem;
  width: 5rem;
  cursor: pointer;
  z-index: 3;
}

.city__illustration {
  width: 100%;
  border-radius: 1rem 1rem 0 0;
  position: relative;
}

.header-content__wrapper {
  position: absolute;
  z-index: 2;
  color: white;
  top: 0;
  display: grid;
  grid-template-rows: 1fr;
  grid-template-columns: repeat(2, 1fr);
  width: 100%;
  height: 100%;
}

.temperature__text {
  font-size: 6rem;
  letter-spacing: 0.75rem;
}

.city-name__container {
  display: flex;
  justify-content: center;
  align-items: center;
  padding-bottom: 25%;
}

.city-name__underline {
  background: transparent;
  border-radius: 5px;
  height: 5px;
  box-shadow: 0 3rem 0 0 #ffffff;
}

.city-name__text {
  text-transform: uppercase;
  letter-spacing: 0.3rem;
  font-size: 1.75rem;
  padding-bottom: 2rem;
}

.today-weather__container {
  align-self: center;
  justify-self: center;
  display: grid;
  width: 100%;
  grid-template-rows: 3fr 1fr;
  grid-template-columns: 1fr;
  justify-items: center;
  grid-gap: 2rem;
}

.temp-state__container {
  display: flex;
  justify-content: center;
  flex-flow: column;
}

.weather-state__text {
  letter-spacing: 0.5rem;
  font-size: 1.15rem;
  text-transform: uppercase;
  margin-top: 0.25rem;
}

.hum-wind__container {
  display: flex;
  align-items: center;
  margin-left: -4rem;
}

.hum-wind__separator {
  margin: 0 2rem;
  width: 2px;
  height: 2.5rem;
  background-color: white;
}

.hum__text, .wind__text {
  text-transform: uppercase;
  letter-spacing: 0.2rem;
  font-size: 0.8rem;
  margin-bottom: 1rem;
}

.hum__container, .wind__container {
  display: flex;
  flex-flow: column;
  justify-content: center;
  align-items: center;
}

/*
================
     BODY
================
*/

.body-content__wrapper {
  display: grid;
  grid-template-columns: 1fr 1.75fr;
  grid-template-rows: 1fr;
  justify-items: center;
  box-sizing: border-box;
  grid-column-gap: 1rem;
  width: 100%;
  padding: 2rem;
}

.forecast__container {
  display: flex;
  flex-flow: row;
  align-items: center;
  align-self: center;
  justify-self: center;
}

.twitter-feed__container {
  margin-top: 1rem;
  width: 100%;
}

.twitter-feed__text {
  color: #0c1066;
  font-size: 1.25rem;
}

.twitter__icon {
  width: 1.5rem;
}

.twitter-feed-tag__text {
  font-size: 0.85rem;
  color: #5f84fb;
  letter-spacing: 0.1rem;
  text-transform: uppercase;
}

.twitter-feed__header {
  display: grid;
  grid-template-rows: 2rem;
  grid-template-columns: 0.5fr 1.5fr 1fr;
  align-items: center;
  justify-items: center;
  width: 100%;
}

.day-weather__container {
  display: flex;
  flex-flow: column;
  margin: 2rem 1.5rem;
  justify-content: center;
  align-items: center;
}

.day-name__text {
  font-size: 1.5rem;
  color: #39437a;
  font-weight: bold;
  text-transform: uppercase;
  margin-bottom: 0.5rem;
}

.forecast-condition__icon {
  height: 4rem;
}

.day-temp__text {
  font-size: 1.85rem;
  color: #0c1066;
  letter-spacing: 0.25rem;
  margin: 0.75rem 0;
  text-align: center;
  padding-left: 0.35rem;
}

.day-state__text {

  font-size: 0.65rem;
  text-transform: uppercase;
  letter-spacing: 0.2rem;
  color: #2B244D;
}
Minimus - details.component.css
B. Services
we want to decouple the logic of retrieving the API weather data from a specific component and move it to a separate service that we can use throughout the application and again we are going to use the short hand format to generate a service using the CLI.
- Weather service
ng g s weather
this service uses the OpenWeatherMap API to retrieve the weather information and makes some modifications before feeding the data to the components at the end. The API does not inform us about the maximum and minimum temperature value and the free plan also restricts us to access only the 5 days/3 hour forecast data so what I ended up doing is I looped through the 3 hours interval temperatures and extracted an approximate max and min value.
and here is the weather.service.ts code:
import {Injectable} from '@angular/core';
import {HttpClient} from '@angular/common/http';
import {Subject} from 'rxjs';

@Injectable()
export class WeatherService {

  constructor(public http: HttpClient) {
  }

  getCityWeatherByName(city: string, metric: 'metric' | 'imperial' = 'metric'): Subject<string> {
    const dataSub = new Subject<string>();
    this.http.get(
      `https://api.openweathermap.org/data/2.5/weather?q=${city}&units=${metric}&APPID=952d6b1a52fe15a7b901720074680562`)
      .subscribe((data) => {
        dataSub.next(data['weather']);
      }, (err) => {
        console.log(err);
      });
    return dataSub;
  }

  getCitiesWeathersByNames(cities: Array<string>, metric: 'metric' | 'imperial' = 'metric'): Subject<any> {
    const citiesSubject = new Subject();
    cities.forEach((city) => {
      citiesSubject.next(this.http.get(
        `https://api.openweathermap.org/data/2.5/weather?q=${city}&units=${metric}&APPID=952d6b1a52fe15a7b901720074680562`));
    });
    return citiesSubject;
  }

  getWeatherState(city: string): Subject<string> {
    const dataSubject = new Subject<string>();
    this.http.get(
      `https://api.openweathermap.org/data/2.5/weather?q=${city}&APPID=952d6b1a52fe15a7b901720074680562`)
      .subscribe((data) => {
        dataSubject.next(data['weather'][0].main);
      });
    return dataSubject;
  }

  getCurrentTemp(city: string, metric: 'metric' | 'imperial' = 'metric'): Subject<number> {
    const dataSubject = new Subject<number>();
    this.http.get(
      `https://api.openweathermap.org/data/2.5/weather?q=${city}&units=${metric}&APPID=952d6b1a52fe15a7b901720074680562`)
      .subscribe((weather: any) => {
        dataSubject.next(Math.round(Number(weather.main.temp)));
      });
    return dataSubject;
  }


  getCurrentHum(city: string, metric: 'metric' | 'imperial' = 'metric'): Subject<number> {
    const dataSubject = new Subject<number>();
    this.http.get(
      `https://api.openweathermap.org/data/2.5/weather?q=${city}&units=${metric}&APPID=952d6b1a52fe15a7b901720074680562`)
      .subscribe((weather: any) => {
        console.log(weather);
        dataSubject.next(weather.main.humidity);
      });
    return dataSubject;
  }


  getCurrentWind(city: string, metric: 'metric' | 'imperial' = 'metric'): Subject<number>  {
    const dataSubject = new Subject<number>();
    this.http.get(
      `https://api.openweathermap.org/data/2.5/weather?q=${city}&units=${metric}&APPID=952d6b1a52fe15a7b901720074680562`)
      .subscribe((weather: any) => {
        dataSubject.next(Math.round(Math.round(weather.wind.speed)));
      });
    return dataSubject;
  }


  getMaxTemp(city: string, metric: 'metric' | 'imperial' = 'metric'): Subject<number>  {
    const dataSubject = new Subject<number>();
    let max: number;
    this.http.get(
      `https://api.openweathermap.org/data/2.5/forecast?q=${city}&units=${metric}&APPID=952d6b1a52fe15a7b901720074680562`)
      .subscribe((weather: any) => {
        max = weather.list[0].main.temp;
        weather.list.forEach((value) => {
          if (max < value.main.temp) {
            max = value.main.temp;
          }
        });
        dataSubject.next(Math.round(max));
      });
    return dataSubject;
  }

  getMinTemp(city: string, metric: 'metric' | 'imperial' = 'metric'): Subject<number>  {
    const dataSubject = new Subject<number>();
    let min: number;
    this.http.get(
      `https://api.openweathermap.org/data/2.5/forecast?q=${city}&units=${metric}&APPID=952d6b1a52fe15a7b901720074680562`)
      .subscribe((weather: any) => {
        min = weather.list[0].main.temp;
        weather.list.forEach((value) => {
          if (min > value.main.temp) {
            min = value.main.temp;
          }
        });
        dataSubject.next(Math.round(min));
      });
    return dataSubject;
  }

  getForecast(city: string, metric: 'metric' | 'imperial' = 'metric'): Subject<Array<any>>  {
    const dataSubject = new Subject<Array<any>>();
    this.http.get(
      `https://api.openweathermap.org/data/2.5/forecast?q=${city}&units=${metric}&APPID=952d6b1a52fe15a7b901720074680562`)
      .subscribe((weather: any) => {
        dataSubject.next(weather.list);
      });
    return dataSubject;
  }

}
Minimus- weather.service.ts
as you can see all the functions return a Subject which we will use to broadcast the modified data to any component that subscribes to it. This free weather API sucks and I might create a tutorial on how to transform this ugly REST API to a much nicer GraphQL one so stay tuned.
a quick run through on what the different service functions do:
— getWeatherState : the current weather state e.g. cloudy - clear…
— getCurrentTemp: the current temperature number
— getMinTemp: the minimum temperature (based on 3 hours interval)
— getMinTemp: the minimum temperature (based on 3 hours interval)
— getCurrentHum: current humidity value (number)
— getCurrentWind: currenty wind speed (number)
— getForecast: get weather data for the 5 upcoming days
— getCityWeatherByName: return the entire weather data from the API of city name provided as a string
— getCitiesWeathersByNames: returns the entire weather data from the API of the city names provided as an array
- UI service
this is small service that has functions that we are going to utilize to share the state of the UI like the theme mode selected (dark or light) application wide.
import { Injectable } from '@angular/core';
import { BehaviorSubject } from 'rxjs';

@Injectable()
export class UiService {

  darkModeState: BehaviorSubject<boolean>;

  constructor() {
    // TODO: if the user is signed in get the default value from Firebase
    this.darkModeState = new BehaviorSubject<boolean>(false);
  }
}
Minimus - ui.service.ts
C. Routing
We have already generated the routing module when we created our app with the CLI but we have to make some modifications to the routing.module.ts to tell Angular what are the different routes (URLs) and their associated components (pages).
import {NgModule} from '@angular/core';
import {Routes, RouterModule} from '@angular/router';
import {HomeComponent} from './pages/home/home.component';
import {DetailsComponent} from './pages/details/details.component';
import {AddComponent} from './pages/add/add.component';
import {LoginComponent} from './pages/login/login.component';
import {SignupComponent} from './pages/signup/signup.component';

const routes: Routes = [
    {path: '', component: HomeComponent},
    {path: 'details/:city', component: DetailsComponent},
    {path: 'add', component: AddComponent},
    {path: 'login', component: LoginComponent},
    {path: 'signup', component: SignupComponent},
];

@NgModule({
    imports: [RouterModule.forRoot(routes)],
    exports: [RouterModule]
})
export class AppRoutingModule {
}
Minimus - app-routing.module.ts
Conclusion
We made a good progress in this very first part of building the Minimus Weather App we got most of the design work from branding to UI and UX decisions, We wrote a lot of HTML & CSS and we made it look beautiful.
Live Demo (V2): https://minimus-weather.firebaseapp.com
Github Repo: https://github.com/hamedbaatour/Minimus
✅ 30s ad
☞ Angular 7 with Angular Material and Firebase Cloud Firestore
☞ NgRx In Depth (Angular 7 and NgRx 7, with FREE E-Book)
☞ A Quick Guide to Angular 7 in 4 Hours
☞ Complete Angular 7 - Ultimate Guide - with Real World App
☞ Go Full Stack with Spring Boot and Angular 7
Suggest:
☞ Angular Tutorial - Learn Angular from Scratch
☞ Intro to HTML & CSS - Tutorial
☞ Learn HTML5 and CSS3 From Scratch - Full Course
☞ Angular 5 vs Angular 6 | What's New in Angular 6 | Features & Updates
☞ Learn Angular 8 from Scratch for Beginners - Crash Course
☞ Build a website using HTML CSS and JavaScript | Food to go Website