How to set up a GraphQL Server using Node.js, Express & MongoDB

. I’ll show you how to set up a GraphQL server using MongoDB. I will show you how you can modularize your GraphQL schema and all this using MLab as our database.
All the code from this article is available here.
So now, let’s get started.
Why GraphQL?
GraphQL is a query language for your APIs. It was released by Facebook back in 2015 and has gained a very high adoption. It’s the replacement of REST.
With GraphQL, the client can ask for the exact data that they need and get back exactly what they asked for. GraphQL also uses a JSON-like query syntax to make those requests. All requests go to the same endpoint.
If you’re reading this article, I assume that you know a little bit about GraphQL. If you don’t know, you can learn more about GraphQL here.
Getting started
First, create a folder, then start our project.
npm init -y
Then install some dependencies for our project.
npm install @babel/cli @babel/core @babel/preset-env body-parser concurrently cors express express-graphql graphql graphql-tools merge-graphql-schemas mongoose nodemon
And then @babel/node as a dev dependency:
npm install --save-dev @babel/node
Babel
Now we’re gonna set up Babel for our project. Create a file called .babelrc in your project folder. Then, put the @babel/env there, like this:
{
  "presets": ["@babel/preset-env"]
}
Then go to your package.json and add some scripts:
{
  "scripts": {
    "server": "nodemon --exec babel-node index.js"
  }
}
We’ll have only one script that we’re gonna use in our project.
“server” — It will mainly run our server.
Server
Now, in our root folder create the index.js file. It will be where we’re gonna make our server.
First, we’re gonna import all the modules that we’ll use.
import express from "express";
import expressGraphQL from "express-graphql";
import mongoose from "mongoose";
import bodyParser from "body-parser";
import cors from "cors";
Then, we’re gonna create our connect with MongoDB using Mongoose:
const app = express();
const PORT = process.env.PORT || "4000";
const db = "Put your database URL here.";

// Connect to MongoDB with Mongoose.
mongoose
  .connect(
    db,
    {
      useCreateIndex: true,
      useNewUrlParser: true
    }
  )
  .then(() => console.log("MongoDB connected"))
  .catch(err => console.log(err));
What about that db const? This is where you’re gonna put your database URL to connect MongoDB. Then you’re gonna say to me: “But, I don’t have a database yet”, yes I got you. For that, we’re using MLab.
MLab is a database-as-a-service for MongoDB, all you need to do is go to their website (click here) and register.
After you register, go and create a new database. To use as free, choose this option:
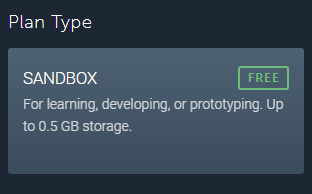

Choose US East (Virginia) as an option, and then give our database a name. After that, our database will show at the home page.

Click on our database, then go to User and create a new user. In this example, I’m gonna create a user called leo and password leoleo1.
After our user is created, on the top of our page, we find two URLs. O_ne to connect using Mongo Shell. The other to connect using a MongoDB URL. We copy the second one._
After that, all you need to do is paste that URL on our db const at the index.js file_._ Our db const would look like this:
const db = "mongodb://leo:[email protected]:21753/graphql-mongodb-server";
Express
Now we’re gonna finally start our server. For that, we’ve put some more lines in our index.js and we’re done.
app.use(
  "/graphql",
  cors(),
  bodyParser.json(),
  expressGraphQL({
    schema,
    graphiql: true
  })
);

app.listen(PORT, () => console.log(`Server running on port ${PORT}`));
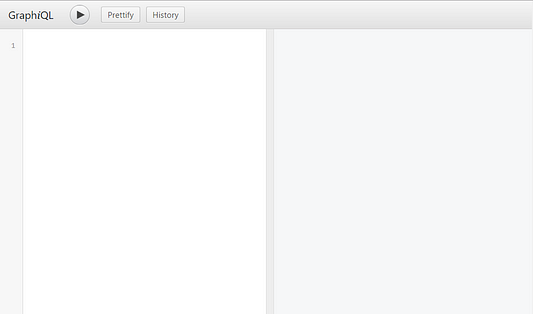
Now, run the command npm run server and go to localhost:4000/graphql and you’ll find a page like this:
MongoDB and Schema
Now, in our root folder, make a folder named models and create a file inside called User.js (yes, with capital U).
Inside of User.js, we’re gonna create our first schema in MongoDB using Mongoose.
import mongoose from "mongoose";

const Schema = mongoose.Schema;

// Create the User Schema.
const UserSchema = new Schema({
  id: {
    type: String,
    required: true,
    unique: true
  },
  name: {
    type: String,
    required: true
  },
  email: {
    type: String,
    required: true
  }
});

const User = mongoose.model("User", UserSchema);

export default User;
Now that we have created our User schema, we’re gonna start with GraphQL.
GraphQL
In our root folder, we’re gonna create a folder called graphql. Inside that folder, we’re gonna create a file called index.js and two more folders: resolvers and types.
Queries
Queries in GraphQL are the way we ask our server for data. We ask for the data that we need, and it returns exactly that data.
All our queries will be inside our types folder. Inside that folder, create an index.js file and a User folder.
Inside the User folder, we’re gonna create an index.js file and write our queries.
export default `
  type User {
    id: String!
    name: String!
    email: String!
  }
  type Query {
    user(id: String!): User
    users: [User]
  }
  type Mutation {
    addUser(id: String!, name: String!, email: String!): User
    editUser(id: String, name: String, email: String): User
    deleteUser(id: String, name: String, email: String): User
  }
`;
In our types folder, in our index.js file, we’re gonna import all the types that we have. For now, we have the User types.
import { mergeTypes } from "merge-graphql-schemas";

import User from "./User/";

const typeDefs = [User];

export default mergeTypes(typeDefs, { all: true });
In case you have more than one type, you import that to your file and include in the typeDefs array.
Mutations
Mutations in GraphQL are the way we modify data in the server.
All our mutations will be inside our resolvers folder. Inside that folder, create an index.js file and a User folder.
Inside the User folder, we’re gonna create an index.js file and write our mutations.
// The User schema.
import User from "../../../models/User";

export default {
  Query: {
    user: (root, args) => {
      return new Promise((resolve, reject) => {
        User.findOne(args).exec((err, res) => {
          err ? reject(err) : resolve(res);
        });
      });
    },
    users: () => {
      return new Promise((resolve, reject) => {
        User.find({})
          .populate()
          .exec((err, res) => {
            err ? reject(err) : resolve(res);
          });
      });
    }
  },
  Mutation: {
    addUser: (root, { id, name, email }) => {
      const newUser = new User({ id, name, email });

      return new Promise((resolve, reject) => {
        newUser.save((err, res) => {
          err ? reject(err) : resolve(res);
        });
      });
    },
    editUser: (root, { id, name, email }) => {
      return new Promise((resolve, reject) => {
        User.findOneAndUpdate({ id }, { $set: { name, email } }).exec(
          (err, res) => {
            err ? reject(err) : resolve(res);
          }
        );
      });
    },
    deleteUser: (root, args) => {
      return new Promise((resolve, reject) => {
        User.findOneAndRemove(args).exec((err, res) => {
          err ? reject(err) : resolve(res);
        });
      });
    }
  }
};
Now that all our resolvers and mutations are ready, we’re gonna modularize our schema.
Modularizing our schema
Inside our folder called graphql, go to our index.js and make our schema, like this:
import { makeExecutableSchema } from "graphql-tools";

import typeDefs from "./types/";
import resolvers from "./resolvers/";

const schema = makeExecutableSchema({
  typeDefs,
  resolvers
});

export default schema;
Now that our schema is done, go to our root folder and inside our index.js import our schema.
After all that, our schema will end up like this:
import express from "express";
import expressGraphQL from "express-graphql";
import mongoose from "mongoose";
import bodyParser from "body-parser";
import cors from "cors";

import schema from "./graphql/";

const app = express();
const PORT = process.env.PORT || "4000";
const db = "mongodb://leo:[email protected]:21753/graphql-server";

// Connect to MongoDB with Mongoose.
mongoose
  .connect(
    db,
    {
      useCreateIndex: true,
      useNewUrlParser: true
    }
  )
  .then(() => console.log("MongoDB connected"))
  .catch(err => console.log(err));

app.use(
  "/graphql",
  cors(),
  bodyParser.json(),
  expressGraphQL({
    schema,
    graphiql: true
  })
);

app.listen(PORT, () => console.log(`Server running on port ${PORT}`));
Playing with our queries and mutations
To test our queries and mutations, we’re gonna start our server with the command npm run server, and go to localhost:4000/graphql.
Create user
First, we’re gonna create our first user with a mutation:
mutation {
  addUser(id: "1", name: "Dan Abramov", email: "[email protected]") {
    id
    name
    email
  }
}
After that, if the GraphiQL playground returns to you the data object that we created, that means that our server is working fine.
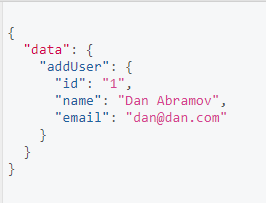
To make sure, go to MLab, and inside of our users collection, check if there is our data that we just created.

After that, create another user called “Max Stoiber”. We add this user to make sure that our mutation is working fine and we have more than one user in the database.
Delete user
To delete a user, our mutation will go like this:
mutation {
  deleteUser(id: "1", name: "Dan Abramov", email: "[email protected]") {
    id
    name
    email
  }
}
Like the other one, if the GraphiQL playground returns to you the data object that we created, that means that our server is working fine.
Get all users
To get all users, we’re gonna run our first query like this:
query {
  users {
    id
    name
    email
  }
}
Since we only have one user, it should return that exact user.
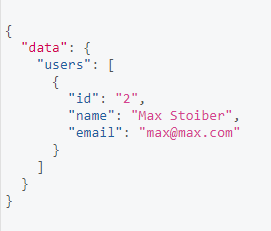
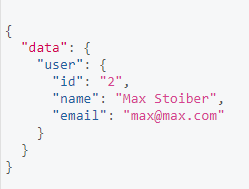
Get a specific user
To get a specific user, this will be the query:
query {
  user(id: "2"){
    id
    name
    email
  }
}
That should return the exact user.
And we’re done!
Our server is running, our queries and mutations are working fine, we’re good to go and start our client. You can start with create-react-app. In your root folder just give the command create-react-app client and then, if you run the command npm run dev, our server and client will run concurrently!
Recommended Courses:
☞ Projects in Node.js - Learn by Example
☞ ChatBots: Messenger ChatBot with API.AI and Node.JS
☞ Master the MEAN Stack - Learn By Example
Suggest:
☞ Learn GraphQL with Laravel and Vue.js - Full Tutorial
☞ Top 4 Programming Languages to Learn in 2019 to Get a Job
☞ Top 4 Programming Languages to Learn In 2019
☞ What To Learn To Become a Python Backend Developer