Vue CLI 3: Everything You Need To Know

Yesterday (at the time of writing), the amazing Vue-core team released version beta-15 of the official Vue command line tools. One feature in particular stands out among the usual bug fixes and performance improvements, the new web based user interface for the Vue command line interface. This awesome tool allows Vue developers to graphically create a new Vue project, live monitor app performance, add plugins to an existing project, and more. This is a pretty big deal, as getting familiar with this tool can make spinning up and maintaining any type of Vue.js application a breeze. Lets dive into some of the features head on. The full change-log for this release can be found on the vue-cli github.
New Project Creation
Lets go through the steps of creating a new vue project from scratch.
- Open a new terminal/command prompt window.
- Install and/or update the vue-cli tools to beta-15 with
npm i -g @vue/cli - Once updated, run
vue ui. You should see a message that the gui is starting with an address likehttp://localhost:8000. If a browser window does not automatically open then you can manually navigate to this address. - A new browser window should open that looks like the following:
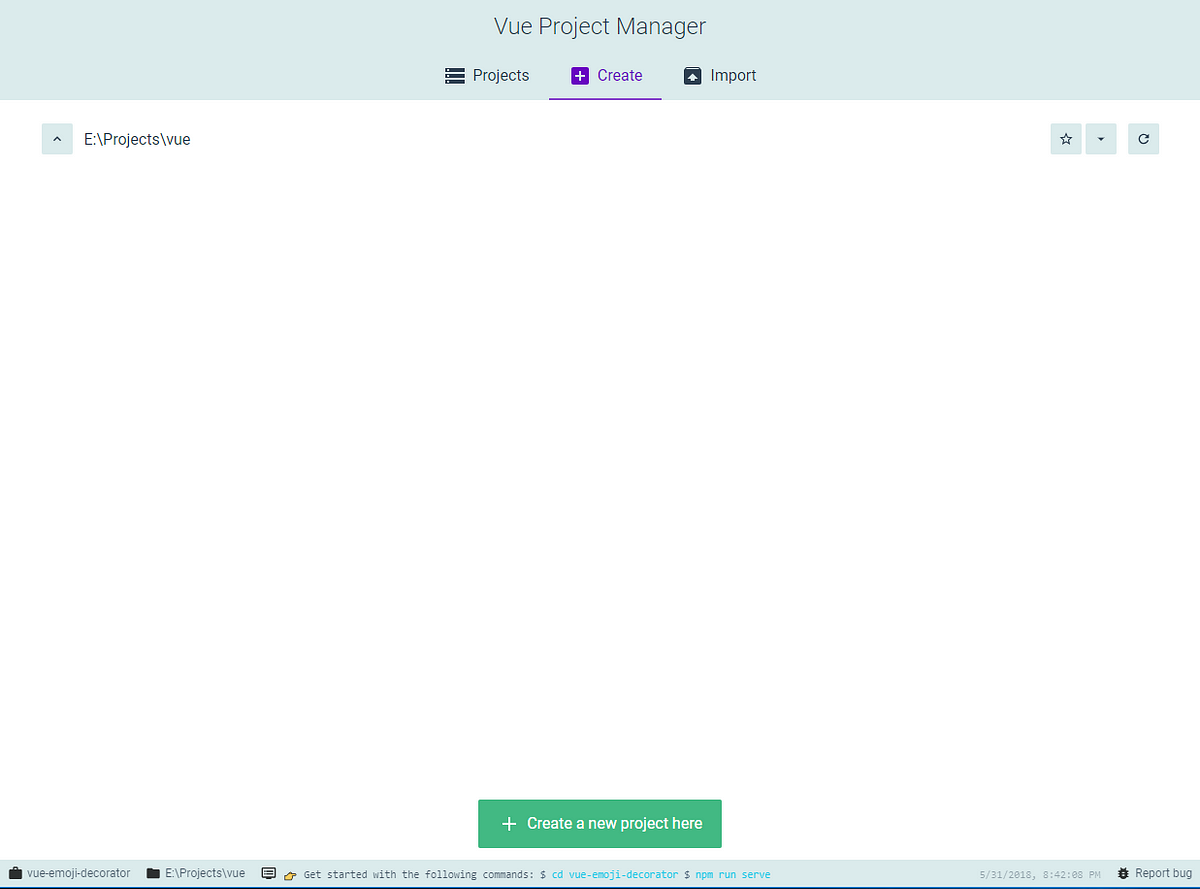
5. Navigate to a folder you want to make the project in and click the green “Create a new project here” button to start the process.
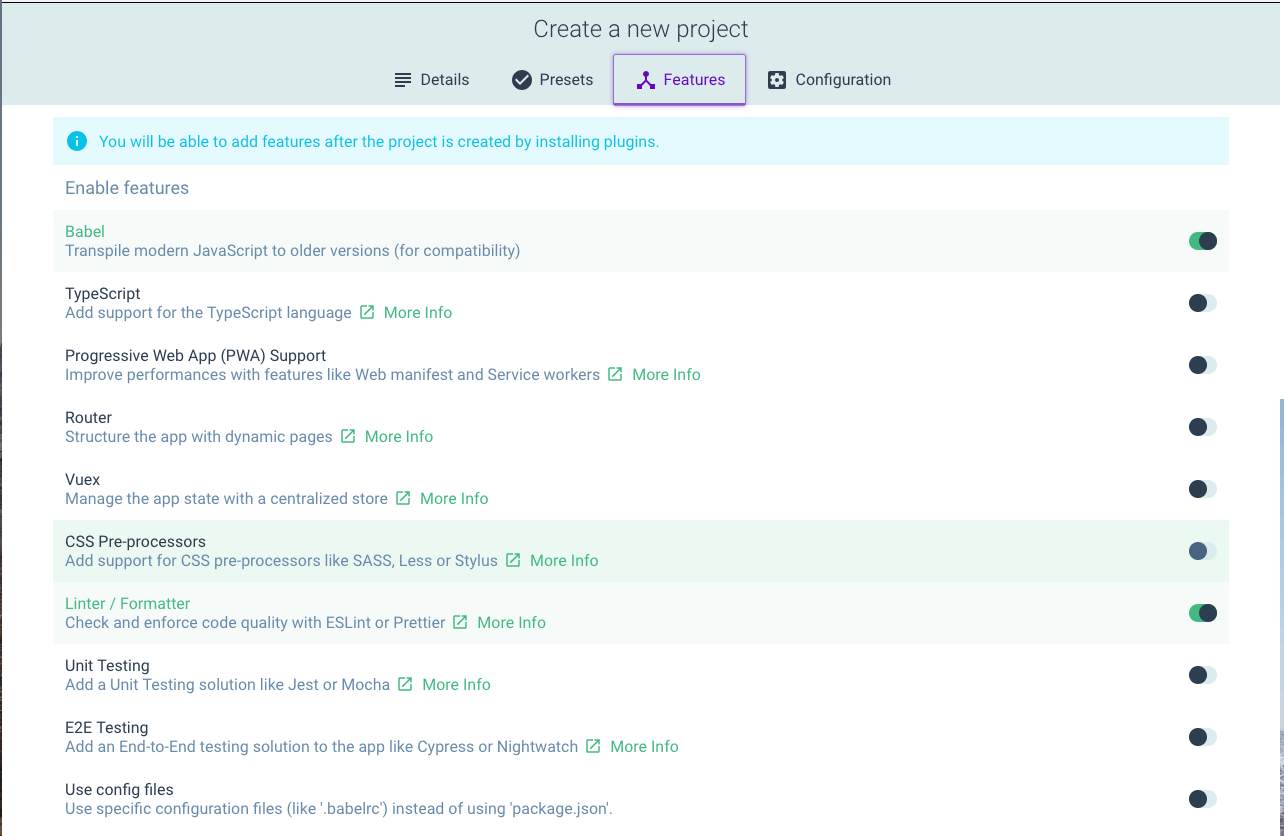
6. Select the manual preset, which will then take you to the features page where you can individually include features such as Typescript support, Routing, Testing support, CSS pre-processors, and Vuex.
7. Finally select any configuration options, then start the install by clicking “create project”. You should start seeing the vue cli commands happening now in the terminal you launched vue ui from.
8. Once complete, you now have a shiny new Vue.js project with just the features you want!
Now lets look into how we can use this new ui to run our build tasks, show application metrics, and add in plugins after project creation.
Project Plugins
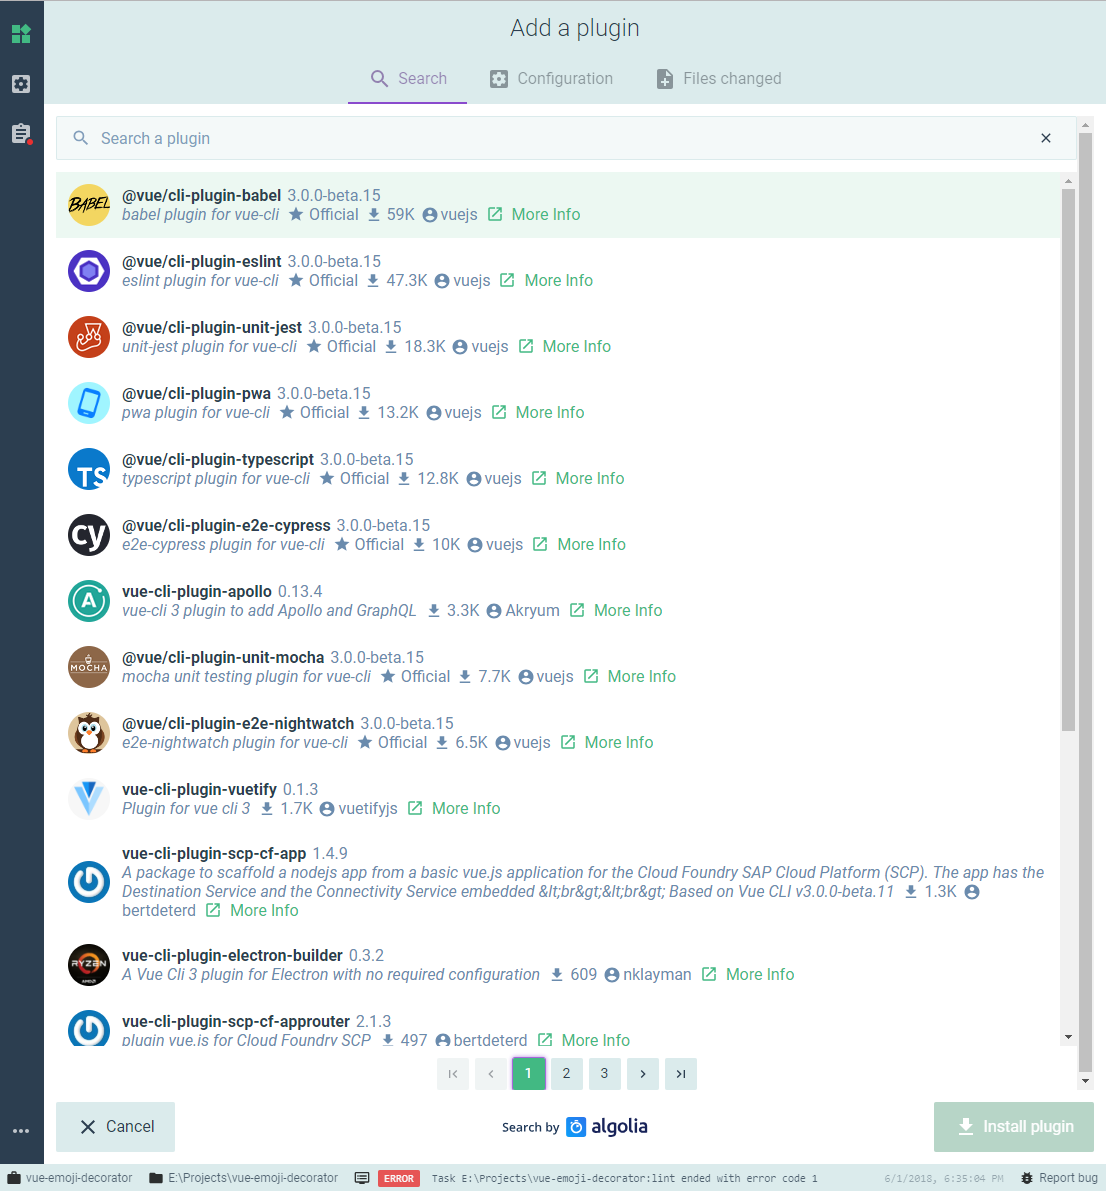
The first section, project plugins, allows you to inject major features into your app after it has already been created. There are hundreds of public plugins available for many popular tools and frameworks. Want to add GraphQL to your app without dealing with excessive configuration? Install the Apollo plugin to get the boilerplate setup for you.
This plugin architecture has been in the cli since the v3 alpha, but the new ui makes finding and installing these plugins so painless. Spinning up a new empty project just to try out some fancy new tools or frameworks would usually take quite a bit of time figuring out how to fit all of the tools together, and this just eliminates a lot of those pain points.
Project Configuration
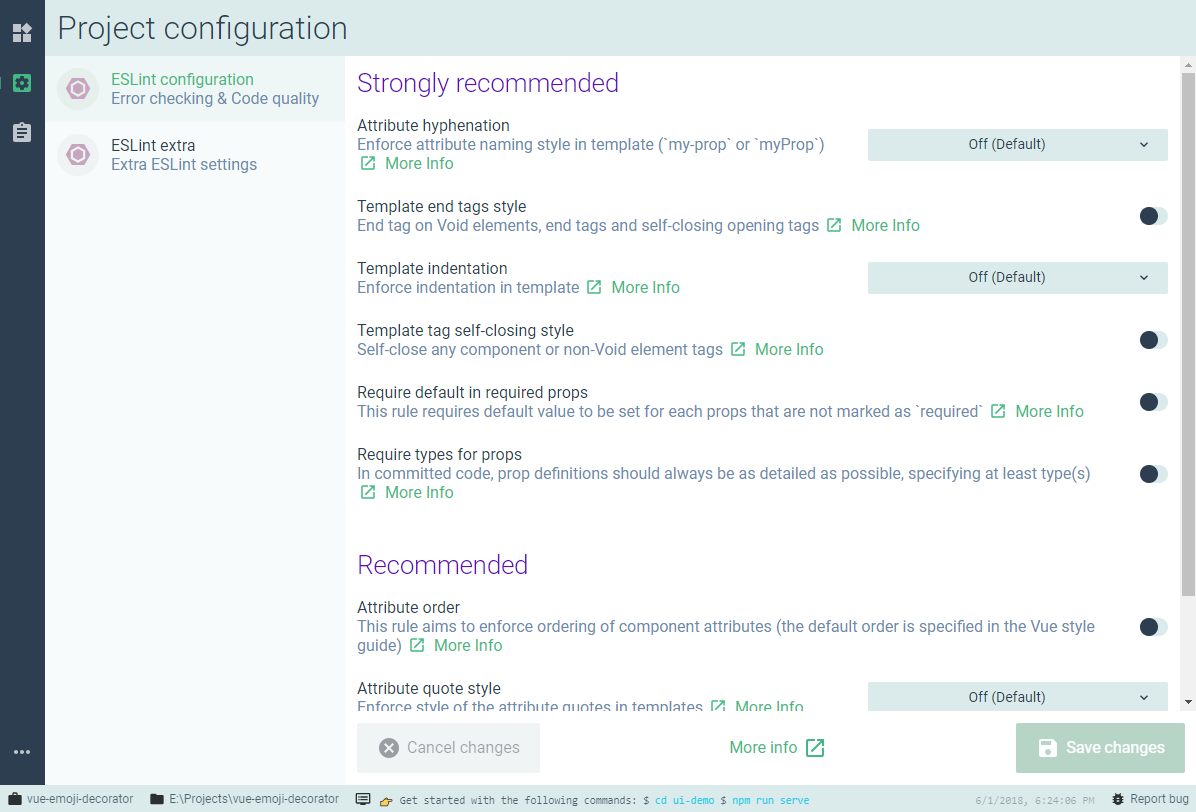
Anyone who has had to manually fiddle with multiple config files for tools like webpack, gulp, eslint, babel, or typescript will love the new project configuration ui. This section provides a clean interface to allow you to tweak linter/transpiler config without deep diving into the nested JSON objects of the configuration files.
Project Tasks
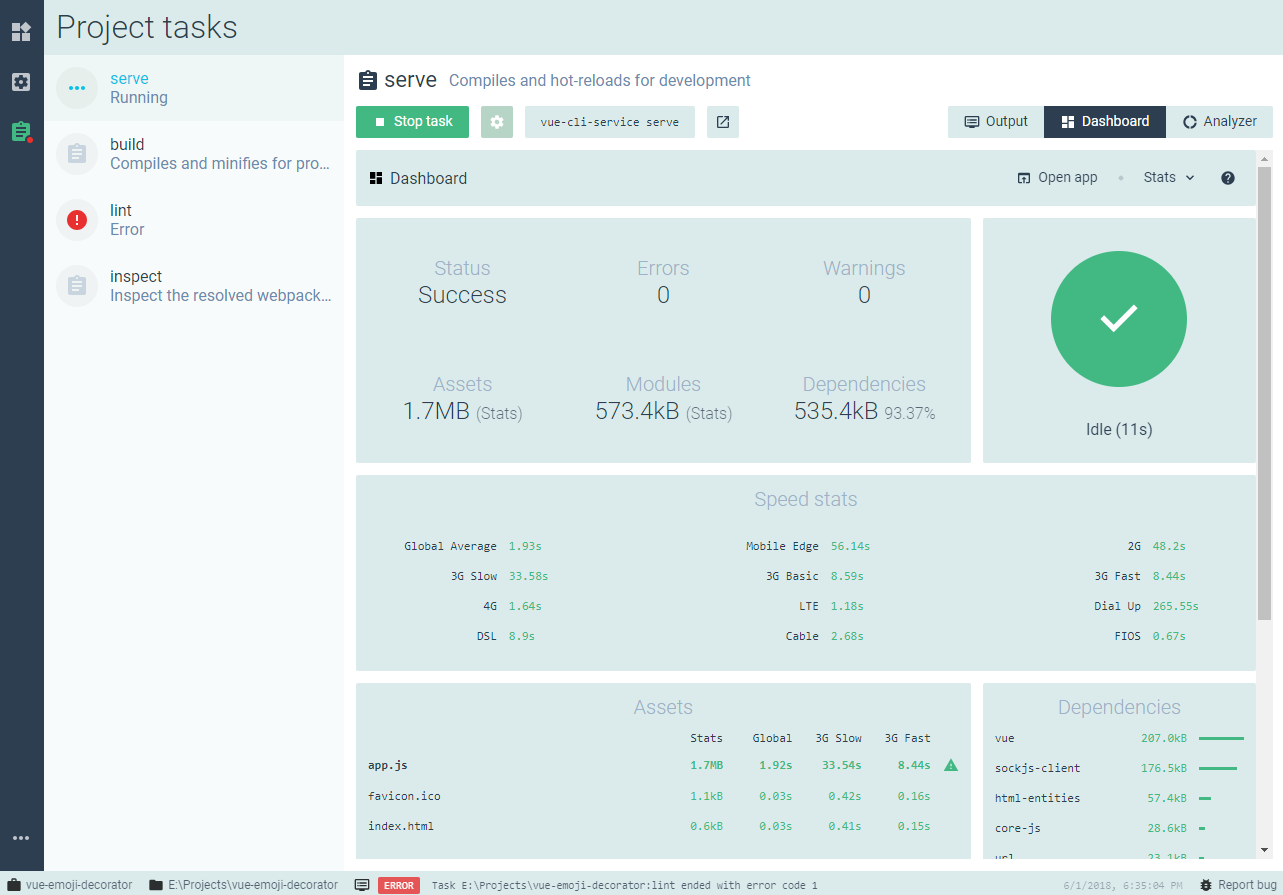
I may have been saving the best for last, as this is my favorite part of the ui. The project tasks section allows you to run your npm scripts from the gui, while providing you with detailed statistics about your application. The data provided makes it easy to see how your application would load on various connection speeds/devices, and allows developers to quickly spot which dependencies may be resource hogs.
Most functions also have options to customize functionality further, for example the gear icon next to “Start/Stop task” for vue-cli-service serve will bring up options allowing you to change NODE_ENV from dev to prod, specify if assets should be served over https, and allow the localhost url/port to be set manually.
Conclusion
The Vue team has provided us with a truly amazing tool and I highly recommend all Vue developers to play around with this on their side projects or personal endeavors. Since the vue-cli v3 is still in beta there may still be some buggy experiences, so it might not be safe to use this in production applications yet. I did run into one issue while exploring this but it was not ui related, it was an npm issue I was able to resolve with a configuration change.
All in all this new vue-cli user interface brings a beautiful, modern interface for some of the more mundane tasks web developers have to handle.
Learn more
☞ Vue JS 2 - The Complete Guide (incl. Vuex)
☞ Vue JS 2 - The Complete Guide (incl. Vue Router & Vuex)
☞ Build A Web App with VueJS, Spring Framework and MongoDB
☞ Vue JS 2.0 - Mastering Web Apps
☞ Vue JS 2: From Beginner to Professional (includes Vuex)
Suggest:
☞ Vue js Tutorial Zero to Hero || Brief Overview about Vue.js || Learn VueJS 2023 || JS Framework
☞ Create Shopping basket page With Vuejs and Nodejs
☞ Vue.js Tutorial: Zero to Sixty