Getting Started with the React Native Navigation Library

If your app has a lot of screens with relatively complex UI, it might be worth exploring React Native Navigation instead of React Navigation. This is because there will always be performance bottlenecks with React Navigation, since it works off the same JavaScript thread as the rest of the app. The more complex your UI, the more data has to be passed to that bridge, which can potentially slow it down.
In this tutorial, we’ll be looking at the React Native Navigation library by Wix, an alternative navigation library for those who are looking for a smoother navigation performance for their React Native apps.
Want to learn React Native from the ground up? This article is an extract from our Premium library. Get an entire collection of React Native books covering fundamentals, projects, tips and tools & more with SitePoint Premium. Join now for just $9/month.
Prerequisites
Knowledge of React and React Native is required to follow this tutorial. Prior experience with a navigation library such as React Navigation is optional.
App Overview
In order to demonstrate how to use the library, we’ll be creating a simple app that uses it. The app will have five screens in total:
- Initialization: this serves as the initial screen for the app. If the user is logged in, it will automatically navigate to the home screen. If not, the user is navigated to the login screen.
- Login: this allows the user to log in so they can view the home, gallery, and feed. To simplify things, the login will just be mocked; no actual authentication code will be involved. From this screen, the user can also go to the forgot-password screen.
- ForgotPassword: a filler screen, which asks for the user’s email address. This will simply be used to demonstrate stack navigation.
- Home: the initial screen that the user will see when they log in. From here, they can also navigate to either the gallery or feed screens via a bottom tab navigation.
- Gallery: a filler screen which shows a photo gallery UI.
- Feed: a filler screen which shows a news feed UI.
Here’s what the app will look like:
You can find the source code of the sample app on this GitHub repo.
Bootstrapping the App
Let’s start by generating a new React Native project:
react-native init RNNavigation --version [email protected]
Note: we’re using a slightly older version of React Native, because React Native Navigation doesn’t work well with later versions of React Native. React Native Navigation hasn’t really kept up with the changes in the core of React Native since version 0.58. The only version known to work flawlessly with React Native is the version we’re going to use. If you check the issues on their repo, you’ll see various issues on version 0.58 and 0.59. There might be workarounds on those two versions, but the safest bet is still version 0.57.
As for React Native version 0.60, the core team has made a lot of changes. One of them is the migration to AndroidX, which aims to make it clearer which packages are bundled with the Android operating system. This essentially means that if a native module uses any of the old packages that got migrated to the new androidx.* package hierarchy, it will break. There are tools such as jetifier, which allows for migration to AndroidX. But this doesn’t ensure React Native Navigation will work.
Next, install the dependencies of the app:
react-native-navigation— the navigation library that we’re going to use.@react-native-community/async-storage— for saving data to the app’s local storage.react-native-vector-icons— for showing icons for the bottom tab navigation.
yarn add react-native-navigation @react-native-community/async-storage react-native-vector-icons
In the next few sections, we’ll be setting up the packages we just installed.
Setting up React Native Navigation
First, we’ll set up the React Native Navigation library. The instructions that we’ll be covering here are also in the official documentation. Unfortunately, it’s not written in a very friendly way for beginners, so we’ll be covering it in more detail.
Note: the demo project includes an Android and iOS folders as well. You can use those as a reference if you encounter any issues with setting things up.
Since the name of the library is very long, I’ll simply refer to it as RNN from now on.
Android Setup
In this section, we’ll take a look at how you can set up RNN for Android. Before you proceed, it’s important to update all the SDK packages to the latest versions. You can do that via the Android SDK Manager.
settings.gradle
Add the following to your android/settings.gradle file:
include ':react-native-navigation'
project(':react-native-navigation').projectDir = new File(rootProject.projectDir, '../node_modules/react-native-navigation/lib/android/app/')
Gradle Wrapper Properties
In your android/gradle/wrapper/gradle-wrapper.properties, update Gradle’s distributionUrl to use version 4.4 if it’s not already using it:
distributionUrl=https\://services.gradle.org/distributions/gradle-4.4-all.zip
build.gradle
Next, in your android/build.gradle file, add mavenLocal() and mavenCentral() under buildscript -> repositories:
buildscript {
    repositories {
      google()
      jcenter()

      // add these:
      mavenLocal()
      mavenCentral()
    }
}
Next, update the classpath under the buildscript -> dependencies to point out to the Gradle version that we need:
buildscript {
  repositories {
    ...
  }

  dependencies {
    classpath 'com.android.tools.build:gradle:3.0.1'
  }

}
Under allprojects -> repositories, add mavenCentral() and JitPack. This allows us to pull the data from React Native Navigation’s JitPack repository:
allprojects {
allprojects {

  repositories {
    mavenLocal()
    google()
    jcenter()
    mavenCentral() // add this
    maven { url 'https://jitpack.io' } // add this
  }

}
Next, add the global config for setting the build tools and SDK versions for Android:
allprojects {
  ...
}

ext {
    buildToolsVersion = "27.0.3"
    minSdkVersion = 19
    compileSdkVersion = 26
    targetSdkVersion = 26
    supportLibVersion = "26.1.0"
}
Lastly, we’d still want to keep the default react-native run-android command when compiling the app, so we have to set Gradle to ignore other flavors of React Native Navigation except the one we’re currently using (reactNative57_5). Ignoring them ensures that we only compile the specific version we’re depending on:
ext {
 ...
}

subprojects { subproject ->
    afterEvaluate {
        if ((subproject.plugins.hasPlugin('android') || subproject.plugins.hasPlugin('android-library'))) {
            android {
                variantFilter { variant ->
                    def names = variant.flavors*.name
                    if (names.contains("reactNative51") || names.contains("reactNative55") || names.contains("reactNative56") || names.contains("reactNative57")) {
                        setIgnore(true)
                    }
                }
            }
        }
    }
}
Note: there are four other flavors of RNN that currently exist. These are the ones we’re ignoring above:
- reactNative51
- reactNative55
- reactNative56
- reactNative57
android/app/build.gradle
On your android/app/build.gradle file, under android -> compileOptions, make sure that the source and target compatibility version is 1.8:
android {
  defaultConfig {
    ...
  }

  compileOptions {
    sourceCompatibility JavaVersion.VERSION_1_8
    targetCompatibility JavaVersion.VERSION_1_8
  }
}
Then, in your dependencies, include react-native-navigation as a dependency:
dependencies {
    implementation fileTree(dir: "libs", include: ["*.jar"])
    implementation "com.android.support:appcompat-v7:${rootProject.ext.supportLibVersion}"
    implementation "com.facebook.react:react-native:+"
    implementation project(':react-native-navigation') // add this
}
Lastly, under android -> defaultConfig, set the missingDimensionStrategy to reactNative57_5. This is the version of RNN that’s compatible with React Native 0.57.8:
defaultConfig {
  applicationId "com.rnnavigation"
  minSdkVersion rootProject.ext.minSdkVersion
  targetSdkVersion rootProject.ext.targetSdkVersion
  missingDimensionStrategy "RNN.reactNativeVersion", "reactNative57_5" // add this
  versionCode 1
  versionName "1.0"
  ndk {
    abiFilters "armeabi-v7a", "x86"
  }
}
MainActivity.java
On your app/src/main/java/com/rnnavigation/MainActivity.java file, extend from RNN’s NavigationActivity instead:
package com.rnnavigation;

// import com.facebook.react.ReactActivity;
import com.reactnativenavigation.NavigationActivity;

// public class MainActivity extends ReactActivity {
public class MainActivity extends NavigationActivity {
  // remove all code inside
}
Since we’ve removed the default code that React Native uses, we’ll no longer need to register the main component as you’ll see later in the Building the App section:
// index.js
import { AppRegistry } from "react-native";
import App from "./App";
import { name as appName } from "./app.json";

AppRegistry.registerComponent(appName, () => App);
MainApplication.java
Next, you also need to update the app/src/main/java/com/rnnavigation/MainApplication.java file to inherit from RNN’s class instead. Start by importing RNN’s classes:
import com.facebook.react.shell.MainReactPackage;
import com.facebook.soloader.SoLoader;

// add these
import com.reactnativenavigation.NavigationApplication;
import com.reactnativenavigation.react.NavigationReactNativeHost;
import com.reactnativenavigation.react.ReactGateway;
Next, inherit from RNN’s NavigationApplication class instead:
// public class MainApplication extends Application implements ReactApplication {
public class MainApplication extends NavigationApplication {

}
Lastly, completely replace the contents of the class with the following:
@Override
protected ReactGateway createReactGateway() {
  ReactNativeHost host = new NavigationReactNativeHost(this, isDebug(), createAdditionalReactPackages()) {
    @Override
    protected String getJSMainModuleName() {
      return "index";
    }
  };
  return new ReactGateway(this, isDebug(), host);
}

@Override
public boolean isDebug() {
  return BuildConfig.DEBUG;
}

protected List<ReactPackage> getPackages() {
  return Arrays.<ReactPackage>asList(

  );
}

@Override
public List<ReactPackage> createAdditionalReactPackages() {
  return getPackages();
}
The only thing that might look familiar to you in the above code is the getPackages() method. Just like in the standard React Native project, this is where you can initialize the classes of your native dependencies.
iOS Setup
In this section, we’ll set up RNN for iOS. Before you proceed, it’s important that you have updated Xcode to the latest available version. This helps to avoid potential errors that comes with outdated Xcode modules.
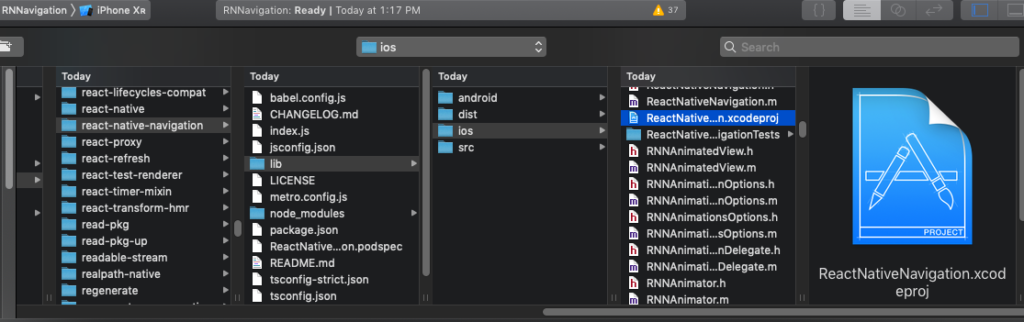
First, open the ios/RNNavigation.xcodeproj file with Xcode. This is the corresponding Xcode project for the app.
Once opened, in your project navigator (left pane where the project files are listed), right-click on Libraries -> Add files to RNNavigation. On the file picker that shows up, go to the node_modules/react-native-navigation/lib/ios directory and select the ReactNativeNavigation.xcodeproj file:
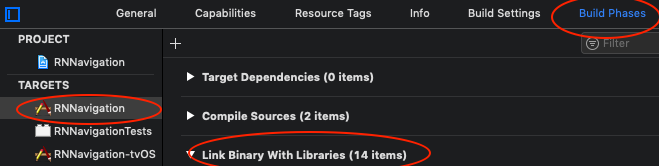
Next, click on RNNavigation in the TARGETS row and click on the Build Phases tab. From there, look for Link Binary With Libraries, expand it, then click on the button for adding a new item:
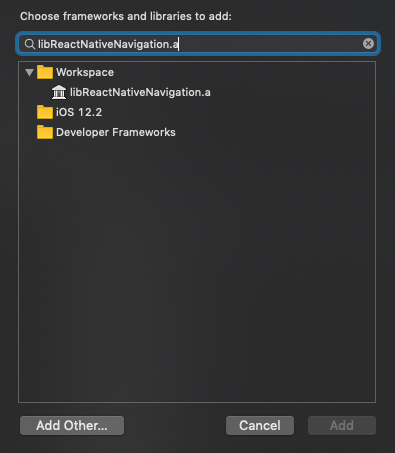
On the modal window that pops up, search for the libReactNativeNavigation.a file, select it, and then click on the Add button:
Next, open the AppDelegate.m file and replace its contents with the following. This is basically the entry point of the React Native app (similar to the MainApplication.java in Android). We’re updating it so that it uses RNN instead:
#import "AppDelegate.h"

 #import <React/RCTBundleURLProvider.h>
 #import <React/RCTRootView.h>
 #import <ReactNativeNavigation/ReactNativeNavigation.h>

 @implementation AppDelegate

 - (BOOL)application:(UIApplication *)application didFinishLaunchingWithOptions:(NSDictionary *)launchOptions
 {
     NSURL *jsCodeLocation = [[RCTBundleURLProvider sharedSettings] jsBundleURLForBundleRoot:@"index" fallbackResource:nil];
     [ReactNativeNavigation bootstrap:jsCodeLocation launchOptions:launchOptions];

     return YES;
 }

 @end
That’s pretty much it for the linking of RNN to iOS. But if you encounter any issues, you’ll probably have to follow the next section as well.
Common Issues
In this section, we’ll go through some of the most common issues that you may encounter when linking RNN to iOS.
When you’ve edited and saved the AppDelegate.m file, you’ll probably encounter this issue. This will appear in red squiggly lines in the file itself:
! 'RCTBundleURLProvider.h' file not found
This happens because the React scheme is missing from your project.
To make it available, execute the following commands inside your project’s root directory (RNNavigation):
npm install -g react-native-git-upgrade
react-native-git-upgrade
This will add the missing files to your project.
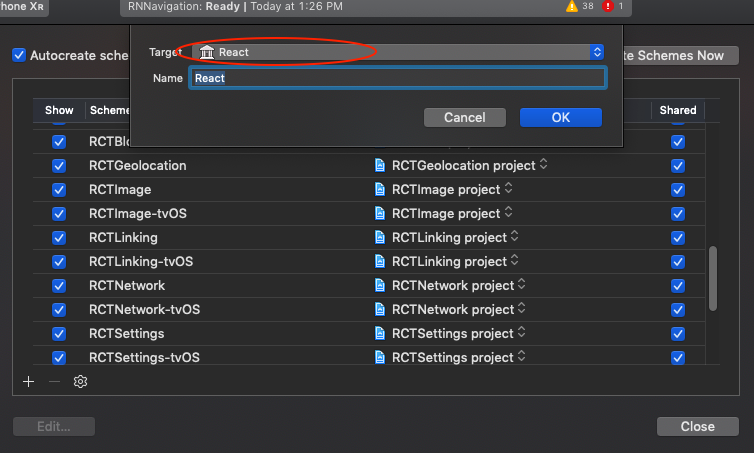
Once that’s done, go to Product -> Scheme -> Manage Schemes, then click on the + button to add a new scheme. From the Target dropdown, select React, then click OK to add it:
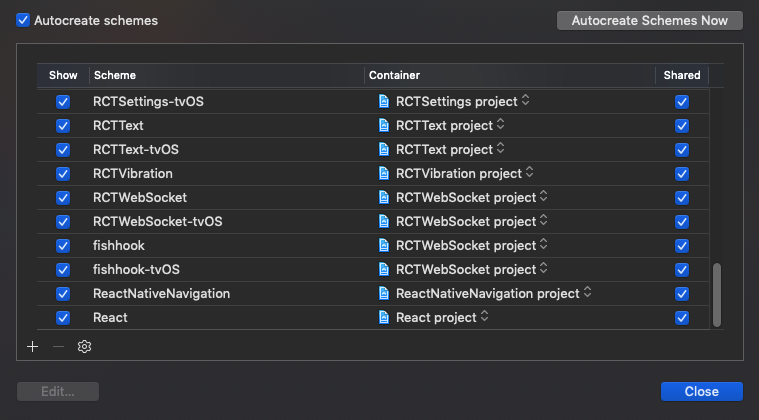
Once added, make sure both the Show and Shared checkboxes are checked:
The next issue that you might encounter is this:
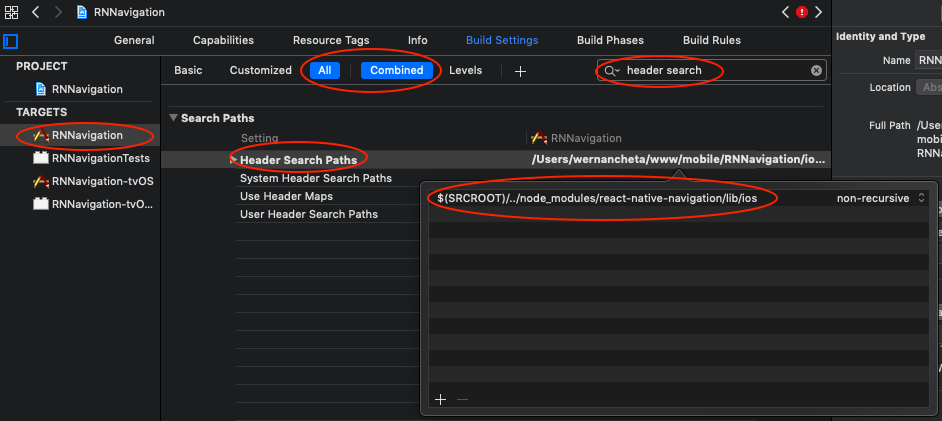
'ReactNativeNavigation/ReactNativeNavigation.h' file not found.
This means it couldn’t find the said file in your project’s path. To solve it, click on RNNavigation in the TARGETS. Then click on Build Settings and below it, make sure the All and Combined is used as a filter, then look for header search in the search bar. Double-click on Header Search Paths, click on the + button, and add $(SRCROOT)/../node_modules/react-native-navigation/lib/ios as a path:
Setting up AsyncStorage and Vector Icons
The process of setting up AsyncStorage and Vector Icons is very similar to the install processes outlined above, so I’ll just link to the official documentation.
Here are the instructions for AsyncStorage:
- Android Setup.
- iOS Setup. Be sure to follow the non-pods version, as that’s easier to get set up with. The non-pods (short for non CocoaPods) is one that doesn’t use CocoaPods as a dependency manager. The main file of the native module will simply be linked as a library. That’s basically the same thing we did with the
libReactNativeNavigation.afile earlier.
And here are the instructions for Vector Icons. To simplify things, just follow the instructions for adding the whole Fonts folder to the Xcode project:
- Android Setup. Be sure to follow the instructions for getImageSource as well, because we’ll be using that later to load the icons.
- iOS Setup.
Note: you can always check the GitHub repo if you get lost.
Okay, so that was a lot of manual setup. If you really need RNN in your project, then it’s a necessity. Every time you introduce a new dependency that has a native link, you have to follow the instructions for manually linking it. react-native link won’t work, because we’ve replaced ReactApplication with NavigationApplication in MainApplication.java, so the linking is now done a little bit differently. You can probably get away with still running react-native link if you know exactly what it’s doing and you can completely undo what it’s done. But it’s safer to just follow the manual linking instructions.
Building the App
Now we’re ready to finally start building the app.
index.js
First, open the existing index.js on the root of the project directory and replace its contents with the following. This serves as the entry point of the app. If you noticed, we no longer have to register the main app component using React Native’s AppRegistry. Instead, we’re now using RNN’s registerComponent() method. This has to do with the updates we did earlier to the MainActivity.java and AppDelegate.m file.
The registerComponent() method accepts the screen’s unique name and the component to use to render the screen. Once it’s registered, we call the registerAppLaunchedListener() method to set the root screen for the app to LoadingScreen. This is similar to what the AppRegistry.registerComponent() does:
// index.js
import { Navigation } from "react-native-navigation";
import Icon from "react-native-vector-icons/FontAwesome";

import Loading from "./src/screens/Loading"; // the loading screen

import "./loadIcons"; // file for loading the icons to be used in the bottom tab navigation

Navigation.registerComponent(`LoadingScreen`, () => Loading);

Navigation.events().registerAppLaunchedListener(() => {
  // set the root component
  Navigation.setRoot({
    root: {
      component: {
        name: "LoadingScreen"
      }
    }
  });
});
Loading Screen
The loading screen serves as the entry point of the app. But you may be asking why a loading screen? Why not a login screen instead? This is because our sample app has a mock login system, meaning that we first have to determine if a user is already logged in or not. Using a loading screen works better than having to initially load a login screen only to find out that a user is already logged in, so we then have to navigate them to the home screen.
Start by creating a src/screens/Loading.js file and add the following:
// src/screens/Loading.js
import React, { Component } from "react";
import { View, Text, ActivityIndicator, StyleSheet } from "react-native";

import { goToLogin, goToTabs } from "../../navigation"; // import the functions for loading either the login screen or the tabs screen (shows home screen by default)

import AsyncStorage from "@react-native-community/async-storage";
Next, create the component itself. When the component is mounted, we try to get the username of the logged-in user from local storage. If it exists, then we navigate the user to the tabs, otherwise to the login screen:
export default class Loading extends Component {
  async componentDidMount() {
    const username = await AsyncStorage.getItem("username");
    if (username) {
      goToTabs(global.icons, username);
    } else {
      goToLogin();
    }
  }

  render() {
    // show loading indicator
    return (
      <View style={styles.container}>
        <ActivityIndicator size="large" color="#0000ff" />
      </View>
    );
  }
}
//

const styles = StyleSheet.create({
  container: {
    flex: 1,
    justifyContent: "center",
    alignItems: "center"
  }
});
In the above code, notice we’re passing global.icons as an argument to the goToTabs() function. That value is being set in the loadIcons.js that we imported from the index.js file earlier. Its job is to load the icons to be used for the bottom tabs, as you’ll see later.
navigation.js
This is where we register all the screens of the app and declare our navigation functions for navigating between the login screen and the tabbed screens:
// navigation.js
import { Navigation } from "react-native-navigation";

import Login from "./src/screens/Login";
import ForgotPassword from "./src/screens/ForgotPassword";
import Home from "./src/screens/Home";
import Feed from "./src/screens/Feed";
import Gallery from "./src/screens/Gallery";

Navigation.registerComponent(`LoginScreen`, () => Login);
Navigation.registerComponent(`ForgotPasswordScreen`, () => ForgotPassword);
Navigation.registerComponent(`HomeScreen`, () => Home);
Navigation.registerComponent(`FeedScreen`, () => Feed);
Navigation.registerComponent(`GalleryScreen`, () => Gallery);
The goToLogin() function creates a stack navigation. In RNN, these navigation types are called “Layouts”. Currently, there are only three: stacks, tabs, and drawers. We’ll only use stack and tabs in this tutorial, but here’s a brief overview of each one:
- Stack: each new screen you navigate to is laid out on top of the current one. So when you go back to the previous screen, the idea is to simply “pop” the current screen out of the stack. We’ll be using the stack navigation to navigate between the Login screen and ForgotPassword screen.
- Tab: each screen can be accessed via a bottom tab navigation. Each tab has both icon and text on it to describe the screen it navigates the user to. This type of navigation is commonly used if there are two or more main screens within the app. Having a bottom tab navigation allows for easy access between those screens. We’ll be using the tab navigation to navigate between the Home, Gallery, and Feed screens.
- Drawer: also called the side menu. This is called drawer because it’s commonly hidden within a hamburger icon and it only shows the menu under it when clicked on.
Going back to the code, we’ve only added the Login screen as a child of stack navigation, even though the ForgotPassword screen is part of it as well. As mentioned earlier, we’ll be using stack navigation to navigate between the Login screen and the ForgotPassword screen. Yet we’ve only added the Login screen here as a child. Adding it will simply make it as the default screen for the stack. In a stack navigation, you should only add the initial screen for that specific stack as the child, as you’ll see later.
The minimum requirement for a child is to add the name property for each screen. This is the name of the screen to be used for rendering. This should be the same name you used when you registered the component:
export const goToLogin = () =>
  Navigation.setRoot({
    root: {
      stack: {
        // create a stack navigation
        id: "stackMain",
        children: [
          {
            component: {
              name: "LoginScreen"
            }
          }
        ]
      }
    }
  });
Note: supplying an ID for the navigation isn’t required, but it’s good practice—especially if you know that you’ll start using the same layout type multiple times in your app.
Next, add the goToTabs() function. Unlike the previous function, this accepts two arguments: icons and username. icons is the array of icons to be used for the individual tabs, while username is the username of the user who logged in. This time, we’re using the bottomTabs navigation. As the name suggests, this allows the user to navigate between screens using bottom tabs. You can create bottom tabs using the following format:
const iconColor = "#444";
const selectedIconColor = "#0089da";

export const goToTabs = (icons, username) => {
  Navigation.setRoot({
    root: {
      bottomTabs: {
        // create a bottom tabs navigation

        id: "bottomTabsMain",
        children: [
          {
            component: {
              name: "HomeScreen",
              options: {
                bottomTab: {
                  fontSize: 11,
                  text: "Home",
                  icon: icons[0],
                  iconColor,
                  selectedIconColor
                }
              },

              // pass the username as a navigation prop to the Home screen
              passProps: {
                username
              }
            }
          },

          {
            component: {
              name: "GalleryScreen",
              options: {
                bottomTab: {
                  fontSize: 11,
                  text: "Gallery",
                  icon: icons[1],
                  iconColor,
                  selectedIconColor
                }
              }
            }
          },

          {
            component: {
              name: "FeedScreen",
              options: {
                bottomTab: {
                  fontSize: 11,
                  text: "Feed",
                  icon: icons[2],
                  iconColor,
                  selectedIconColor
                }
              }
            }
          }
        ]
      }
    }
  });
};
As you’ve seen from the code above, this pretty much uses the same format as the stack navigation. The only difference is that, this time, we’re also specifying an options property for the individual bottomTab. These options are mostly used for configuring the styles of the individual tab. They’re self-explanatory, so I won’t go into detail, but I just want to explain the icon property. By default, this accepts a local image that’s required by a require('./path/to/image.png') call. But since we’ve already installed Vector Icons, we might as well use it as the icon source instead. The only problem is that we can’t really supply a React component as the value for the icon because it expects a resource. The icons parameter accepts an array of icon resource and that’s what we’re using instead. You’ll learn how we’re loading those in the next section.
Note: you can find more styling options for bottom tabs in the official documentation for Styling. Just look for bottomTabs or bottomTab.
loadIcons.js
Here’s the code for the loadIcons file that we imported in the index.js file earlier. This uses icons from FontAwesome. Here, we’re using the getImageSource() method from Vector Icons to get the actual image resource. This allows us to use it as an icon for the bottom tabs:
// loadIcons.js
import Icon from "react-native-vector-icons/FontAwesome";

(function() {
  Promise.all([
    Icon.getImageSource("home", 11), // name of icon, size
    Icon.getImageSource("image", 11),
    Icon.getImageSource("rss-square", 11)
  ]).then(async values => {
    global.icons = values; // make it available globally so we don't need to load it again
  });
})();
Login Screen
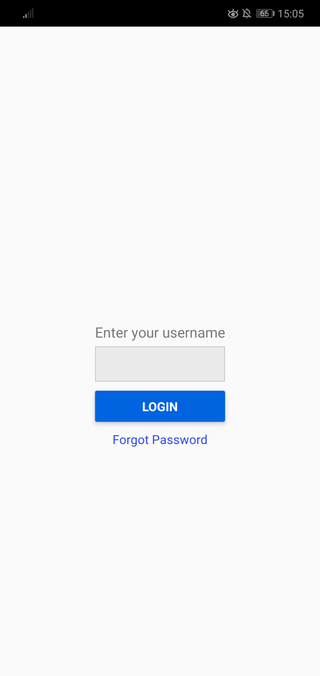
The Login screen is the default screen that the user will see if they aren’t logged in. From here, they can log in by entering their username or they can click on forgot password to view the screen for resetting their password. As mentioned earlier, all of this is just mocked and no actual authentication code is used:
// src/screens/Login.js
import React, { Component } from "react";
import { Navigation } from "react-native-navigation";
import {
  View,
  Text,
  TextInput,
  Button,
  TouchableOpacity,
  StyleSheet
} from "react-native";
import AsyncStorage from "@react-native-community/async-storage";

import { goToTabs } from "../../navigation";

export default class Login extends Component {
  static get options() {
    return {
      topBar: {
        visible: false // need to set this because screens in a stack navigation have a header by default
      }
    };
  }

  state = {
    username: ""
  };

  render() {
    return (
      <View style={styles.wrapper}>
        <View style={styles.container}>
          <View style={styles.main}>
            <View style={styles.fieldContainer}>
              <Text style={styles.label}>Enter your username</Text>
              <TextInput
                onChangeText={username => this.setState({ username })}
                style={styles.textInput}
              />
            </View>

            <Button title="Login" color="#0064e1" onPress={this.login} />

            <TouchableOpacity onPress={this.goToForgotPassword}>
              <View style={styles.center}>
                <Text style={styles.link_text}>Forgot Password</Text>
              </View>
            </TouchableOpacity>
          </View>
        </View>
      </View>
    );
  }

  // next: add login code
}
//

const styles = StyleSheet.create({
  wrapper: {
    flex: 1
  },
  container: {
    flex: 1,
    alignItems: "center",
    justifyContent: "center",
    padding: 20
  },
  fieldContainer: {
    marginTop: 20
  },
  label: {
    fontSize: 16
  },
  textInput: {
    height: 40,
    marginTop: 5,
    marginBottom: 10,
    borderColor: "#ccc",
    borderWidth: 1,
    backgroundColor: "#eaeaea",
    padding: 5
  }
});
Here’s the login code. This simply stores the username to local storage and navigates the user to the tabbed screens:
login = async () => {
  const { username } = this.state;
  if (username) {
    await AsyncStorage.setItem("username", username);
    goToTabs(global.icons, username);
  }
};
Lastly, here’s the code for navigating to another screen via stack navigation. Simply call the Navigation.push() method and pass in the ID of the current screen as the first argument, and the screen you want to navigate to as the second. The name should be the same one you used when you called Navigation.registerComponent() in the navigation.js file earlier:
goToForgotPassword = () => {
  Navigation.push(this.props.componentId, {
    component: {
      name: "ForgotPasswordScreen"
    }
  });
};
ForgotPassword Screen
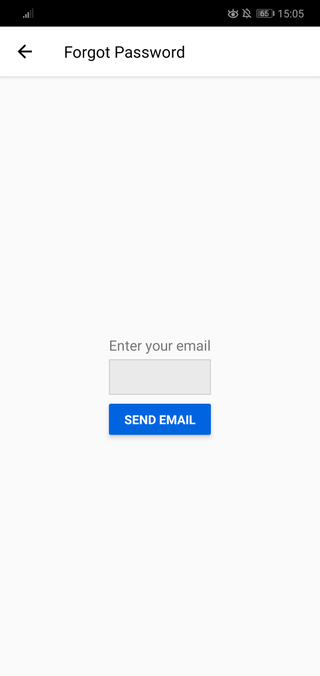
As mentioned earlier, this screen is simply used as a filler to demonstrate stack navigation. Make sure that the topBar is set to visible, because it’s where the back button for going back to the Login screen is located:
// src/screens/ForgotPassword.js
import React, { Component } from "react";
import { View, Text, TextInput, Button, StyleSheet } from "react-native";

export default class ForgotPassword extends Component {
  static get options() {
    return {
      topBar: {
        visible: true, // visible
        title: {
          text: "Forgot Password"
        }
      }
    };
  }

  state = {
    email: ""
  };

  render() {
    return (
      <View style={styles.wrapper}>
        <View style={styles.container}>
          <View style={styles.main}>
            <View style={styles.fieldContainer}>
              <Text style={styles.label}>Enter your email</Text>
              <TextInput
                onChangeText={email => this.setState({ email })}
                style={styles.textInput}
              />
            </View>

            <Button
              title="Send Email"
              color="#0064e1"
              onPress={this.sendEmail}
            />
          </View>
        </View>
      </View>
    );
  }

  //
  sendEmail = async () => {};
}
//

const styles = StyleSheet.create({
  wrapper: {
    flex: 1
  },
  container: {
    flex: 1,
    alignItems: "center",
    justifyContent: "center",
    padding: 20
  },
  fieldContainer: {
    marginTop: 20
  },
  label: {
    fontSize: 16
  },
  textInput: {
    height: 40,
    marginTop: 5,
    marginBottom: 10,
    borderColor: "#ccc",
    borderWidth: 1,
    backgroundColor: "#eaeaea",
    padding: 5
  }
});
You can also have a separate button for going back to the previous screen. All you have to do is call the Navigation.pop() method:
Navigation.pop(this.props.componentId);
Home Screen
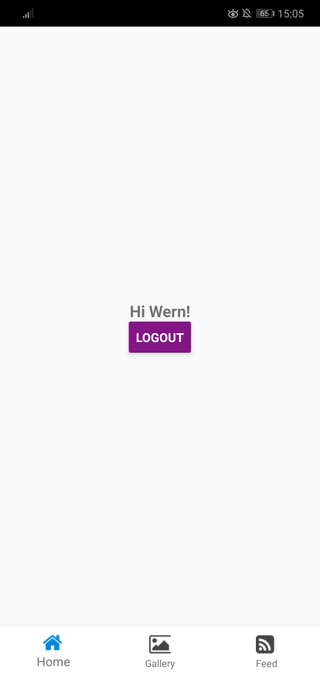
The Home screen is the default screen for the tabbed navigation, so it’s what the user will see by default when they log in. This screen shows the user’s name that was passed as a navigation prop as well as a button for logging out. Clicking the logout button will simply delete the username from local storage and navigate the user back to the login screen:
// src/screens/Home.js
import React, { Component } from "react";
import { View, Text, Button, StyleSheet } from "react-native";
import Icon from "react-native-vector-icons/FontAwesome";
import AsyncStorage from "@react-native-community/async-storage";

import { goToLogin } from "../../navigation";

export default class Home extends Component {
  render() {
    const { username } = this.props;
    return (
      <View style={styles.container}>
        <Text style={styles.text}>Hi {username}!</Text>
        <Button onPress={this.logout} title="Logout" color="#841584" />
      </View>
    );
  }
  //

  logout = async () => {
    await AsyncStorage.removeItem("username");
    goToLogin();
  };
}

const styles = StyleSheet.create({
  container: {
    flex: 1,
    justifyContent: "center",
    alignItems: "center"
  },
  text: {
    fontSize: 18,
    fontWeight: "bold"
  }
});
In case you’re wondering how we got access to the username, we’ve passed it as a navigation prop from the navigation file earlier:
// navigation.js
{
  component: {
    name: "HomeScreen",
    options: {
      ...
    },

    // here:
    passProps: {
      username
    },

  }
},
Gallery Screen
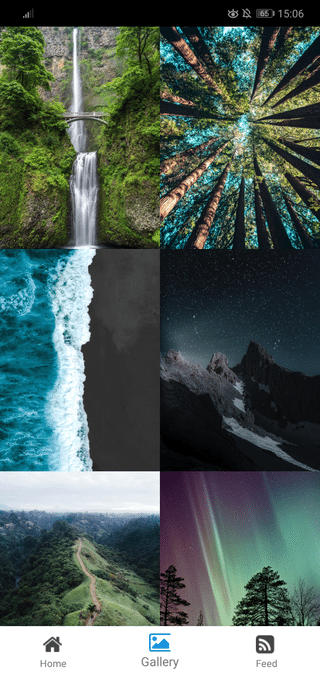
The Gallery screen is just a filler screen so we won’t be delving too much into it. Basically, it just shows a photo gallery UI:
// src/screens/Gallery.js
import React, { Component } from "react";
import {
  View,
  Text,
  FlatList,
  Image,
  Dimensions,
  StyleSheet
} from "react-native";

const { width } = Dimensions.get("window");
const base_width = width / 2;

const images = [
  {
    id: 1,
    src: require("../images/blake-richard-verdoorn-20063-unsplash.jpg")
  },
  {
    id: 2,
    src: require("../images/casey-horner-487085-unsplash.jpg")
  },
  {
    id: 3,
    src: require("../images/sacha-styles-XK7thML3zEQ-unsplash.jpg")
  },
  {
    id: 4,
    src: require("../images/eberhard-grossgasteiger-1036384-unsplash.jpg")
  },
  {
    id: 5,
    src: require("../images/justin-kauffman-449060-unsplash.jpg")
  },
  {
    id: 6,
    src: require("../images/vincent-guth-182001-unsplash.jpg")
  }
];

export default class Gallery extends Component {
  render() {
    return (
      <View style={styles.container}>
        <FlatList
          data={images}
          keyExtractor={(item, index) => item.id.toString()}
          numColumns={2}
          renderItem={this.renderImage}
        />
      </View>
    );
  }
  //

  renderImage = ({ item }) => {
    return (
      <Image source={item.src} style={{ width: base_width, height: 250 }} />
    );
  };
}

const styles = StyleSheet.create({
  container: {
    flex: 1
  }
});
Feed Screen
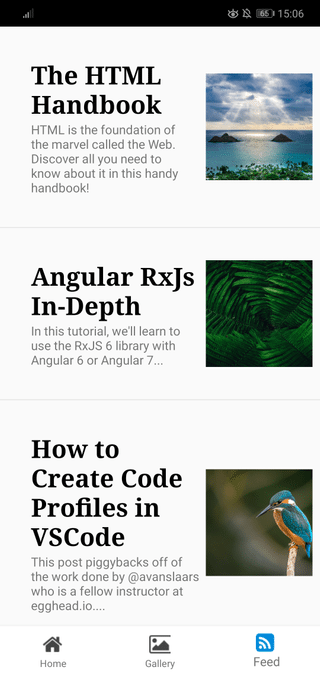
Just like the Gallery screen, the Feed screen is also a filler. It simply shows a news feed UI:
// src/screens/Feed.js
import React, { Component } from "react";
import {
  View,
  Text,
  FlatList,
  Image,
  TouchableOpacity,
  StyleSheet
} from "react-native";

const news_items = [
  {
    id: 1,
    title: "The HTML Handbook",
    summary:
      "HTML is the foundation of the marvel called the Web. Discover all you need to know about it in this handy handbook!",
    image: require("../images/amanda-phung-1281331-unsplash.jpg")
  },
  {
    id: 2,
    title: "Angular RxJs In-Depth",
    summary:
      "In this tutorial, we'll learn to use the RxJS 6 library with Angular 6 or Angular 7...",
    image: require("../images/daniil-silantev-318853-unsplash.jpg")
  },
  {
    id: 3,
    title: "How to Create Code Profiles in VS Code",
    summary:
      "This post piggybacks off of the work done by @avanslaars who is a fellow instructor at egghead.io....",
    image: require("../images/vincent-van-zalinge-38358-unsplash.jpg")
  }
];

export default class Feed extends Component {
  render() {
    return (
      <View style={styles.container}>
        <FlatList
          data={news_items}
          keyExtractor={(item, index) => item.id.toString()}
          renderItem={this.renderItem}
        />
      </View>
    );
  }
  //

  renderItem = ({ item }) => {
    return (
      <TouchableOpacity onPress={this.goToNews}>
        <View style={styles.news_item}>
          <View style={styles.news_text}>
            <View style={styles.text_container}>
              <Text style={styles.title}>{item.title}</Text>
              <Text>{item.summary}</Text>
            </View>
          </View>
          <View style={styles.news_photo}>
            <Image source={item.image} style={styles.photo} />
          </View>
        </View>
      </TouchableOpacity>
    );
  };
  //

  goToNews = () => {};
}
//

const styles = StyleSheet.create({
  container: {
    flex: 1
  },
  news_item: {
    flex: 1,
    flexDirection: "row",
    paddingRight: 20,
    paddingLeft: 20,
    paddingTop: 20,
    paddingBottom: 20,
    borderBottomWidth: 1,
    borderBottomColor: "#E4E4E4"
  },
  news_text: {
    flex: 2,
    flexDirection: "row",
    padding: 15
  },
  title: {
    fontSize: 28,
    fontWeight: "bold",
    color: "#000",
    fontFamily: "georgia"
  },
  news_photo: {
    flex: 1,
    justifyContent: "center",
    alignItems: "center"
  },
  photo: {
    width: 120,
    height: 120
  }
});
Running the App
At this point, you should be able to run the app:
react-native run-android
react-native run-ios
Try out the app and see if it performs better than React Navigation (if you’ve used it before).
Conclusion and Next Steps
In this tutorial, you learned how to use the React Native Navigation library. Specifically, you learned how to set up React Native Navigation and use the stack and tab navigation. You also learned how to load icons from React Native Vector Icons instead of using image icons.
Suggest:
☞ React Native Course for Beginners [Build Mobile Apps in React Native]
☞ JavaScript for React Developers | Mosh
☞ Learn React - Full Course for Beginners - React Tutorial 2019
☞ React + TypeScript : Why and How