Learn how to use Vue with the Square payment form!

Vue.js is a popular choice when it comes to front-end JavaScript frameworks. It has handy features like data binding and easy rendering control out of the box, all while having the performance and extensibility you need. But what if you want to take some payments? In this post we’ll walk through the highlights of converting an existing e-commerce website to use Vue.js and adding payment capabilities with a new component wrapping Square’s Payment Form.
You will want to be somewhat experienced with things like Vue components and conditional rendering in order to get the most of this tutorial, so if this is your first look at Vue.js, take a look at the video on the Vue.js homepage.
If you want to skip the tutorial and jump right to the completed results, take a look at the tristansokol/vue-square GitHub repo.
Setup
With the plethora of development tools that help out in modern JavaScript development, getting everything installed and configured can be a challenge in itself. Luckily a new class of tools for scaffolding front-end projects & to help manage all your tools have come around: command line interfaces. [vue-cli](https://github.com/vuejs/vue-cli) is one of those tools that can create a variety of boilerplates to help speed up development. We will start our development with the webpack template:
vue init webpack .
After a little bit of interactive configuration your empty directory will populate your directory with working babel, eslint, webpack, etc. as well as a slew of development tools for Vue.js. It would have taken hours to set up everything individually, so feel free to take a nap or read a book, because you are way ahead of schedule now!
A quick npm run dev shows the default landing page for the template:
Building the Store
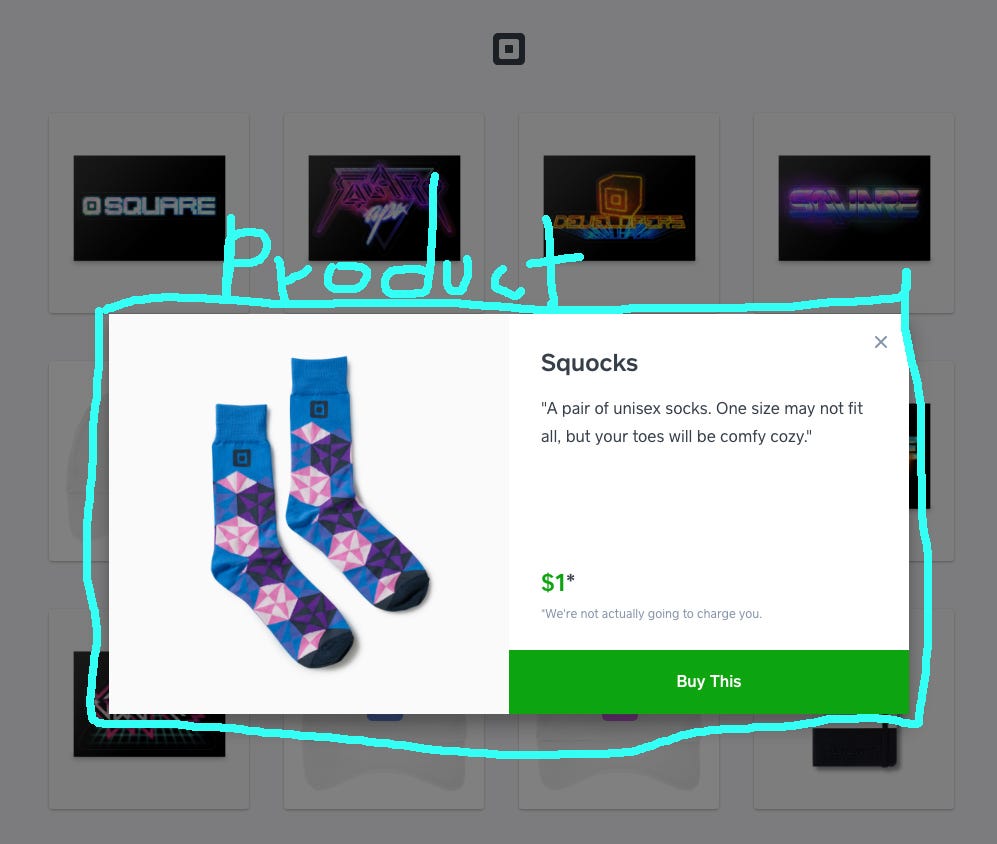
Fellow Square Richard Moot has done most of the heavy lifting of building an e-commerce store in a project on glitch that we can use as the inspiration for our work:

We have all of the code for a basic storefront, and a modal for each product with a link to buy:

We’ll be using quite a bit of the existing stylings and markup for this project, with slight modifications to better fit with Vue.js. Most of our effort will be in creating a new payment form component for people to pay (instead of the current functionality of generating Checkout forms).
Components
Our CLI wizardry set us up for using Vue’s Single File Components, but how should we split up the page? Generally repeated items are great targets for “componentization”, and on this page, each product is pretty much identical in function. Only the specifics of the individual items change. Let’s create a component to hold all of the products, and then a separate component for each product like this:

With this setup, we will fit the logic and template for the modal inside our “product” component. We will need to create a dedicated child component for the payment form. This will let us keep the stylings and logic for the payment form separate, and more reusable for future projects.
The Payment Form component
Square’s payment form is how you can turn customers looking to buy, into money in your bank account. It is composed of some html that you use to build out the form, css for styling, and some javascript to tie it all together. If this is your first time using the payment form, definitely take a look at the documentation to get a bit more background: SqPaymentForm Overview. Creating a new component starts with a new .vue file. Let’s take a look at what is inside:

Template
In the template of our component, we set up the html for what is rendered on the page. For this component the important parts will be form fields for customers to place their credit card details, and a button to pay, but we’ll also need a few other parts to get the job done:
vue-square.html
<template>
<div>
  <div id="sq-ccbox">
    <!--
      You should replace the action attribute of the form with the path of
      the URL you want to POST the nonce to (for example, "/process-card")
    -->
    <form id="nonce-form" novalidate action="path/to/payment/processing/page" method="post">
      <div class="errorbox">
        <div class="error" v-for="error in errors">
          {{error}}
        </div>
      </div>
      <div id="card-tainer">
        <div class="cardfields card-number" :id="id+'-sq-card-number'">o</div>
        <div class="cardfields expiration-date" :id="id+'-sq-expiration-date'">e</div>
        <div class="cardfields cvv" :id="id+'-sq-cvv'">e</div>
        <div class="cardfields postal-code" :id="id+'-sq-postal-code'">e</div>
      </div>

      <input type="hidden" id="card-nonce" name="nonce">
      <div id="sq-walletbox">
        <div v-show=!applePay class="wallet-not-enabled">Apple Pay for Web not enabled</div>
        <!-- Placeholder for Apple Pay for Web button -->
        <button v-show=applePay :id="id+'-sq-apple-pay'" class="button-apple-pay"></button>

        <div v-show=!masterpass class="wallet-not-enabled">Masterpass not enabled</div>
        <!-- Placeholder for Masterpass button -->
        <button v-show=masterpass :id="id+'-sq-masterpass'" class="button-masterpass"></button>
      </div>
    </form>
  </div>
  <button @click="requestCardNonce( $event)" class='productPurchase payButton'>Pay</button>
</div>
</template>
<form id="nonce-form" novalidate action="path/to/payment/processing/page" method="post">
This is where the Form in Payment Form gets its name. Card nonces are generated client-side with JavaScript, but in order to take a payment, you’ll need to send the nonce to your backend where you can securely call the Charge endpoint. A browser’s default form functionality is a great way to do that. whenever the card nonce is created, the browser will redirect to a specified URL for processing. Vue.js is only for client-side code, so we will skip the processing in this post, but you can learn more about it in the Transaction API Overview.
<div class="error" v-for="error in errors">
  {{error}}
</div>
We can take advantage of Vue’s list rendering syntax to iterate through any errors that might crop up when generating the nonce, and render them.
<div id="card-tainer">
  <div class="cardfields card-number" :id="id+'-sq-card-number'">
  </div>
  <div class="cardfields expiration-date" :id="id+'-sq-expiration-date'">
  </div>
  <div class="cardfields cvv" :id="id+'-sq-cvv'">e</div>
  <div class="cardfields postal-code" :id="id+'-sq-postal-code'">
  </div>
</div>
The payment form replaces these elements with a series of iframes to handle the sensitive card data that end users put in. One thing to note here is that the id of each of these elements is bound (as in [v-bind](https://vuejs.org/v2/guide/syntax.html#v-bind-Shorthand)) to the id variable in the Vue.js payment form component. This id is a prop that corresponds to each product’s id and is unique for each product. The unique identifiers help make sure that the payment form successfully renders for each product, and doesn’t render the wrong product.
<div id="sq-walletbox">
  <div v-show=!applePay class="wallet-not-enabled">
    Apple Pay for Web not enabled
  </div>
  <!-- Placeholder for Apple Pay for Web button -->
  <button v-show=applePay
          :id="id+'-sq-apple-pay'"
          class="button-apple-pay">
  </button>
  <div v-show=!masterpass class="wallet-not-enabled">
    Masterpass not enabled
  </div>
  <!-- Placeholder for Masterpass button -->
  <button v-show=masterpass
          :id="id+'-sq-masterpass'"
          class="button-masterpass">
  </button>
</div>
This section displays the buttons for Apple Pay and Masterpass. In addition to the unique identifiers for the elements, we also use Vue’s conditional rendering with v-show to only display the buttons if the variables masterpass & applePay are truthy, which are set in the javascript depending on if the browser supports these payment methods.
<button @click="requestCardNonce($event)" class='productPurchase payButton'>Pay</button>
In order to make a purchase (and kick off the nonce creation process) you need to hit a button, just like this one. The @click is a Vue.js event handler, and in order to prevent the default behavior of clicking a submit button in the form, we need to pass in the event using the special Vue $event variable.
Javascript
vue-square.js
<script>
export default {
  name: "paymentForm",
  data: function() {
    return {
      errors: [],
      masterpass: false,
      applePay: false
    };
  },
  watch: {
    showPaymentForm: function() {
      if (!this.showPaymentForm) {
        return 1;
      }
      this.paymentForm.build();
    }
  },
  props: {
    showPaymentForm: Boolean,
    id: Number
  },
  mounted: function() {
    let locationId = "75MBQ5SS3SKJK";
    let applicationId = "sq0idp-gbQhcOCpmb2X4W1588Ky7A";
    let that = this;
    this.paymentForm = new SqPaymentForm({
      autoBuild: false,
      applicationId: applicationId,
      locationId: locationId,
      inputClass: "sq-input",
      // Initialize the payment form elements

      // Customize the CSS for SqPaymentForm iframe elements
      inputStyles: [
        {
          fontSize: ".9em"
        }
      ],

      // Initialize Apple Pay placeholder ID
      applePay: {
        elementId: that.id + "-sq-apple-pay"
      },

      // Initialize Masterpass placeholder ID
      masterpass: {
        elementId: that.id + "-sq-masterpass"
      },

      // Initialize the credit card placeholders
      cardNumber: {
        elementId: that.id + "-sq-card-number",
        placeholder: "Card number"
      },
      cvv: {
        elementId: that.id + "-sq-cvv",
        placeholder: "CVV"
      },
      expirationDate: {
        elementId: that.id + "-sq-expiration-date",
        placeholder: "MM / YY"
      },
      postalCode: {
        elementId: that.id + "-sq-postal-code",
        placeholder: "Zip Code"
      },

      // SqPaymentForm callback functions
      callbacks: {
        /*
           * callback function: methodsSupported
           * Triggered when: the page is loaded.
           */
        methodsSupported: function(methods) {
          // Only show the button if Apple Pay for Web is enabled
          // Otherwise, display the wallet not enabled message.
          that.applePay = methods.applePay;
          that.masterpass = methods.masterpass;
        },

        /*
           * Digital Wallet related functions
           */
        createPaymentRequest: function() {
          var paymentRequestJson;
          /* ADD CODE TO SET/CREATE paymentRequestJson */
          return paymentRequestJson;
        },
        validateShippingContact: function(contact) {
          var validationErrorObj;
          /* ADD CODE TO SET validationErrorObj IF ERRORS ARE FOUND */
          return validationErrorObj;
        },

        /*
           * callback function: cardNonceResponseReceived
           * Triggered when: SqPaymentForm completes a card nonce request
           */
        cardNonceResponseReceived: function(errors, nonce, cardData) {
          if (errors) {
            errors.forEach(function(error) {
              that.errors.push(error.message);
            });
            return;
          }
          // Assign the nonce value to the hidden form field
          document.getElementById("card-nonce").value = nonce;

          // POST the nonce form to the payment processing page
          document.getElementById("nonce-form").submit();
        },
        /*
           * callback function: paymentFormLoaded
           * Triggered when: SqPaymentForm is fully loaded
           */
        paymentFormLoaded: function() {
          console.log("paymentFormLoaded");
          /* HANDLE AS DESIRED */
        }
      }
    });
  },
  methods: {
    requestCardNonce: function(event) {
      // Don't submit the form until SqPaymentForm returns with a nonce
      event.preventDefault();

      // Request a nonce from the SqPaymentForm object
      this.paymentForm.requestCardNonce();
    }
  }
};
</script>
There is quite a bit of code here, and most of it is explained in depth in the payment form documentation, but here are the highlights of what is going on.
name: 'paymentForm',
data: function() {
  return {
   errors: [],
   masterpass: false,
   applePay: false
 }
},
Every component in Vue.js needs a name, and this one is paymentForm. The data for the payment form is pretty sparse: two booleans to hold Masterpass and Apple Pay browser support, and an array to hold any errors that get generated in the nonce generation process.
mounted: function() {
  let locationId = "75MBQ5SS3SKJK";
  let applicationId = "sq0idp-gbQhcOCpmb2X4W1588Ky7A";
  let that = this;
  this.paymentForm = new SqPaymentForm({
    autoBuild: false,
    ...
mounted executes a method when the function gets created. We can use that to build our paymentForm object as soon as it is available. A new variable, that, stores the scope of the Vue instance while we are inside the payment form’s code. We will use that to assign the values of this.applePay & this.masterpass when the payment form determines if those payment methods are supported. It is important to note the **autoBuild: false**property, that option tells the payment form to wait until paymentForm.build() is called to render the elements of the payment form.
watch: {
  showPaymentForm: function() {
    if (!this.showPaymentForm) {
      return 1;
    }
    this.paymentForm.build();
  }
},
Vue.js’s watch functionality lets us keep track of a variable, and do something based on the value. In this case we are using the showPaymentForm variable that determines the visibility of the payment form to also execute the javascript needed for the payment form. Whenever showPaymentForm turns true, the payment form is built and shown to the end user.
props: {
  showPaymentForm: Boolean,
  id: Number
},
The component has two [props](https://vuejs.org/v2/guide/components-props.html) which communicate between the parent component (the product.vue) and the payment form component. The showPaymentForm should sound familiar from the other sections, and the id number is what we used in the html to uniquely identify each card field.
methods: {
  requestCardNonce: function(event) {
  // Don't submit the form until SqPaymentForm returns with a nonce
    event.preventDefault();
  // Request a nonce from the SqPaymentForm object
    this.paymentForm.requestCardNonce();
  },
},
Methods are the functions for the component, and this component only has the one for handling the click of the pay button: the default behavior is halted (which would submit the form) and the payment form triggers its requestCardNonce() method instead.
The rest of the component is just the styling for elements. Single file components in Vue make it easy to scope your css to individual components, so changing the styling or organization of these components can all be done from within the .vue component file itself.
With our payment form component in place, it is easy to add the payment form to the existing modal:
And it should be easy to add it to any other Vue.js application.
This is the tip of the iceberg in the types of online store experiences that you can build for customers with Vue.js and Square. Take a look at the complete code on GitHub and let me know what you think! If there is demand from the Vue community, we can make more posts showing how you can implement it with Square’s APIs.
Source viva: Learn how to use Vue with the Square payment form!
Recommended Courses:
Real Time Single Page Forum App with Pusher Laravel & vuejs
☞ http://bit.ly/2IiqUSD
Vue JS 2 Course for Students with ZERO ES6 foundation
☞ http://bit.ly/2wK4ch0
Getting Started with Vue JS
☞ http://bit.ly/2L1w9UL
Vue JS 2.0 - Mastering Web Apps
☞ http://bit.ly/2jWcOrB
Suggest:
☞ Vue js Tutorial Zero to Hero || Brief Overview about Vue.js || Learn VueJS 2023 || JS Framework
☞ Learn Vue 2 in 65 Minutes -The Vue Tutorial for 2018
☞ Create Shopping basket page With Vuejs and Nodejs
☞ The Vue Tutorial for 2018 - Learn Vue 2 in 65 Minutes