Developing a social networking platform using Ruby on Rails

. Web development has become so much fun for me because of it.
For quite some time I have been thinking of writing a blog post on Rails. I am not writing the usual post on “How to develop a blogging platform under 5 minutes using Rails”. I wanna build something awesome and write a tutorial on it. The idea of developing a social networking platform has always excited me. So I am gonna try and build one using Rails.

Prerequisites
☞ Learn Ruby on Rails: Stripe Payment Processing
Here are a few things to consider before we proceed with development —
- Ruby & Rails: https://gorails.com/setup
- Postgres: https://www.digitalocean.com/community/tutorials/how-to- install-and-use-postgresql-on-ubuntu-14-04
- Heroku toolbelt: https://toolbelt.heroku.com/
- Git(Optional): http://git-scm.com/downloads
Start Hacking
To create a new rails app run rails new socify. This will generate the app structure and the Gemfile which contains the default gemset that ships with rails.
Go into the app directory. The first thing we need to do is modify the default gemset. Just use this Gemfile which contains the required gems. To fetch the gems and resolve dependencies we use bundler. Note that we have bundler already installed during setup. Go ahead and type bundle install.
Note: For version control I use Git. You can using replace the default .gitignore with this one.
Run Rails:
The app has nothing so far since we haven’t added anything. Try running rails s and visit localhost:3000. This should display the default landing page that says —

Asset Pipeline:
The Rails Asset pipeline concatenates, minifies and serves the app’s assets. We can add the custom css and js files to the pipeline. First of all rename application.css to application.css.scss since we are going to write our styling in Sass. Also remove turbolinks(Not a big fan of it) from application.js. Include the required assets.
@import "bootstrap-sprockets";
@import "bootstrap";
@import "font-awesome";
@import "jquery.datetimepicker";
@import "*";
//= require jquery
//= require jquery_ujs
//= require bootstrap
//= require bindWithDelay
//= require jquery.datetimepicker
//= require_tree .
The app still points to the welcome aboard page since the root_path is not configured yet. Let’s create a home controller with an action to serve as the landing page. Add a simple Navbar.
<nav class="navbar navbar-default navbar-fixed-top">
  <div class="container">
    <div class="navbar-header">
      <button type="button" class="navbar-toggle collapsed" data-toggle="collapse" data-target="#navbar-top">
        <span class="sr-only">Toggle navigation</span>
        <span class="icon-bar"></span>
        <span class="icon-bar"></span>
        <span class="icon-bar"></span>
      </button>
      <%= link_to "Socify", root_url, class: "navbar-brand" %>
    </div>
    <div class="collapse navbar-collapse" id="navbar-top">
      <ul class="nav navbar-nav navbar-right">
        <% if user_signed_in? %>
          <li><%= link_to('Sign out', destroy_user_session_path, method: :delete) %></li>
        <% else %>
          <li><%= link_to 'Sign up', new_user_registration_path %></li>
          <li><%= link_to 'Sign in', user_session_path %></li>
        <% end %>
      </ul>
    </div>
  </div>
</nav>
rails g controller home front
Rails.application.routes.draw do
  root to: 'home#front'
end
Authentication
And one more thing, Don’t Reinvent the Wheel. We will try to follow this throughout the development of this app. So rather than solving a problem that already has an optimal solution we can re-use the solution. Always remember,
Don’t Reinvent the Wheel &
Don’t Repeat Yourself(DRY)
One such solution to authentication is Devise. Devise provides an excellent authentication mechanism by taking care of user authentication, security and session management. Great! Let’s use it.
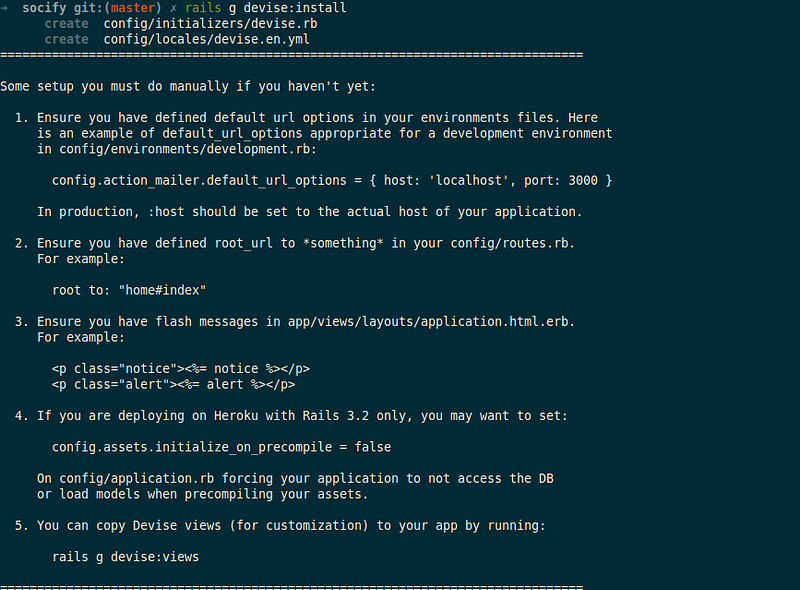
Run rails g devise:install. There are a few things to configure after setting devise. Refer Getting started guide.

Note: Okay, I got a really weird error which was caused due to a single line in application.rb [link]. Removed and everything works smooth now. Ignore if you are not facing it.
Generate devise user model using rails g devise user.Let’s add a few columns to the model by modifying the migration. Run rake db:migrate to create the users table with the respective fields.
class DeviseCreateUsers < ActiveRecord::Migration
  def change
    create_table(:users) do |t|
      t.string :name,               null: false, default: ""
      t.string :email,              null: false, default: ""
      t.string :encrypted_password, null: false, default: ""
      t.string :about
      t.string :avatar
      t.string :cover

      t.string   :reset_password_token
      t.datetime :reset_password_sent_at

      t.datetime :remember_created_at

      t.integer  :sign_in_count, default: 0, null: false
      t.datetime :current_sign_in_at
      t.datetime :last_sign_in_at
      t.string   :current_sign_in_ip
      t.string   :last_sign_in_ip

      t.string   :confirmation_token
      t.datetime :confirmed_at
      t.datetime :confirmation_sent_at

      t.timestamps null: false
    end

    add_index :users, :email,                unique: true
    add_index :users, :reset_password_token, unique: true
    add_index :users, :confirmation_token,   unique: true
  end
end
In addition to user validation, authentication & session management devise also handles user confirmation. Just adding :confirmable to user model will do the trick.
class User < ActiveRecord::Base
  devise :database_authenticatable, :registerable, :confirmable,
    :recoverable, :rememberable, :trackable, :validatable
end
Note: Don’t forget to change config.reconfirmable to false in config/initializers/devise.rb.
Everything in devise works out-of-the-box. Don’t believe me? Try visiting http://localhost:3000/users/sign_in. You might see a form that devise has already generated behind the scenes. And for user sign_up http://localhost:3000/users/sign_up. Is this cool or what!

The real question you would have now is “Can we customize it?”. Of course we can. This generator rails g devise:views copies the default views to our app for us to override. We can use some boilerplate code for the forms. You can check it out here.
Since we are adding new attributes to devise forms we need to tell devise controllers which params to allow. Read more about strong params here.
class ApplicationController < ActionController::Base
  protect_from_forgery with: :exception

  before_filter :configure_permitted_parameters, if: :devise_controller?
  protected
  def configure_permitted_parameters
    devise_parameter_sanitizer.for(:sign_up) << [:name, :password_confirmation]
    devise_parameter_sanitizer.for(:sign_in) << [:email, :remember_me]
  end
end
Posts & Events
Authenticated user needs a way to share content. To generate the basic CRUD for post lets use scaffolding. This will generate the model, controller, views along with the database migration. And since post belongs to the user model we can add a reference to it which will generate the necessary relations.
rails g scaffold post attachment:string content:text user:references
rake db:migrate
Create Post:
To create a new post add the following form to home/index.html.erb and in **posts_controller**handle it. Really straight forward!
<%= form_for(@post) do |f| %>
  <div class="form-group">
    <%= f.label 'Update status' %><br>
      <%= f.text_area :content, class: 'form-control', autofocus: true,
          placeholder: 'What\'s up?' %>
      <%= f.file_field :attachment, class: 'form-control' %>
  </div>
  <%= f.submit :post, class: 'btn btn-primary'%>
<% end %>
def create
  @post = Post.new(post_params) do |post|
    post.user = current_user
  end
  if @post.save
    redirect_to root_path
  else
    redirect_to root_path, notice: @post.errors.full_messages.first
  end
end
When we do @post.save rails will automatically validate the post object based on the validations we have written in post model. If there are errors we will pass it along while redirecting.
Carrierwave:
To handle file uploads we can use carrierwave. With carrierwave file uploads are really easy to handle. Generate an uploader class which contains the necessary configuration to handle the file after upload. Now all we need to do is mount the uploader in the model.
rails g uploader avatar
class Post < ActiveRecord::Base
  mount_uploader :attachment, AvatarUploader
end
Create Event:
Creating an event is similar to posts. Since they have a title and date we might need a datepicker to select date & time. I am just gonna use the following jQuery plugin https://github.com/xdan/datetimepicker. Add the assets to vendor/assets/ directory and include in application.js and application.css.scss. Format the date in the following format and let Rails take care of the rest.
(document).ready(function(){
  $("#event_when").datetimepicker({
    maxDate:'0',
    format:'Y/m/d H:i'
  });
});
Likes & Comments
Since we are building a social networking app it is really important to add likes and comments. I am not going to Reinvent the wheel as stated above. Checkout acts_as_votable and acts_as_commentable.
Likes:
Using acts_as_votable it’s really easy to add likes/votes to a model. The following commands will create votes table to store the likes info. Just add acts_as_votable to a model to make it votable.
rails generate acts_as_votable:migration
rake db:migrate
Generate a controller to handle like & unlike actions.
class LikesController < ApplicationController
  before_action :find_likeable
  before_action :authenticate_user!
  respond_to :js

  def create
    @likeable.liked_by current_user
  end

  def destroy
    @likeable.disliked_by current_user
  end

  private
  def find_likeable
    @likeable_type = params[:likeable_type].classify
    @likeable = @likeable_type.constantize.find(params[:likeable_id])
  end
end
Comments:
Acts_as_commentable works a bit differently although the setting up is pretty much the same. The following commands will generate comment model along with the migration for it.
rails g comment
rake db:migrate
Add acts_as_commentable to a model to make it commentable. Generate a controller to handle create and delete actions.
class CommentsController < ApplicationController
  before_action :authenticate_user!
  before_action :find_commentable, only: :create
  respond_to :js

  def create
    @comment = @commentable.comments.new do |comment|
      comment.comment = params[:comment_text]
      comment.user = current_user
    end
    @comment.save
  end

  def destroy
    @comment = current_user.comments.find(params[:id])
    @comment_id = params[:id]
    @comment.destroy
  end

  private
  def find_commentable
    @commentable_type = params[:commentable_type].classify
    @commentable = @commentable_type.constantize.find(params[:commentable_id])
  end
end
Now we are pretty much done with likes and comments. Just add the forms to the views.
<% if current_user.liked? likeable %>
  <%= form_tag unlike_path(likeable_type: likeable.class.to_s, likeable_id: likeable.id), method: :post, remote: true do %>
    <% button_tag class: 'btn btn-block liked' do %>
      <%= fa_icon 'thumbs-up' %> unlike
    <% end %>
  <% end %>
<% else %>
  <%= form_tag like_path(likeable_type: likeable.class.to_s, likeable_id: likeable.id), remote: true do %>
    <% button_tag class: 'btn btn-block' do %>
      <%= fa_icon 'thumbs-up' %> like
    <% end %>
  <% end %>
<% end %>
<%= form_tag comments_path(commentable_type: commentable.class.to_s, commentable_id: commentable.id), method: :post, remote: true do %>
  <div class="form-group">
    <%= text_area_tag :comment_text, nil, placeholder: 'Enter Comment', class: 'form-control' %>
  </div>
  <%= submit_tag :comment, class: 'btn btn-primary' %>
<% end %>
Notice that I am using remote:true, so forms will be submitted using Ajax. Checkout this article on how remote forms work using Ajax http://guides.rubyonrails.org/working_with_javascript_in_rails.html.
Relationships
Now to the most important part of the social app, relations. So far it’s just an app where people can post, like or comment. Adding relationships between users is what makes it a network. Add acts_as_follower. Oh yeah! There is a ruby gem for almost everything. That’s the best part of using rails.

rails generate acts_as_follower
class User < ActiveRecord::Base
  acts_as_follower
  acts_as_followable
end
class FollowsController < ApplicationController
  before_action :authenticate_user!
  respond_to :js

  def create
    @user = User.find(params[:user_id])
    current_user.follow(@user)
  end

  def destroy
    @user = User.find(params[:user_id])
    current_user.stop_following(@user)
  end
end
<div class="follow">
  <% if user.followed_by?(current_user) %>
    <%= form_tag unfollow_path(user_id: user.id), method: :post, remote: true do %>
      <%= button_tag 'unfollow', class: 'btn btn-primary' %>
    <% end %>
  <% else %>
    <%= form_tag follow_path(user_id: user.id), method: :post, remote: true do %>
      <%= button_tag 'follow', class: 'btn btn-success' %>
    <% end %>
  <% end %>
</div>
That’s it. You can now start following any user.
Public Activity
The social app that we are building needs to keep track of more than just posts. If you notice facebook’s newsfeed it shows likes, comments, follows & much more. We will keep track of records using the public_activity gem. Refer the public activity wiki on Github for setting up & displaying activities.
rails g public_activity:migration
rake db:migrate
Add the following to the models you want to track activity, for example models/post.rb. And since the logged in user has created we add current_user as the owner for the tracked resource.
class Post < ActiveRecord::Base
  include PublicActivity::Model
  tracked only: [:create], owner: Proc.new{ |controller, model| controller.current_user }
end
We will fetch all the activities using PublicActivity::Activity::all in the index action of the home controller. Display the activities on the view using render_activities(@activities) https://github.com/chaps-io/public_activity#displaying-activities.
class HomeController < ApplicationController
  respond_to :html, :js
  def index
    @activities = PublicActivity::Activity.all
  end
end
<div id="activities">
  <%= render_activities(@activities)%>
<div>
Note: Need to fetch based on whether user is logged in or not, but ok for the time being. Checkout the final code on Github.
Finally we need to create public_activity/model_name/ with views for each action. Checkout views/public_activity/to see how it is handled. We can add public activity tracking to other activities such comments and events too.
NewsFeed
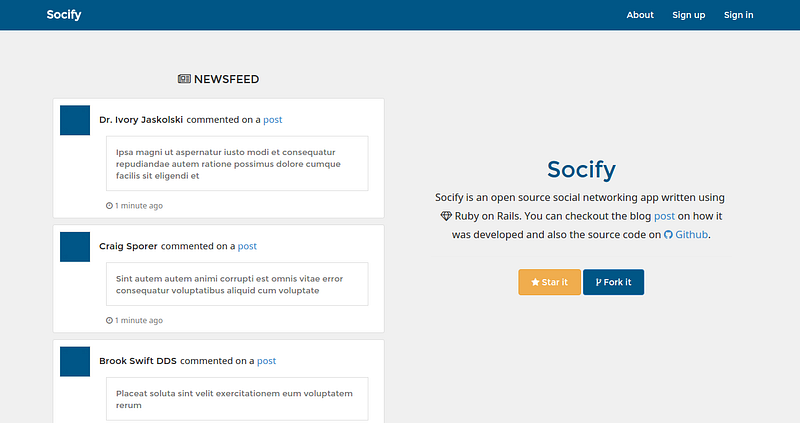
NewsFeed content differs based on user session. The front action serves as the front-page when user is not logged in. When logged in we show index action that lists activities created by the user’s friends.
But, we are not going to display all the records at once. This will increase the page load when data becomes huge. You guessed it! we will paginate the records using will_paginate.
class HomeController < ApplicationController
  before_action :set_user, except: :front
  respond_to :html, :js

  def index
    @post = Post.new
    @friends = @user.all_following.unshift(@user)
    @activities = PublicActivity::Activity.where(owner_id: @friends).order(created_at: :desc).paginate(page: params[:page], per_page: 10)
  end

  def front
    @activities = PublicActivity::Activity.order(created_at: :desc).paginate(page: params[:page], per_page: 10)
  end

  def find_friends
    @friends = @user.all_following
    @users =  User.where.not(id: @friends.unshift(@user)).paginate(page: params[:page])
  end

  private
  def set_user
    @user = current_user
  end
end
Final Touches
Congratulations! You have built a social networking platform using Ruby on Rails.

But looking at the site the design looks bad and also right now there is no permissions model. So let’s just add permissions and some basic styling so that it looks pretty.
Deploy

Deploying a rails app on Heroku is too damn easy. All we have to do is to add a heroku app and push to it using Git. Create a new app on heroku, add rails app and push to heroku master.
heroku login
heroku git:remote -a [appname]
git push heroku master
heroku run rake db:migrate
Since our app sends email for confirmation & password recovery we need to add smtp config to config/environments/production.rb. I am just gonna use sendgrid for this. Also we are uploading media and heroku doesn’t store it on the server. There is an addon called Cloudinary which we will use.
I think that’s pretty much it. Everything deployed and looks good.

To populate mock data we will use a rake task under lib/tasks. We will use faker and populator to generate data.
rake fill:data
You may check out the source code on Github (under stable branch int the Repo) and demo deployed on Heroku. If you found this article useful please hit the Recommend button below to help me Spread the word. Cheers!
☞ Learn Ruby on Rails from Scratch
☞ Ruby on Rails 5: Building real world apps for newbies
☞ 8 Beautiful Ruby on Rails Apps in 30 Days & TDD - Immersive
☞ Ruby On Rails For Beginners Practical Ruby On Rails Training
Suggest:
☞ Ruby on Rails 5 Tutorial: Build Web Application
☞ Ruby on Rails Tutorial for Beginners
☞ What To Learn To Become a Python Backend Developer
☞ 40+ Online Tools & Resources For Web Developers & Designers