VueJs: Server Side Render with Vue-router

We are also going to go through a basic (but not necessarily simple) example of how to configure and use SSR with vue-router.
I have written a shorter , implementation focused, version of this article in Anthony Gore blog (without any extra information about server side render). Just in case you are interested only in the implementation I leave you the link:
Vue.js Server-Side Rendering With Vue Router: Step-By-Step Guide
When should I consider using SSR?
There are two main reasons for using SSR.
1. Better SEO. Search engine crawlers are going to see a fully rendered page when the application loads since the server is the one building that first loaded page.
2. Faster time-to-content. Since the first render is entirely built by the server you are going to get, from the client side, a fully-rendered page sooner. This provides a better user experience and is really important for apps where time-to-content plays a critical role.
So if SEO or time-to-content are critical for your app you should probably use SSR no matter the trade-offs but in any other scenario… think it twice and be certain you are going to win more than you are going to lose because the trade-off is not cheap. If your only concern is improving SEO there are other technics to consider like prerendering.
Trade-Offs
There are at least three major things you need to consider before choosing to use SSR.
1. Some three party libraries may need some manipulation to be able to run in an SSR app.
2. SSR requires an environment where Node.js server can run.
3. Since this is going to be more expensive for a server than just serving static files if your application has or expects high traffic you have to be prepared to deal with high server load.
Full Basic Implementation
Before jumping into the actual implementation there are some main concepts that you need to understand… so let’s go through them:
- SSR consists in creating a first fully loaded version of the app for the actually requested route on the server, once that page is rendered on the client side, the client side code takes ownership.
- You are going to need two entry building points for your app, one for the server and one for the client.
The configuration is not simple and the information on the web about SSR using vue-router is, at this day, kind of poor.
So let’s hope this example brings some clarity to the subject…
Dependencies
Let’s go through the dependencies that we are going to have to install…
1. We are going to use a template to start that has already configured a basic webpack build for a vueJs app. We are also going to need to install vue-cli:
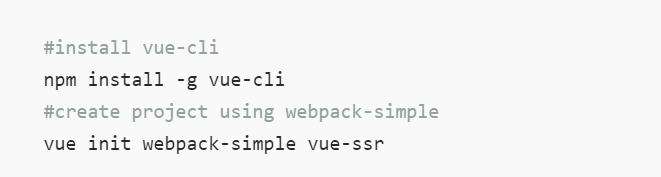
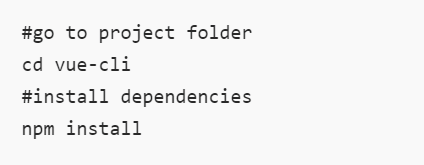
Now we need to install all the dependencies of webpack-simple template. Until this point nothing related to SSR we are just setting a general vueJs environment.
2. So now we have a vueJs project ready to start adding SSR configuration, but before that, we need to add three dependencies all related to SSR.

vue-server-render: Vue library for SSR.vue-router: Vue library for SPA.express: we need a NodeJS server running.webpack-merge: we are going to use it to merge webpack configuration.
Webpack Configuration
We are going to need two webpack configurations, one to build from the client entry file and one to build from the server entry file.
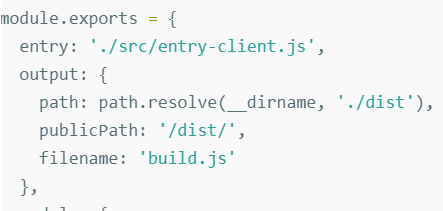
For our base webpack configuration we are just going to use the one that comes with the template we installed, except that we are changing the entry to entry-client.js.
Let’s add now the server webpack configuration…
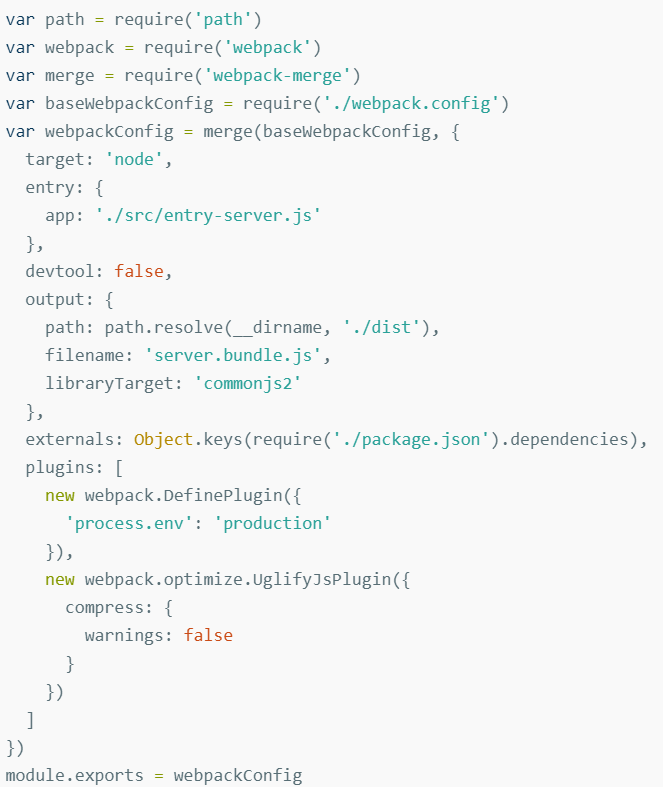
There is nothing strange here except two things, the entry is entry-server.js and for the output, we are using commonjs as a library target.
So that’s the webpack configuration, let’s see the scripts for building the app in packages.json.
Packages.json build scripts
You can change this to your needs but there are three steps you need to perform to start your application.
1. You need to build the client-entry
2. You need to build the server-entry
3. You need to start the server

In the configuration, we are using the start script that is going to run the three steps that we mention before. But we have set scripts to run them separately if needed.
Folder Structure
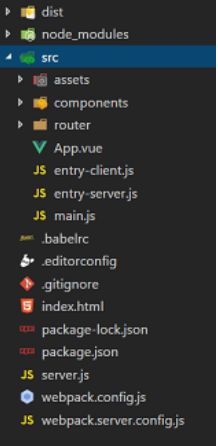
- the dist folder is created by webpack when building
- the node_modules… well you know this.
- src contains our vue app, inside you are going to find the server and client entry points, the vue main.js file, the App component, a folder for the components (we have home and about components), the router folder containing the router configuration and finally the assets folder.
- .babelrc, .gitignore, packages.json… you probably now what they are. - index.html is the main HTML for our app.
- server.js is the server configuration and starting file.
- finally, the two webpack configurations that we already talk about.
Index HTML
This is our main HTML file.
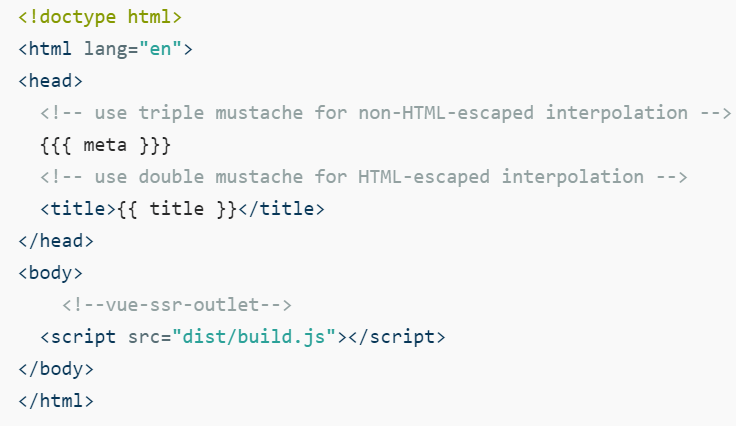
There are a couple of things to discuss:
- I have added some interpolation to this template to populate that data later on the server. Is a functionality of vue server side render that I wanted to show.
- we target the
build.jsthat is the result of the client bundle generated from webpack.
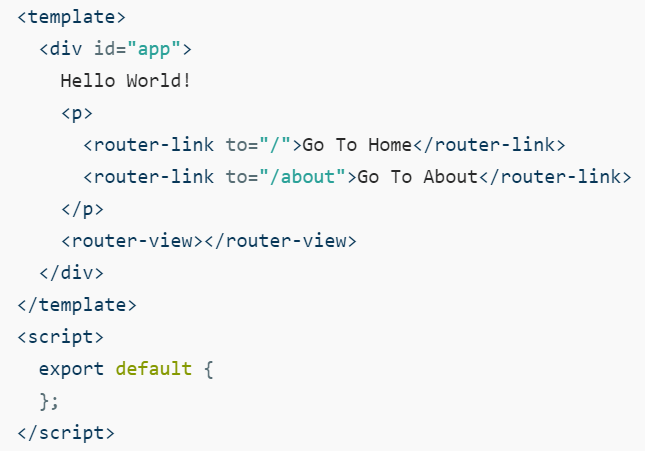
APP.vue component
This component is the root component of our app and it has a couple of responsibilities.
1. configuration for menu using vue-router links.
2. set the container for the routes components to render.
3. set the element with the id app that is going to be used for mounting the client side part of the application.
Router file configuration
Since our application is going to start on the server we need to provide a new instance of the router for each server request. Inside the router folder, we are going to have a file with our router config.
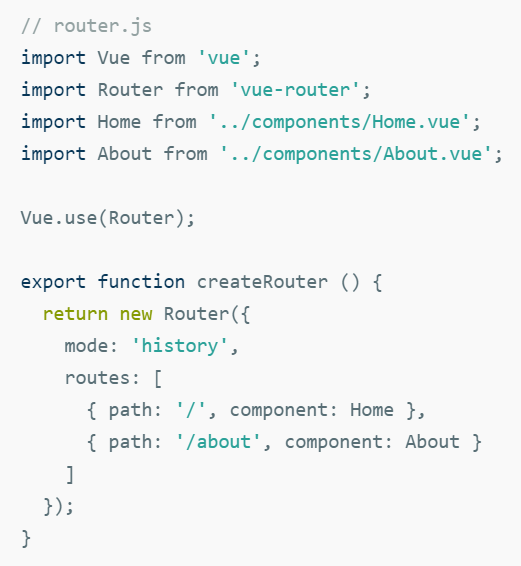
Let’s go through the code:
- we import all the dependencies we needed.
- we tell vue to use vue-router.
- we export a function that provides a new instance of the router configuration.
- we instantiate the router un history mode and with the configuration of the two routes, we are going to handle.
Main Vue file configuration
For the same reason that we need to provide a new router instance, we need to provide a new app instance. This file has the responsibility of starting the router and the root app component.
Both, the server entry point and the client entry point, are going to use this file.
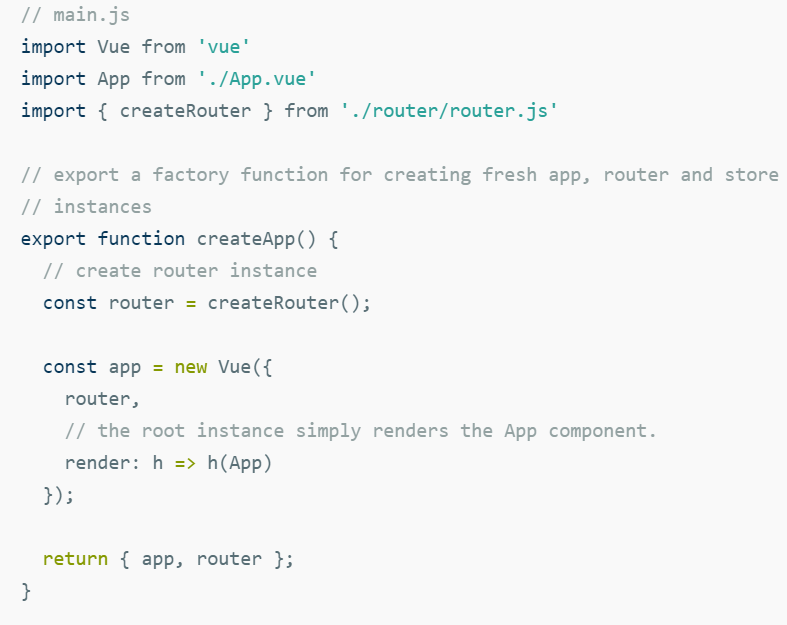
Let’s go through the code:
- we import all the dependencies needed.
- we export a function that provides a new instance of the app and the router.
- we instantiate the router using the method we saw before in the
route.jsfile. - we create a new app instance with the router and the render, passing the root app component.
- we return both instances.
Client entry point
This code is quite straight-forward. This is the entry file for the webpack client build configuration.
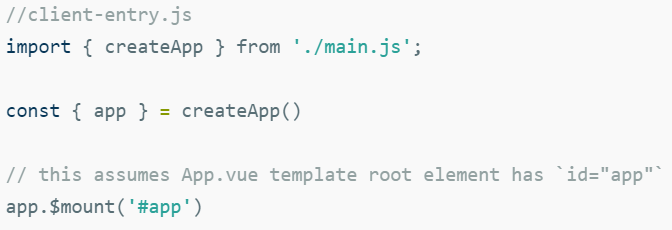
Let’s go through the code:
- we import all the dependencies needed.
- we create the app from the
main.jsfile and keep theappinstance. - we mount
appin a node with the id set to app. In the case of this example, the node containing that id is the root element of the template ofApp.vuecomponent as we mentioned before.
Server entry point
This file is the entry point for webpack server build. The result of that build is what we are going to target later when we configure the server.
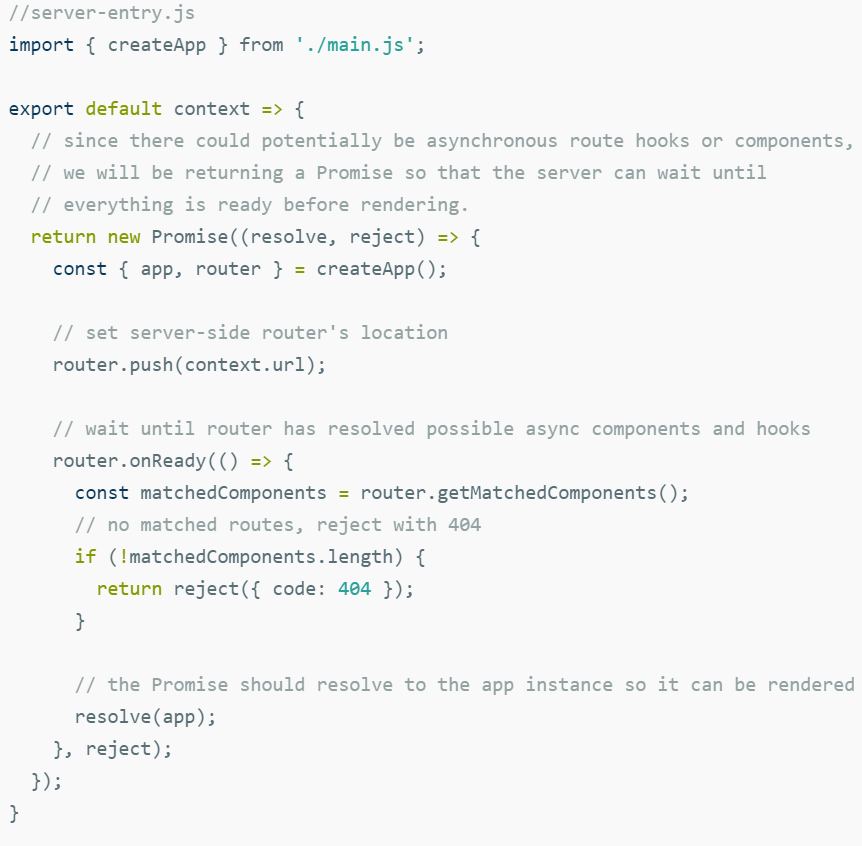
Let’s go through the code:
- we import all the dependencies needed.
- we export a function that receives a context as param.
- the functions return a promise.
- we instantiate app and router from
main.jscreate app function. - we get the current url from the context (this is going to be provided by the server) in order to push the correct url to the router.
- once the router is ready we check that a route matches the context url, if it does we resolve the promise and returns the app instance if not we reject the promise.
Configuring and starting the server
We have almost everything ready, the only thing missing is the configuration and start-up of the express server.
Wow!!!… and you thought it was too much before… haha don’t worry let’s dig into the code and see what’s going on, is the last thing to configure.
- we are importing
expressto create the server, we are also importing some node js functionalities. - we import the server bundle that’s the result of the webpack server build.
- we import the
vue-server-rendererlibrary and create the rendering providing theindex.htmllocation for the template. - we configure
expresspath. - we start the server.
- the bundle is the result of building the
serve-entry.jswith webpack, so we can use the default function that receives the context as a param with the url. Since it is a promise we set a success with and an error callback.
The success callback does a bunch of stuff so let’s go through that:
- we create a const with the data that is going to be interpolated in the
index.html(we saw the interpolation in this HTML before). - we call the render to string function of the renderer that receives the app (returned by the resolved promise), the context that we just created (to use the interpolation in the index, this is optional), and the callback function if everything works well.
- the render to string callback function checks if any error, if not it just sends the generated HTML as a response.
Finally, we start listening to the port 8080.
Now if you run the script start and open the localhost:8080 in the browser you are going to see things working SSR and vue-router.
And this is it ladies and gentlemen!!
Conclusion
I don’t think I need to say that is a lot of configuration to make things work, but once is done you are not going to touch it a lot, just be sure SSR is what you need.
I leave you the github project working with all these things we just went through:
Recommended Courses:
☞ Curso Avanzado de Vuejs 2, Vuex y AdonisJs 4
☞ VueJS + Firebase: Desde 0 hasta una proyecto en internet
☞ Vuejs 2 y Vuex desde 0 con las mejores prácticas
☞ Secure Your VueJs Applications With Auth0
☞ Crea Sistemas de Compras - Ventas con Laravel 5.7 y VuejS
Suggest:
☞ Vue js Tutorial Zero to Hero || Brief Overview about Vue.js || Learn VueJS 2023 || JS Framework
☞ Learn Vue.js from scratch 2018
☞ Is Vue.js 3.0 Breaking Vue? Vue 3.0 Preview!
☞ Vue.js Tutorial: Zero to Sixty