Build a Todo App with Electron
Prerequisites
I’m assuming you’ve read the previous tutorial and have a basic idea of the main process and browser processes. ( both linked below )
- Knowledge of JavaScript
- Knowledge of HTML/CSS is recommended
- NodeJS installed
- Basic knowledge of Electron processes
- If you’re not familiar with Node, setting up an npm project and jumping into code then I suggest reading/doing the previous tutorial before this one.
Project Setup
Instead of starting from scratch we’ll use Electron’s quick start boilerplate.
Note: I suggest reading this tutorial and then trying to build your own todo-list or something similar. There are many ways to create it and you’ll learn more effectively working on your own version. ( and it’s hard to follow projects on written tutorials )
- Download/clone the boilerplate anywhere you want.
- Run
**npm install**and install any extra packages you want ( i.e I added Standard JS style for linting ) - Look at all the files — they have comments that explain what each line does.
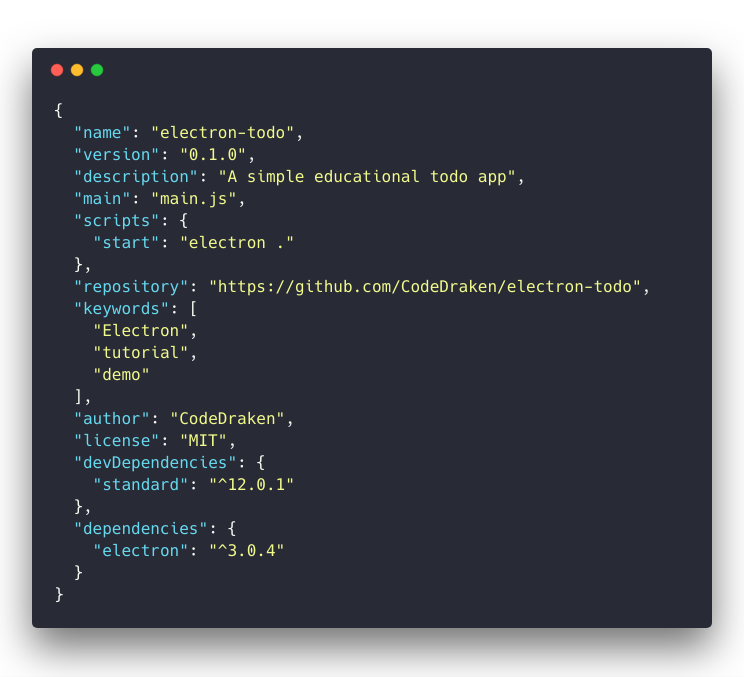
Here’s my package.json — we’ll dive into the other files as we start adding code to them.
Update 10/10/2019: This tutorial still works even with the latest packages and I’ll be updating and adding new tutorials soon! If something doesn’t work and you’re on a different version check the Electron breaking changes page below:
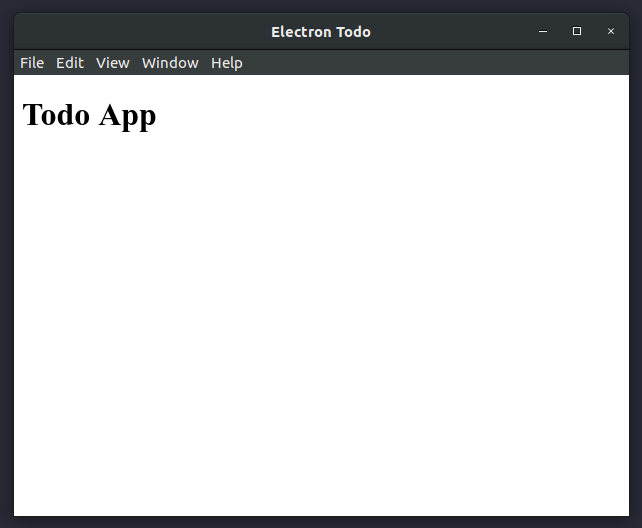
Finally, run npm start to make sure it works. ( I changed my HTML to some placeholder text )
Tweaks
Let’s make some tweaks to the boilerplate. ( all the code is on GitHub )
Use Strict
I added “use strict” to the top of all JS files to use the stricter version of JavaScript. See the rules of strict mode here if you’re not familiar.
Object Oriented
We’ll do some basic OO programming using classes, starting with a Window class for creating browser windows. ( not to be confused with the global window object ) You could add another class for managing multiple windows but in this project, we’ll only have two windows.
Important Update: For Electron v5 and above change the defaultProps object to include this additional config to use Node in the renderer process:
const defaultProps = {
  width: 500,
  height: 800,
  show: false,
  webPreferences: {
    nodeIntegration: true
  }
}

This class allows us to create windows with a default config, load an HTML file, open the devtools in the new window and gracefully display the window when it’s ready to show. It still has all of the BrowserWindow’s methods and anything we add on top of it.
ready-to-show is emitted when the renderer process has finished rendering the page. Using it will prevent any flicker on pages with a lot of content to load. Read more about it here.
If you’re not familiar with objects in JavaScript then get a quick overview with this post.
Note: It’s entirely up to you how you design your app, you don’t need to use classes. Just be wary of any possible memory leaks and try to keep your code clean.
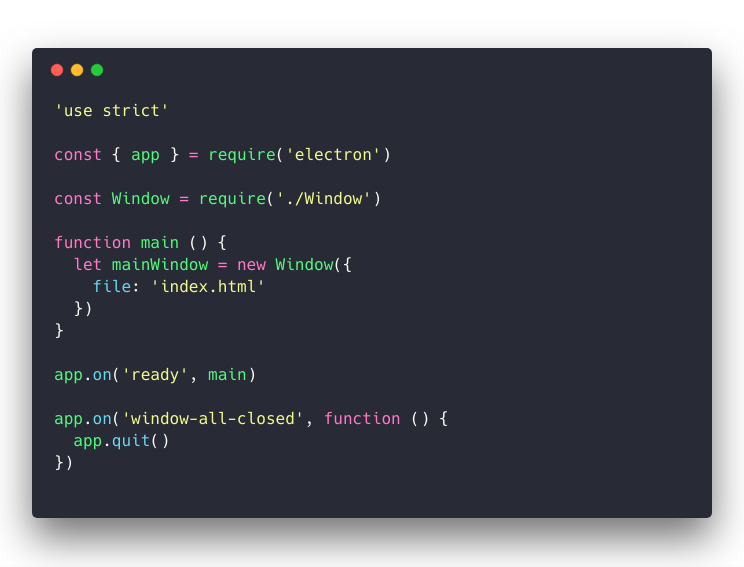
Cleanup Main.js
I’ve removed most of the boilerplate to keep it clean for presentation purposes. Besides cleanup, I’ve also added a main function that for right now, only creates a new window.
System Font in CSS
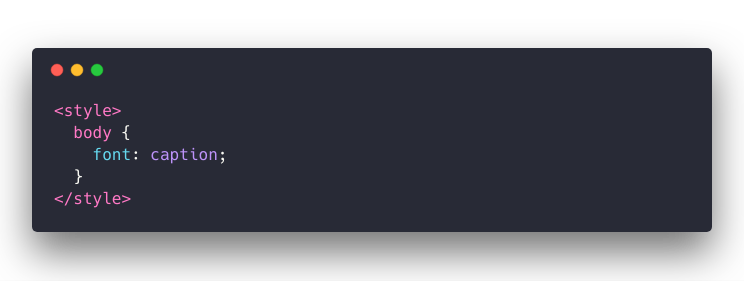
It’s really easy to use the system font, we just use font: caption in CSS. ( I added a style tag to the HTML and put it there )
The Final File Structure
For future reference my file structure by the end of this tutorial is this:
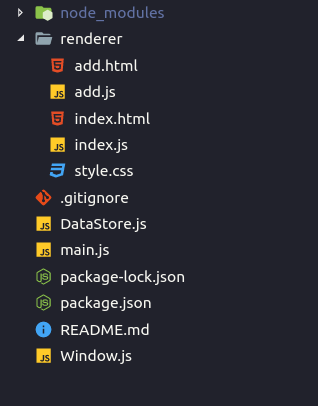
- index.html — Todo List Window HTML
- index.js — renderer JS for Todo List Window
- add.html — Add Todo Window HTML
- add.js — renderer JS for Add Todo Window
- style.css — all CSS styles
- DataStore.js — handles JSON data
- main.js —the main process entry point
- Window.js — class for creating windows
What this App Does
Now that we got the basic boilerplate out of the way let’s figure out how the app will look and what each part of the app does.
Todo List Window
- Displays todos
- Sends data control events to the main process i.e
delete todo - Sends request to create an “Add Todos” window to the main process when adding a todo
Add Todos Window
- Input for adding a todo
- Sends the new todo to the main process
Main process
- Writing data — adds todos, removes todos
- Reading data — reads todos
- Sending data — will send todos to the Todo List window on initial load and when updated
- Receives data — from both windows and handles communicating between windows
- Creating Windows — creates the Todo List window and an Add Todo window when requested by the main window.
Storing the Data
We have a few options for storing data.
- Local Storage API — the browser’s storage
- Disk Storage — on the user’s computer using whatever format i.e JSON, CSV, etc
- Database — we could use a local database or one on a server
Each has their pros and cons. We’ll see how to implement all of these methods.
Data Flow
Overall the data flow / events will look something like this:

Okay, that diagram totally looks like a bomb with a bunch of wires to cut… try not to overthink it. 😅 There are other ways to do it — you could use a simple modal orelectron.remote to access the main process directly for adding/modifying todos.
App Preview
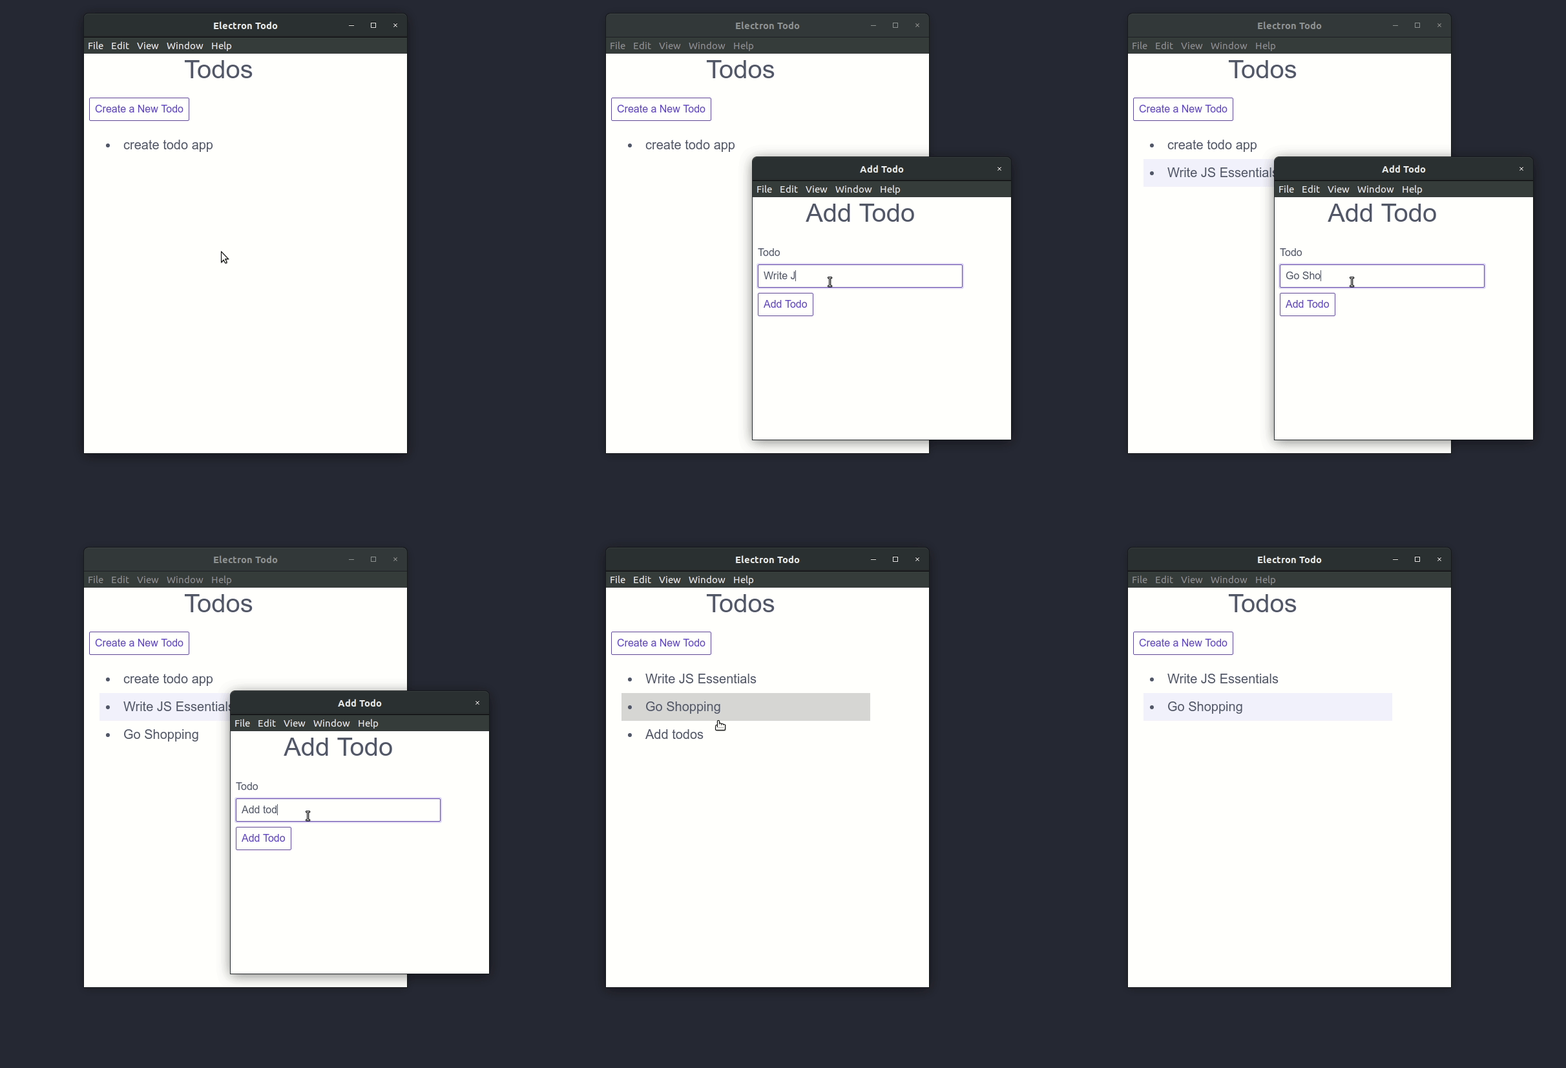
The app will look something like this and the todos will persist after closing the app. The styling is very minimal here, it’s all about the flow of data.
Coding the Data Manager
Let’s start with the data. I mentioned there are three ways to handle data — local storage API, disk storage, or a database.
Local Storage and Databases
These are easier to transfer to or from a website and in this todo app you would handle it in the renderer JS doing something like this:
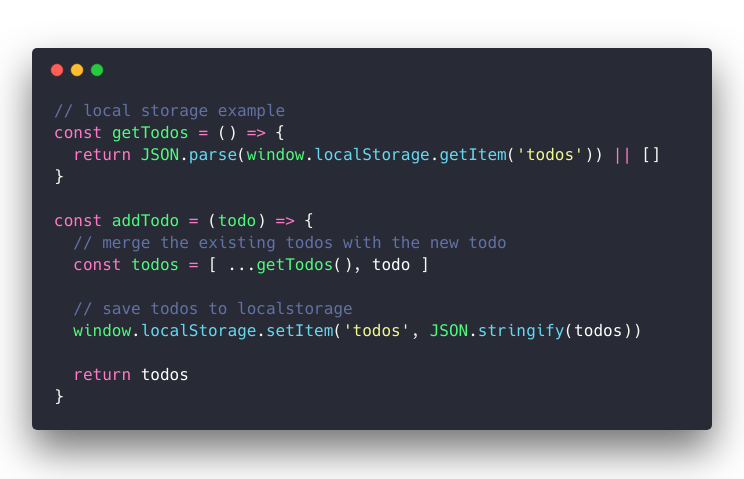
A database would be similar just using an API call on either the renderer or on the main process. We’ll be focusing on file storage in this tutorial.
Storing Data on the Filesystem
The first question is where do we store our data? Most of the time you store it in an “App Data” folder that differs for each operating system. This is where we’ll be storing our data.
Linux: _~/.config/<App Name>_
Mac OS: _~/Library/Application Support/<App Name>_
Windows: _C:\Users\<user>\AppData\Local\<App Name>_
In Electron we can use [**app.getPath('userData')**](https://github.com/electron/electron/blob/master/docs/api/app.md#appgetpathname) to get the correct folder. Then we make a function to write our data to the disk or we use a library that does it for us.
Using a Library to Store Data
Storing data in Node is pretty straightforward — convert the data to a string then use fs.writeFile to write it to the disk. This is not a Node tutorial so let’s instead explore a library made for Electron.
https://github.com/sindresorhus/electron-store
This library handles creating the JSON file and reading/writing to it. For example:
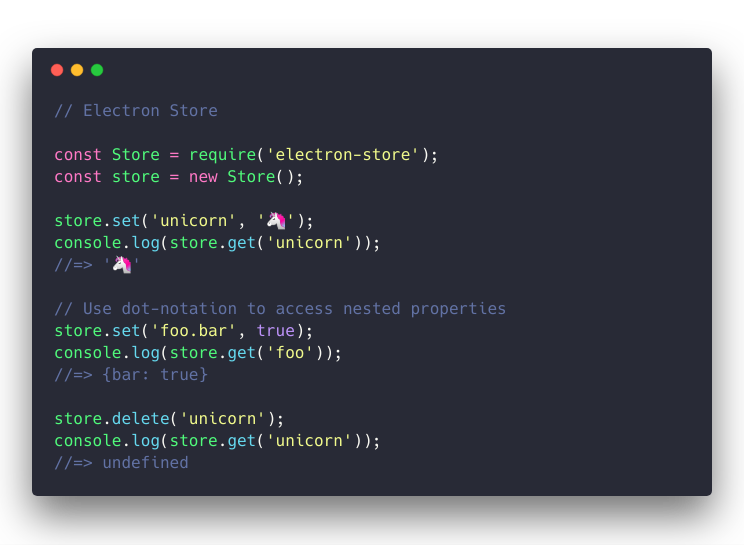
DataStore.js
Notice that electron-store uses an object constructor for Store — let’s try extending this object ( just like we did with BrowserWindow ) so we could easily have multiple todo lists stored if we wanted to.
Our DataStore class could be something like this:
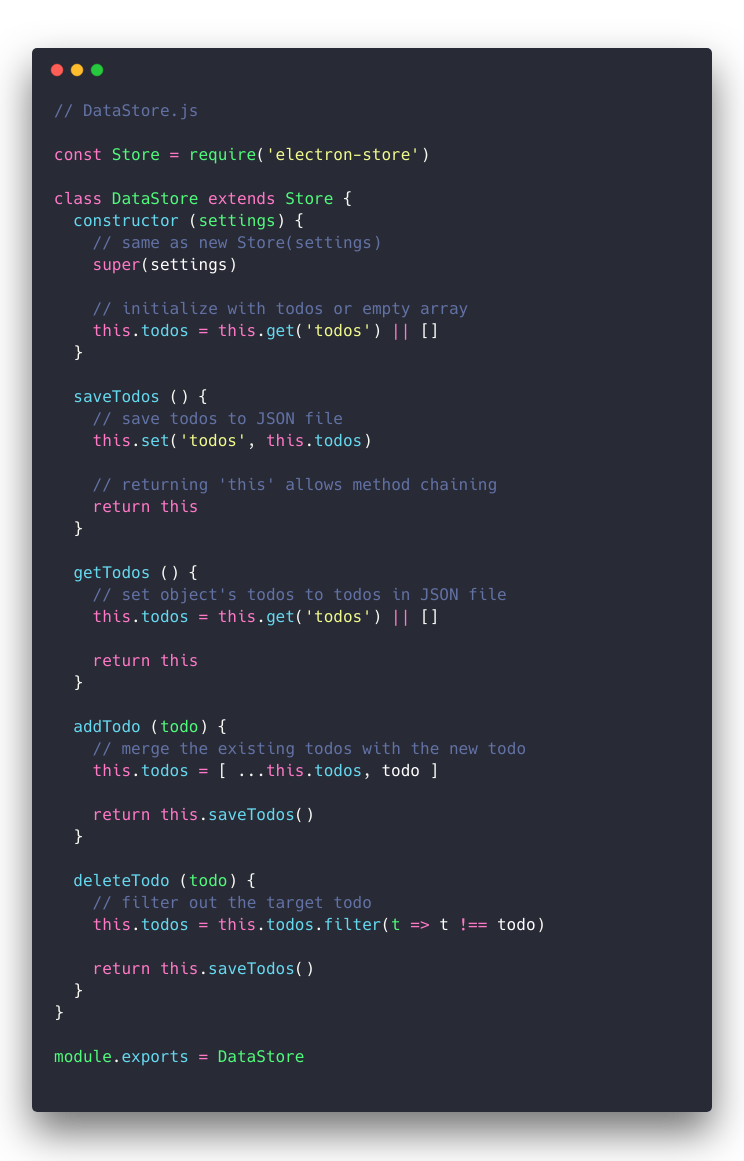
Here all of the todos are stored in an array on the object and there are methods for interacting with them. Storing it on the object prevents us from having to do expensive file operations every time we want to access our todos — there are pros and cons to the class defined above but that’s beyond the scope of this tutorial.
The get and set methods come from electron-store and handle the JSON file.
Returning this allows method chaining, which is not really necessary, but it’s a nice addition. Here’s the DataStore in practice:
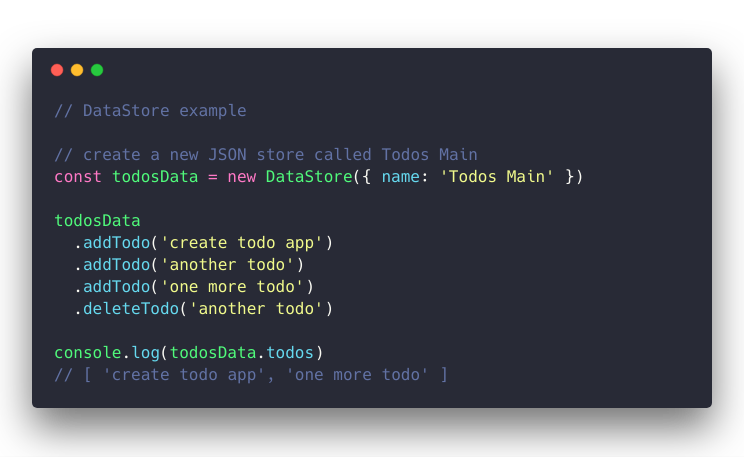
And if we check our app data folder: ( I’m on Linux )

On a side note, you’ll notice that Local Storage and other files we didn’t create also exist in our app data folder.
Wiring it all up
Finally, let’s connect all of the pieces.
You may recall this diagram from earlier:

So far we’ve created the Data Manager ( DataStore.js ) and can handle creating windows with our Window class. All that’s left are the event handlers. ( the wires in the diagram )
Note: I left out “Complete todo” to keep it simple.
File Structure
As a reminder the file structure at this point looks like this:

Event Listeners on the Main Process
If you recall from previous tutorials we use ipcMain.on() for listening and myWindow.webContents.send() for sending events from the main process.
Looking at the diagram above we need to listen for:
- Create Todo
- Delete Todo
- Add Todo
- Create Todo Window
This is our final main.js ( which is where I added these listeners )
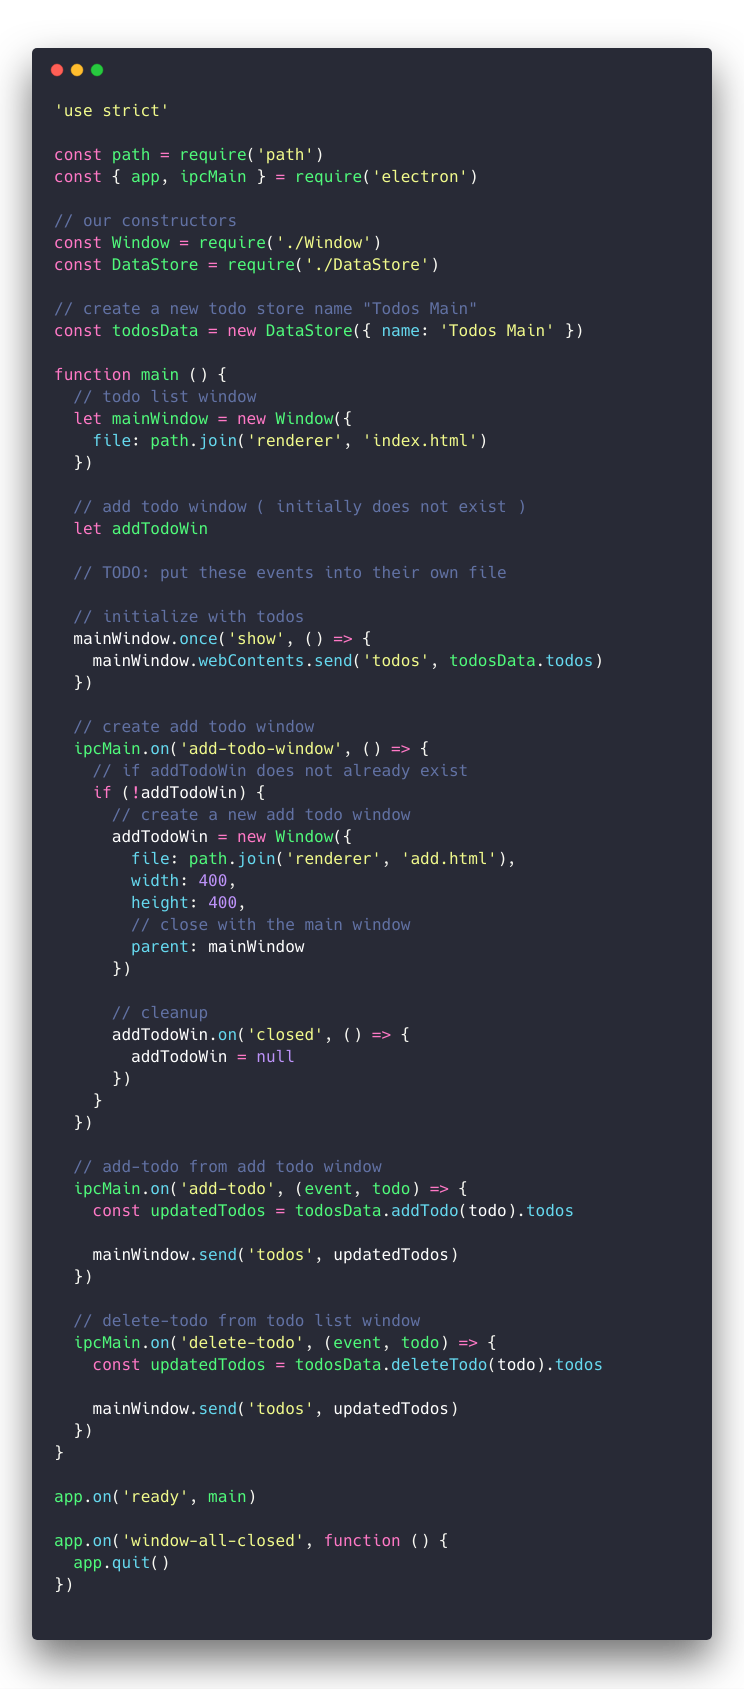
It’s pretty self-explanatory and could be cleaned up a bit. All we do is listen for an event then use our DataStore instance todosData to handle the data.
Event Handlers on the Todo List Window
Here is where we’ll be sending all the events we’re listening for in the main.js as seen above. This will involve selecting DOM elements so let’s look at the HTML first.
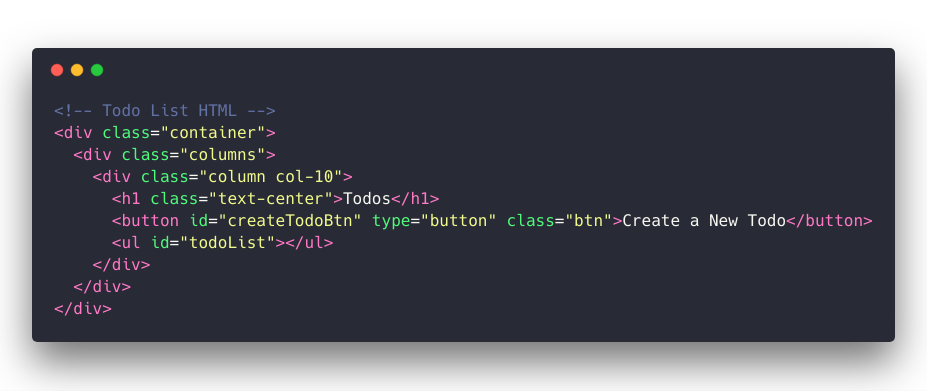
I’m using Spectre.css for styling. The important part here is the button id and the ul id.
In the JS file for the Todo List window:

Here we say when the button is clicked send the ‘add-todo-window’ event to the main process which then opens the Add Todo Window.
Next, we listen for the ‘todos’ event which is sent by the main process when the window first loads, and when the todos change.
We then generate the HTML for those todos and add event listeners that handle when an item is clicked — sending the ‘delete-todo’ event to the main process.
Event Handlers on the Add Todo Window
This one is pretty straightforward.
The main part of the HTML is a form:
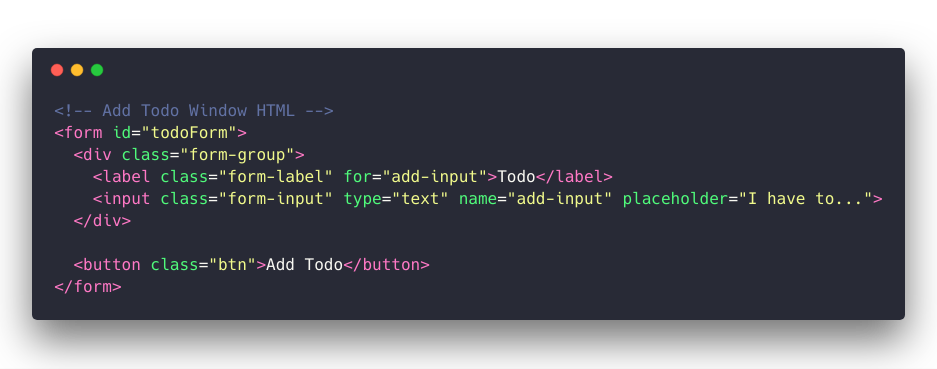
And the JS:
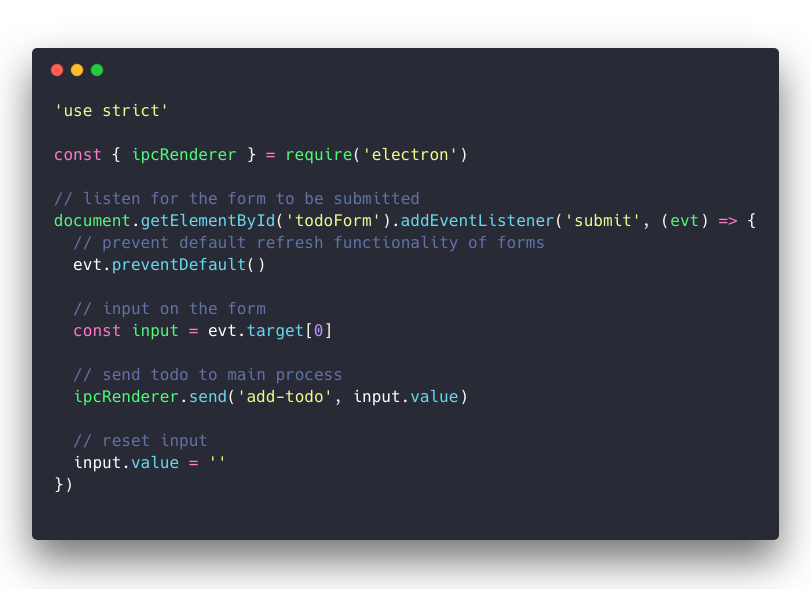
Once the form is submitted we send the input text and then clear the input to allow more values to be added.

And that’s it!
Recap
We covered:
- File Storage
- Local Storage API / Database ( briefly )
- Where to store data
- Multiple Windows
- Window ← → Window communication ( add todo window → main process → todo list window )
- The general data flow of an electron app
- Object Oriented programming to extend objects
Some Ideas for Improving the app
We’ll cover these techniques in later tutorials.
- Remove the default menu and add a custom one
- Add some CSS transitions
- Use a hidden browser to create a new process to save the todos
Suggest:
☞ Build a Native Desktop App with Electron (YouTube Stats App)
☞ How To Build a Node.js Application with MongoDB
☞ NodeJS With MongoDB Tutorial For Beginners
☞ MongoDB Complete Introduction & Summary