Building a Vue SPA With Laravel

Prerequisite
- Fundamental of Laravel
- Fundamental of Vue
- Fundamental of VueRouter
1. Install Laravel
composer global require "laravel/installer"
This command allows you to install the Laravel installer, so you can create a new laravel project easily in the future.
Once it completed downloaded. Enter the following command.
laravel new <any-projects-name-you-want>

You just have to wait until it completes to download.
1.1 Remove preset scaffolding Optional
This is the optional step.
We are not using the scaffolding in this tutorial. Therefore, I am going to remove it to keep the folder structure as neat as possible.
Simply enter the command below.
php artisan preset none

After removing the scaffolding, remember to run npm install to install all the dependencies.
Thanks to John LeVan
2. Install Vue, VueRouter and Vuetify
npm install vue vue-router vuetify
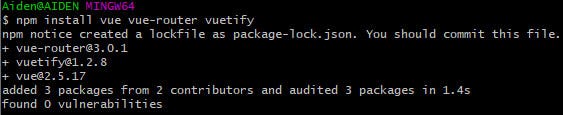
By enter this command, Vue, Vue Router and Vuetify will be downloaded into your node_modules folder.
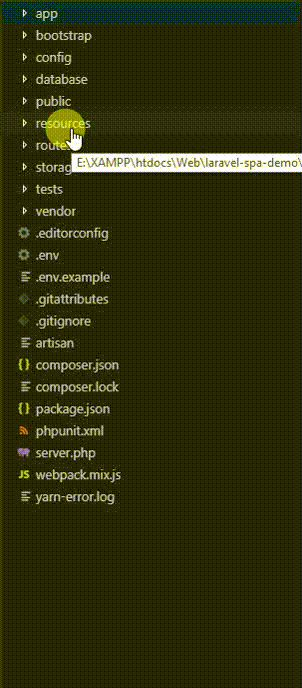
3. Create app.blade.php
Rename welcome.blade.php to app.blade.php under resources/views directory.
Remove the code and tweak it like the screenshot below.
The reason to do so is to keep your code simple and clean.
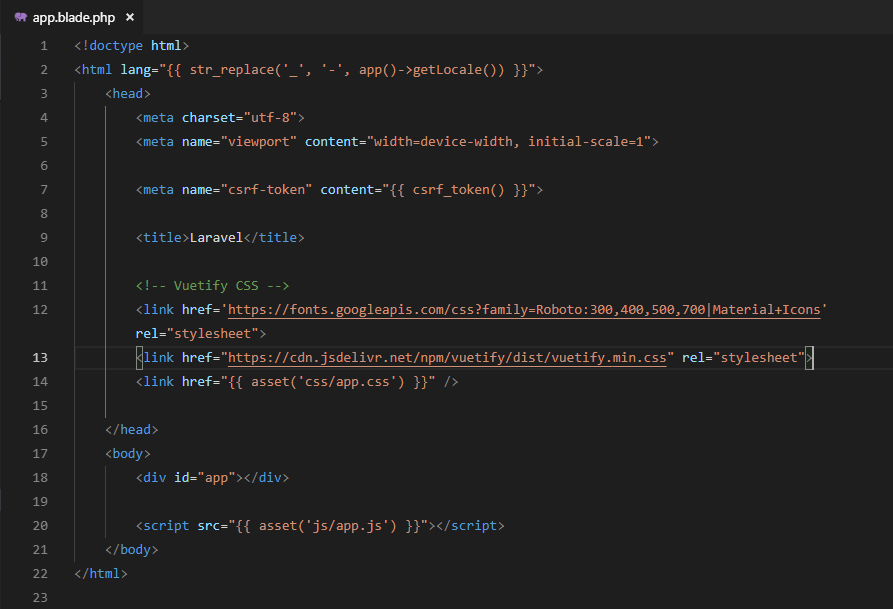
We included Vuetify CSS because we will be using it later. You can find the the code easily from here.
You need to add <meta> of CSRF. Axios need to fetch the CSRF from the meta and insert it into Axios header. If you don’t do so, you are not allow to submit your form by using POST method.
You can get the line of code from this Laravel CSRF.
4. Modify Laravel routes
Go to routes/ directory and open the web.php.
Replace the default with the code below.
Route::get('/{any}', 'SinglePageController@index')->where('any', '.*');

Without this line of code in the web.php, your Vue Router can’t work properly.
5. Create Controller
After updating the web.php file, we need to create a SinglePageControllerto handle the route.
Go to your terminal and enter the command below:
php artisan make:controller SinglePageController
You will see the controller are created under app/Http/Controllers/ directory.
Open the SinglePageController.php file and add the line of codes below into the class.
public function index() {
    return view('app');
}
6. Modify app.js
Open your app.js file under resources/js/ and tweak the script as screenshot below.
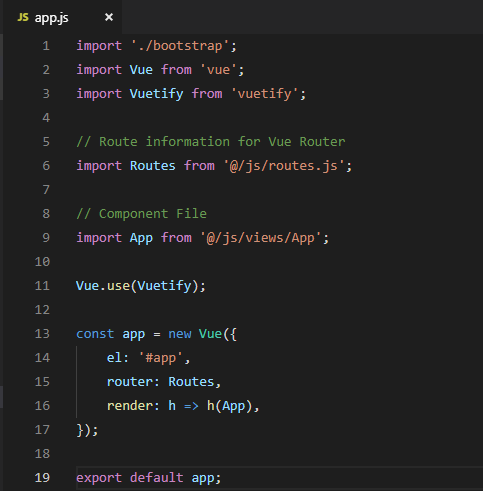
I prefer to use import for my own preferences.
Read this post from Stack Overflow if you want to know more about import and require
If you run npm run watch now, you will receive an error message from the Toast.
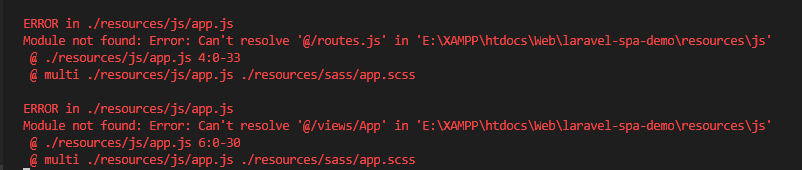
This is because we still haven’t create the routes.js and App.vue.
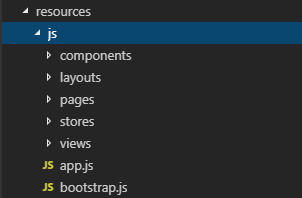
7. Structure the js directory
We have to create some folders into the resources/js/ directory.
Although we are not using the folder now, but I always keep this as a habit when I am setting up for SPA by using Laravel.
We are creating a layouts, pages, views and stores folder. By right, I also need to create a routes folder but I will skip this for now in this tutorial.
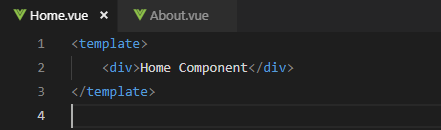
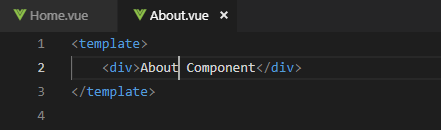
8. Setup Vue Components
We need to create some components now.
Let’s create Home.vue and About.vue under resources/js/components/ directory.
You can delete the ExampleComponent.vue component if you want to. Since we are not using it.
We just need to create a very simple template here.
And now, we need to create App.vue under resources/js/views/. This would be the main file that used to render those files which fall under those directories which we created earlier.
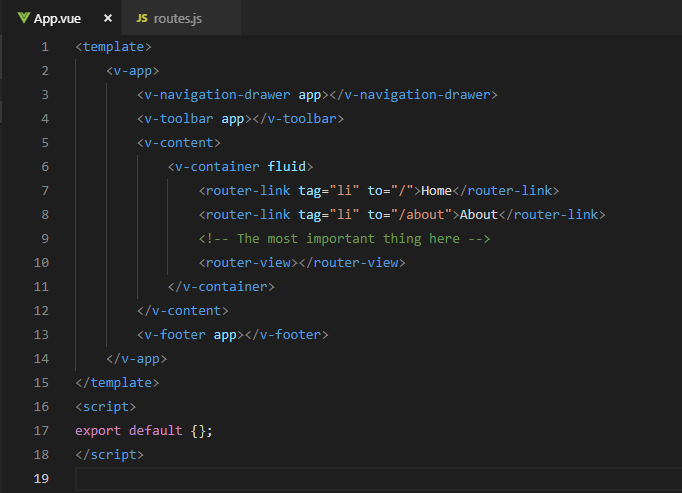
You might find these HTML tags are very complex. You can ignore them for now because those HTML tags are used for Vuetify.
The most important part of the scripts is the <router-view>. This is where you see your content of the component.
If you npm run watch, you will realize the error about App.vue is missing. This is because we have created the file.
9. Setup Vue Router
We need to create a route in order for us to navigate.
You will need to create a routes.js file under resources/js/ directory.
Then you just need to input the code as shown below.
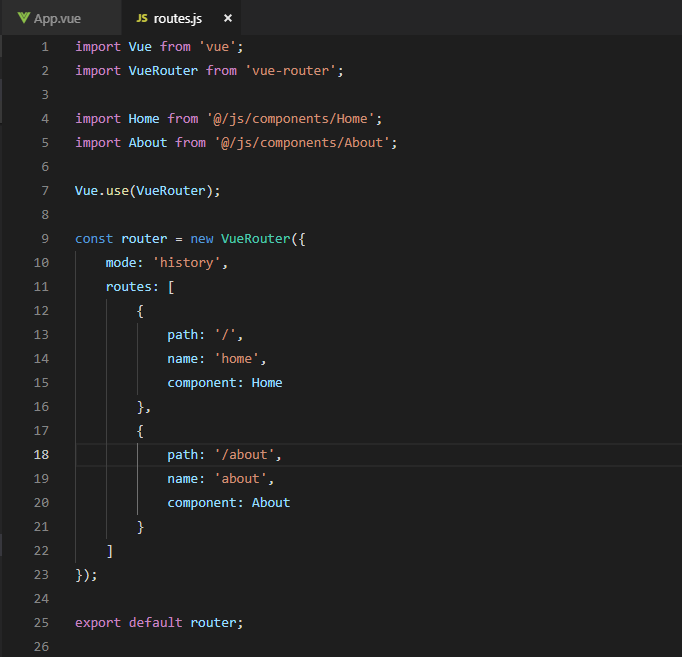
As you can see we import the components we created earlier under resources/js/components/
If you compile the file by enter the command of npm run watch now, you will receive an error, because the compiler does not understand what does the @ used for.
10. Setup webpack.mix.js
Let’s go to webpack.mix.js at your root directory.
We need to define the @ in order to tell the compiler what does the @ uses for.
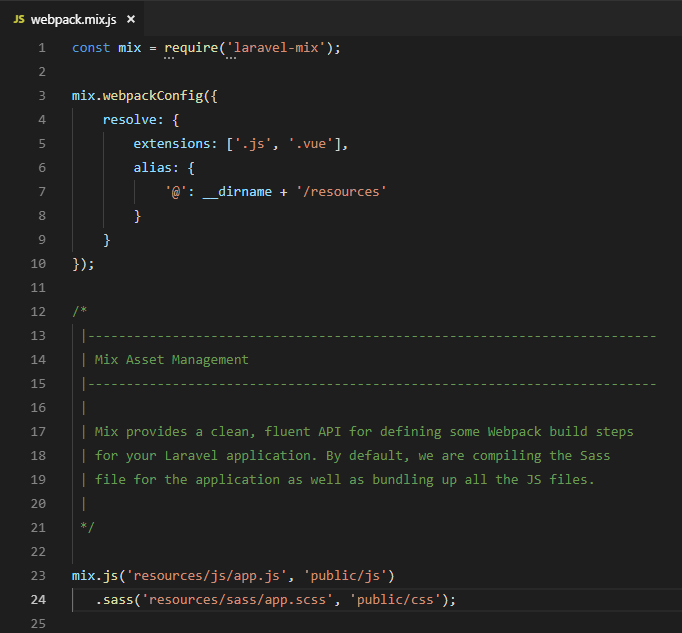
After adding the alias in webpack.mix.js, then the compiler would understand the @ is represent resources/.
Why we want to do so? In the future your directory might have a lot of levels. This is to save your time to typing ../ instead you just need to type @.
Now, re-run your npm run watch again.
Because your compiler need to re-compile the webpack you adjusted in order to understand the alias.
You will see this in a while.

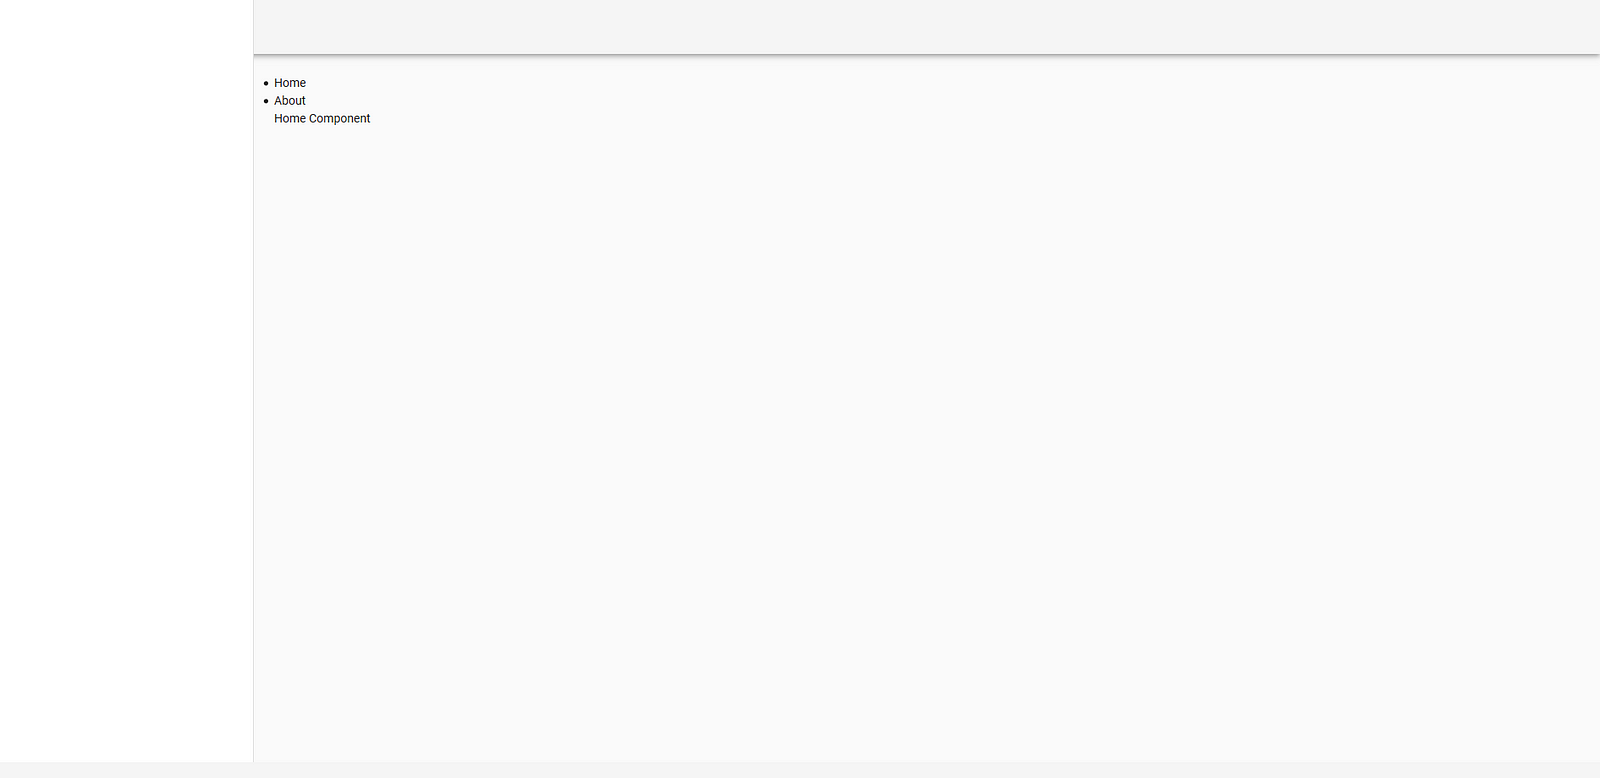
11. Let’s run and see the result.
Let run the command below, php artisan serve
By doing so, your website is now live on your localhost, [http://localhost:8000](http://localhost:8000).
Some of you might ask why I want to post the screenshot but not sharing the code.
Well, simply because I want all of you to code by yourself and memorize it.
I hope you enjoy my tutorial.
30s ad
☞ Vuejs 2 + Vuex + Firebase + Cloud Firestore
☞ Building Applications with VueJs, Vuex, VueRouter, and Nuxt
☞ Ethereum and Solidity: Build Dapp with VueJS
☞ Learn Web Development Using VueJS
☞ Vuejs 2 + Vuex con TypeScript Nivel PRO
☞ Curso de Vuejs 2, Cognito y GraphQL
Suggest:
☞ Learn GraphQL with Laravel and Vue.js - Full Tutorial
☞ Is Vue.js 3.0 Breaking Vue? Vue 3.0 Preview!
☞ Laravel Tutorial - Abusing Laravel
☞ Learn Vue.js from scratch 2018
☞ Vue js Tutorial Zero to Hero || Brief Overview about Vue.js || Learn VueJS 2023 || JS Framework