Building A Vue.js Blog : Launch in 2 Hours

Which ones should you use? Well, a few. My favourite one right now is Vue.js
That progressive JavaScript framework is well-worth your time (I swear; scout’s honor).
Be it to refactor your app’s frontend, craft a complex, SEO-friendly SPA, or launch a simple blog.
And building a Vue.js blog is precisely what I’m going to focus on today.
In this post, I’m going to provide an open source Vue.js blog demo and cover:
- Setup and routing
- Displaying your blog feed with filters
- Displaying individual posts with comments
- Creating a custom Vue plugin to keep your data decoupled
The result will be a JAMstack-ready, truly decoupled Vue blog you can plug into any data source — more on that later.
Important note: for this post, we assume you have a basic understanding of Vue.js.
Separating concerns in our Vue blog application
Take a quick look at the important bits of the document tree:
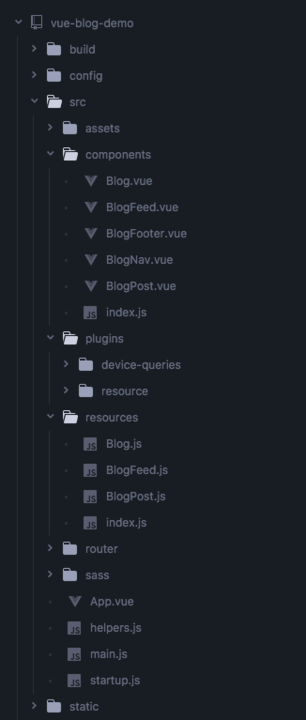
I won’t go into the details of the webpack setup. But those familiar with Vue would recognize the vue-cli webpack template. We’re also using vue-routerfor routing purposes.
I’ve only added two folders to the base setup: src/sass and src/resources. We’ll get into why the Vue app’s Sass is separate from the components another time.
The src/resources folder is where we’ll put our decoupled data-access layer which we discuss towards the end of the post.
The component tree itself is nothing groundbreaking:
<Blog>- Our homepage<BlogNav>- Handles navigation logic<BlogFeed>- Renders the post listing<BlogPost>- Renders an individual post<BlogFooter>- Renders the static footer
Finally, we’ve got the router used for URL handling and passing down props.
router.js
import Vue from 'vue'
import Router from 'vue-router'
import Blog from '../components'

Vue.use(Router)

export default new Router({
  mode: 'history',
  linkActiveClass: 'active',
  routes: [{
    path: '/',
    name: 'feed',
    component: Blog
  }, {
    path: '/by/:author',
    name: 'author',
    props: true,
    component: Blog
  }, {
    path: '/read/:post',
    name: 'post',
    props: true,
    component: Blog
  }]
})
I’ve taken a slightly non-traditional approach, as the router will always render the same component. We handle displaying the right content ourselves, the <Blog> component is our main hub dispatching props to its three children.
The first route is our site root which just displays our default view (<BlogFeed>) unfiltered.
The second is our authors filter, accessed by navigating to /by/:author. Vue-Router grabs any path nodes preceded by : as variables and injects their value into the route’s component as props.
Last but not least, we do the same thing for the /read/:post route, which will display a single blog post’s content.
Rendering the blog feed
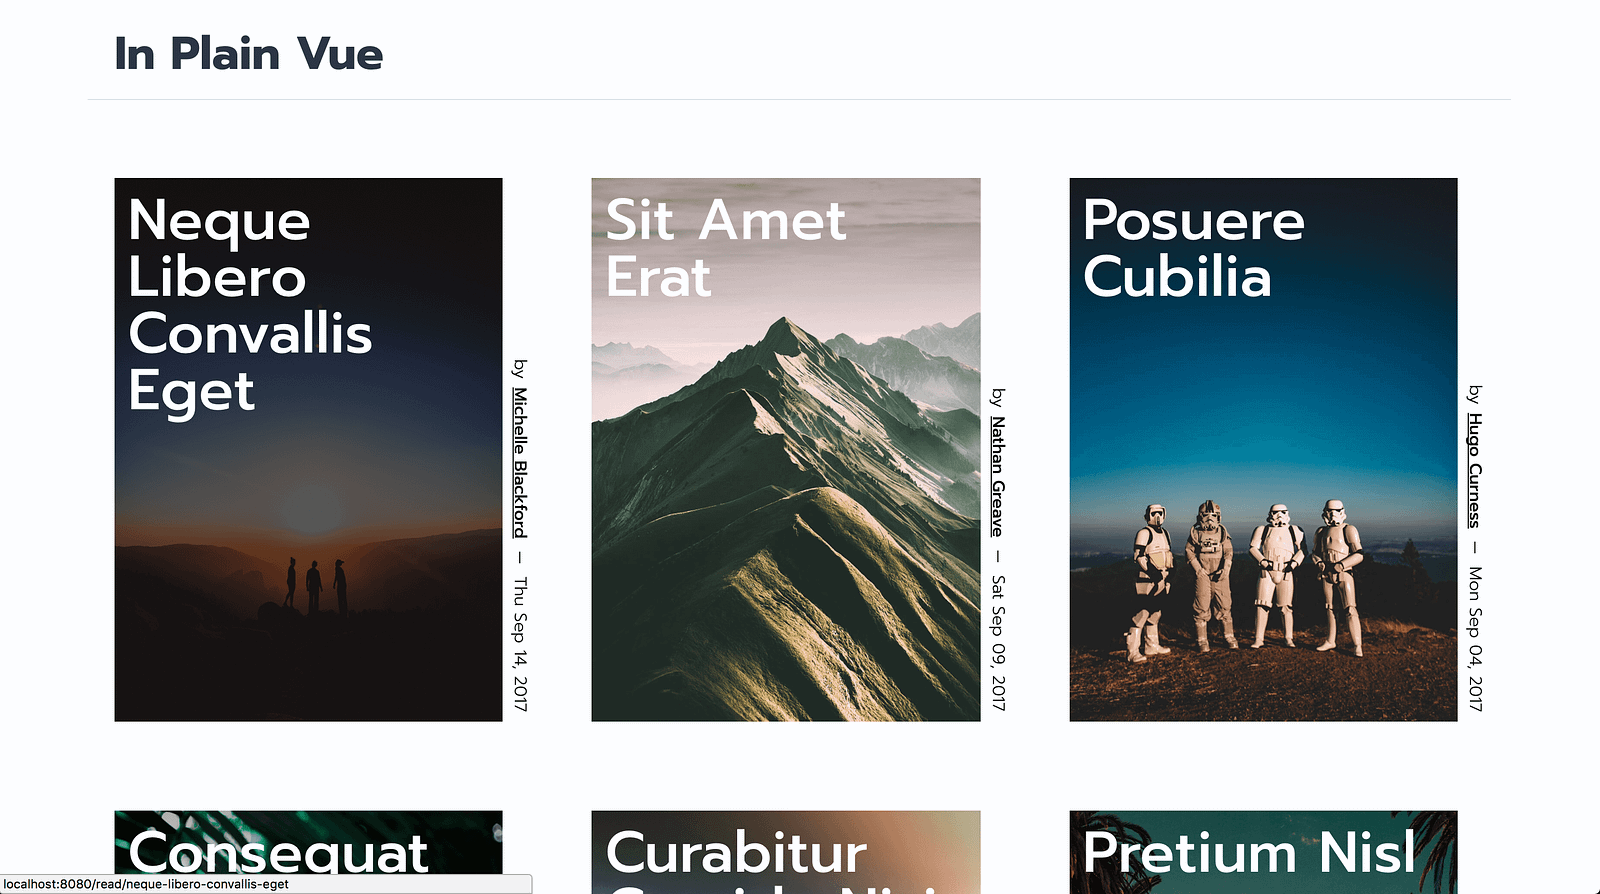
For now, we’ll skip over actually fetching our data and assume it’s already been loaded. Here’s what the <BlogFeed> Component looks like:
BlogFeed.vue
<template>
  <transition-group tag="ul" :name="preview"  class="blog__feed">
    <li v-for="post in feed" class="preview" :key="post.id">
      <figure class="preview__figure" :style="getBgImg(post.image)">
        <transition name="v--fade">
          <figcaption v-if="!reading || $device.phone" class="preview__details">
            <router-link class="preview__title" :to="`/read/${post.id}`">
              {{ post.title }}
            </router-link>

            <div class="preview__meta">
              <time class="preview__published">
                {{ prettyDate(post.published) }}
              </time>

              <router-link class="preview__author" :to="`/by/${kebabify(post.author)}`">
                {{ post.author }}
              </router-link>
            </div>
          </figcaption>
        </transition>
      </figure>
    </li>
  </transition-group>
</template>

<script>
import { kebabify, getBgImg, prettyDate } from '../helpers'
export default {
  name: 'blog-feed',
  resource: 'BlogFeed',
  props: { filters: Object },
  data() {
    return { transition: 'preview-appear' }
  },

  computed: {
    reading() { return this.filters.post },
    feed() {
      const filterBy = {
        post: (filter, { id }) => filter === id,
        author: (filter, { author }) => filter === this.kebabify(author)
      }
      if (!Object.keys(this.filters).length) return this.posts

      return this.posts.filter(post => {
        return Object.keys(this.filters).every(filter => {
          return filterBy[filter](this.filters[filter], post)
        })
      })
    }
  },

  methods: { kebabify, getBgImg, prettyDate },
  beforeMount() { this.$getResource('feed') }
}
</script>
As you can see towards the top of the script, we receive a filters object from the parent <Blog> component. The feed() computed property will take care of handling any changes to the filters as they happen. It filters the post array by looping over each active filter and running the corresponding function against the post. It then returns only posts that pass every test.
In our template, we v-for the filtered feed, which will keep it up to date at all times. This is probably the most efficient way of handling filters. As you can easily add new ones by appending a new method to filterBy.
Clicking a post will change the route to that post’s ID. But you may notice that the selected image from the feed remains visible on the left side. We never actually hide the listing, we only filter out any post whose ID does not match, leaving us with one post.
In case you’re inclined, I recently covered some Vue transitions used here on CSS-Tricks.
Rendering individual blog posts
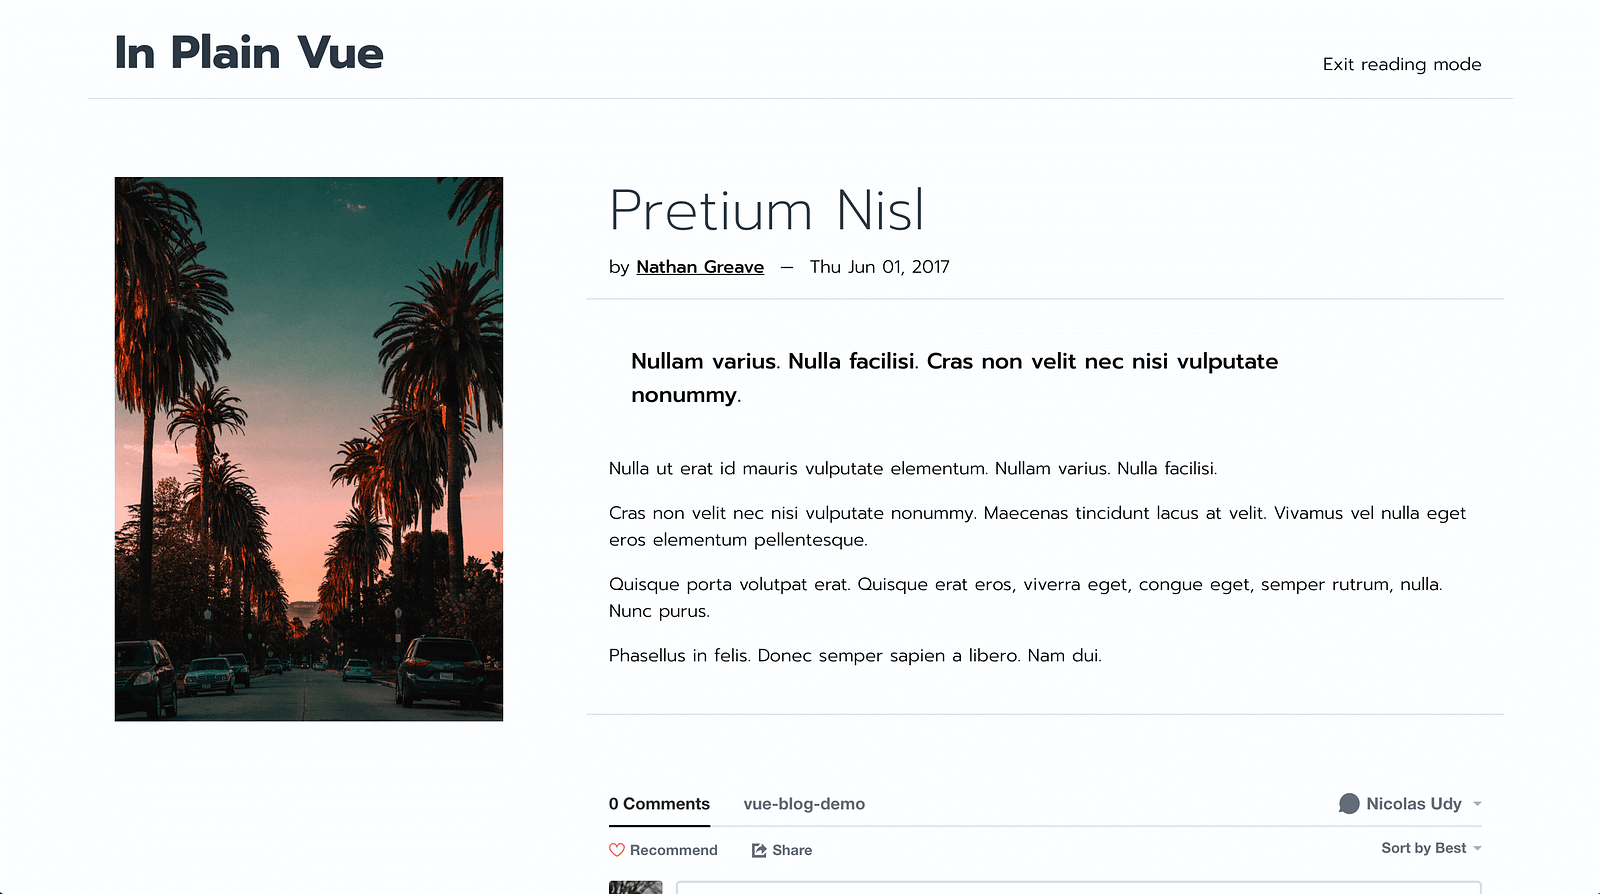
Okay, we’ve got the right image displayed on the left side. Now we only need to bring in the corresponding content to its right. It may seem counter-intuitive, but the <BlogPost> component is always there waiting for something to do.
As soon as a /read/:post route is hit, it will load the corresponding post and slide into view using a Vue <transition>. The rest is a plain old Vue template, putting the right variables in place. You’ll generally receive the post body with the HTML pre-inserted. Make sure to use the v-html attribute instead of {{ mustaches }} to avoid auto-escaping tags.
In the demo, I used Disqus along with vue-disqus to add comments to posts. This is what I like the most about the state of frontend development these days. You can add features like these in minutes.
Vue data decoupling: a word on the JAMstack
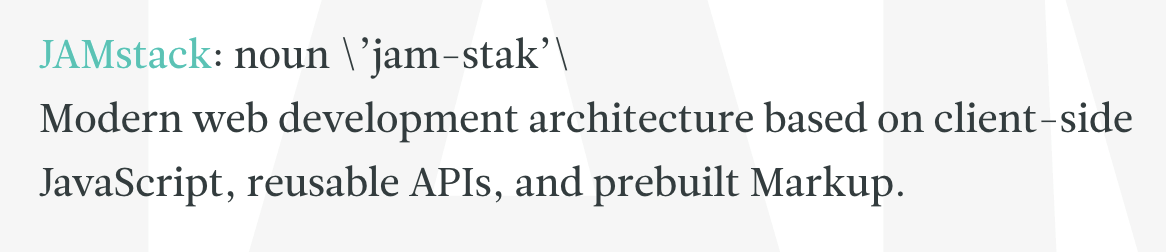
The JAMstack (JavaScript, APIs, & Markup) is the product of frontend development’s rapid evolution in recent years, notably in the JS community.
Get up to speed on the JAMstack with this key talk.
In my honest opinion, two of its most redeeming features fuel its rise in popularity:
- Ease of access Familiar languages/frameworks coupled with abstracted back-ends make it hard to resist. I wouldn’t be shocked to learn most front-end developers share my dread for databases.
- Decoupled data source In theory, it doesn’t matter where your data is coming from or how many APIs you’re calling to get it, as long as you can feed it to your App. For websites, this means you’re never strictly bound to your CMS. You can swap it out if need be.
Why does it matter?
As much as I enjoy working with data, I don’t like managing it.
The decoupled backend is without a doubt an attractive prospect. One that I sold to my boss when looking into building a website with Vue.js and a headless CMS. As it turns out, it’s very easy to allow your API’s data structure to define your App’s inner workings. Sooner or later, you’ll find yourself wondering what happened to the whole “decoupled” argument.
A good hint that you’re falling into this trap is if you’re fetching data and parsing the response within your Vue components. The first step is to removeall your API calls from your components to create a replaceable data-access layer.
There are a ton of tools and techniques to help you implement this sort of pattern. What’s difficult is making sure you keep them in mind while building your website or App.
Creating the resource plugin
This blog demo is a simple, open source example of how you could go about it without adding any dependencies other than lodash.merge (4.2kb gzipped).
Often, the simplest way with Vue is to use its plugin system. You’ve probably made use of it before, like mounting the router or Vuex. As a refresher, all you need to do is pass a plugin to Vue.use() along with any options before creating your root Vue instance.
Behind the scenes, Vue takes the plugin object and looks for an install()method. It calls this method passing in Vue as the first argument and your options object as the second.
There are a whole bunch of sweet things you can do within this scope. But our mission today is only to create a $getResource instance method. You’ll be able to call this method using this.$getResource(method, options) from within a component. This approach is pretty cool since it’s mounted to each new component instance. That’s a fancy way of saying you get access to the component’s this binding as you’re used to.
Head over to ./resources/resource.js:
resource.js
import _merge from 'lodash.merge'

export default {
  // don't be a fool, make use of defaults
  install(Vue, { endpoint = '', resources = {} }) {
    // add the method to the Vue prototype
    Vue.prototype.$getResource = function(method, options) {
	  // this "this" references "this" in this component, ok?
      let name = this.$options.resource
      // turn around and walk away if anything is missing
      if (!name || !resources[name] || !resources[name][method]) return;

      // get the API path and response resolver
      let { path, resolve } = resources[name][method](options)

      // methods return promises to keep chain alive
      const mappers = {
	    // only return promise without modifying instance $data
        pipe: dataSet => Promise.resolve(dataSet),
        // deep merge dataSet with component's $data
        merge: dataSet => {
          _merge(this.$data, dataSet)
          return Promise.resolve(dataSet)
        },
        // set $data props, accepts "dot.notation" string access
        set: dataSet => {
          Object.keys(dataSet).forEach(prop => {
            this.$set(this.$data, prop, dataSet[prop])
          })

          return Promise.resolve(dataSet)
        }
      }

      // fetch and parse resource then pass it to the resolver
      return fetch(endpoint + path)
        .then(response => response.json())
        .then(response => resolve(response, mappers))
    }
  }
}
We assign the $getResource method to the Vue prototype. As you can see, our options are endpoint and resources.
endpointis an object ofresourcesand the API’s base URL to which we’ll append our query paths.resourcesare “implementations” or definitions indicating how to handle the resource.
We’ll get into those real soon.
The install() method creates a closure, capturing these options in its scope. Any function defined herein will have access to them at all times.
Stepping into the function, after a few checks to make sure we’ve got everything, we call the resource method. This method is defined to accept a string as the first argument and pass in any option received as the second argument. We grab the path property and the resolve method and define our three mappers:
pipe()returns the data in a Promisemerge()uses lodash’s merge utility to do a deep merge of thedataSetwith the component’s$dataset()loops overdataSet's keys, assigning them to the$data
That last bit is a pretty nice way of adding a shortcut without convoluting your code. Both methods conserve Vue’s reactivity and return a Promise. We can then chain .then(dataSet => {}) to run some logic after the fetch is complete.
Finally, a call is made to ES2015’s native fetch() method. The JSON response is parsed and passed along with the mappers to the resolvefunction.
Resource implementations
With most of the heavy lifting taken care of, we’re now ready to look at how we define our resources. If we look at the ./resources folder in our project you’ll see the implementation directory.
Open up implementation/BlogPost.js:
BlogPost.js
export default {
  post(id) {
    return {
      path: `/post/${id}.json`,
      resolve: (response, mappers) => {
        let { title, content, meta } = response.results[0]
        content = '<p>' + content.split('\n\n').join('</p><p>') + '</p>'

        return mappers.merge({ title, content, ...meta })
      }
    }
  }
}
This implementation offers a post() method, expecting a post id as a parameter.
It then returns an object containing the computed path and a resolver function that maps the correct response data to the component. Keep in mind, the goal here is to shape the data to match your components and not the other way around.
Connecting the dots
Now we can get things going by telling Vue to use our custom plugin. First, we create an index in our implementations folder. This index declares export { default as ResourceName } from './ResourceName' for each resource.
In main.js we pass the plugin and our resource collection to Vue like so:
main.js
import resource from './resources/resource'
import * as resources from './resources/implementation'

Vue.use(resource, {
	resources,
	endpoint: '/static/api'
})
Calling your resources
Now all that’s left to do is to call the resources from our components by adding a resource option with the name of the resource we want to use. When we call this.$getResource it will then know which one to load. I’ve included some sample JSON data in the static/api directory, which is what will be loaded and processed by our plugin.
Take <BlogPost> for example:
BlogPost.vue
<script>
import VueDisqus from 'vue-disqus/VueDisqus'
import { kebabify, prettyDate } from '../helpers'
export default {
  name: 'blog-post',
  resource: 'BlogPost',
  components: { VueDisqus },
  props: { post: String },
  data() {
    return {
      title: '',
      author: '',
      content: '',
      published: '',
      description: ''
    }
  },
  watch: {
    post(to, from) {
      if (to === from || !this.post) return;
      this.$getResource('post', to)
    }
  },
  methods: { kebabify, prettyDate },
  beforeMount() { if (this.post) this.$getResource('post', this.post) }
}
</script>
Simple stuff. We’ve got our component’s data object schema, all filled out with placeholders as recommended by Vue and our resource definition. In the beforeMount() hook, we check to see if the visitor has landed directly on a blog-post route and call it. Otherwise we wait for the post property to change and react by loading the new post.
We don’t even need to assign the response to the data. It gets assigned to our component data by the resolvers. Personally, I quite like this approach because:
- I like things that make my life easier.
- I like it when other people can figure out what’s going on. Our placeholder data is nicely defined and the calls to
$getResourcehint that we’re fetching data.
Awesome! We’re avoiding any references specific to our API’s implementation inside the component. Instead, we call our AJAX methods using an identifier. Much like you would with Vuex, Vue’s official state management plugin.
Result: live Vue.js blog demo (steal it!)
Closing thoughts
You should end up with a simple blog application front-end that is darn smooth and truly decoupled from the back-end. This means you could completely change API providers & data structure and nothing would change in your Vue components. All the necessary logic is in one place.
Again, my goal in this post is, among other things, open your eyes to this potential issue so you don’t get caught off guard.
Don’t adapt your app to the data, adapt your data to your app.
While the above is a given for many back-end developers, it might be new territory for the front-end ones.
The approach I’ve proposed works quite well but lacks some flexibility for large-scale projects. If you’re keen on managing the relationship between the App and API more closely, I recommend checking out the following resources:
- Vue.js documentation
- Tools like Vuex centralized data-store
- AJAX libraries like vue-resource or Axios
- Data-persistence layers like JS-Data.
As we’ve seen, Vue.js not only offers blazing fast data-reactivity, it’s also very flexible and extendable. In some of my recent projects, I’ve developed similar data-access layers that even take care of component data injection and validation. They also take care of defining and generating the input forms for the CMS.
Knowing your tools, their strengths/weaknesses and how to leverage them is the key to becoming a solid developer. I’ve hopefully nudged you closer towards that today.
Vue JS Essentials with Vuex and Vue Router ☞ http://bit.ly/2KCimX3
Build Web Apps with Vue JS 2 & Firebase ☞ http://bit.ly/2IK7Tnu
Vue JS 2: From Beginner to Professional (includes Vuex) ☞ http://bit.ly/2Ng631r
Suggest:
☞ Vue js Tutorial Zero to Hero || Brief Overview about Vue.js || Learn VueJS 2023 || JS Framework
☞ Vue.js Tutorial: Zero to Sixty
☞ Learn Vue 2 in 65 Minutes -The Vue Tutorial for 2018
☞ Create Shopping basket page With Vuejs and Nodejs