Building a Chat App With VueJs Cloud Firestore

Recently, Google’s Firebase platform released a new product, Cloud Firestore. Much like the Firebase real-time database, it is a NoSQL-based cloud database that can be used to build real-time applications. It addresses some of the problems Firebase has, like writing complex queries. You can read more about its features here.
In this post, I’ll be building a simple real-time chat application called Firechat which uses Vue and Vuex, and the new Cloud Firestore. I’ll look at how to integrate Firestore into a Vue.js application and some best practices with Vuex. You can get the final source code here on Github.
Vuex Easy Firestore Example
Let’s start by scaffolding a new Vue application using the vue-cli. I’ll use the _webpack-simple_template.
$ vue init webpack-simple firechat
Before going any further, I want to use the spread operator ... and async/await. We will also be using Vuex for state management, and uuid for generating random ids, so let’s install those. We will also need the Firebase module.
$ npm install babel-plugin-transform-async-to-generator babel-plugin-transform-object-rest-spread Firebase babel-polyfill vuex uuid --save
Next, in the project root directory, edit .babelrc like so:
{
  "presets": [
    ["env", { "modules": false }]
  ],
  "plugins": ["transform-async-to-generator", "transform-object-rest-spread"]
}
.babelrc
Now we can use the spread operator ... and await/async.
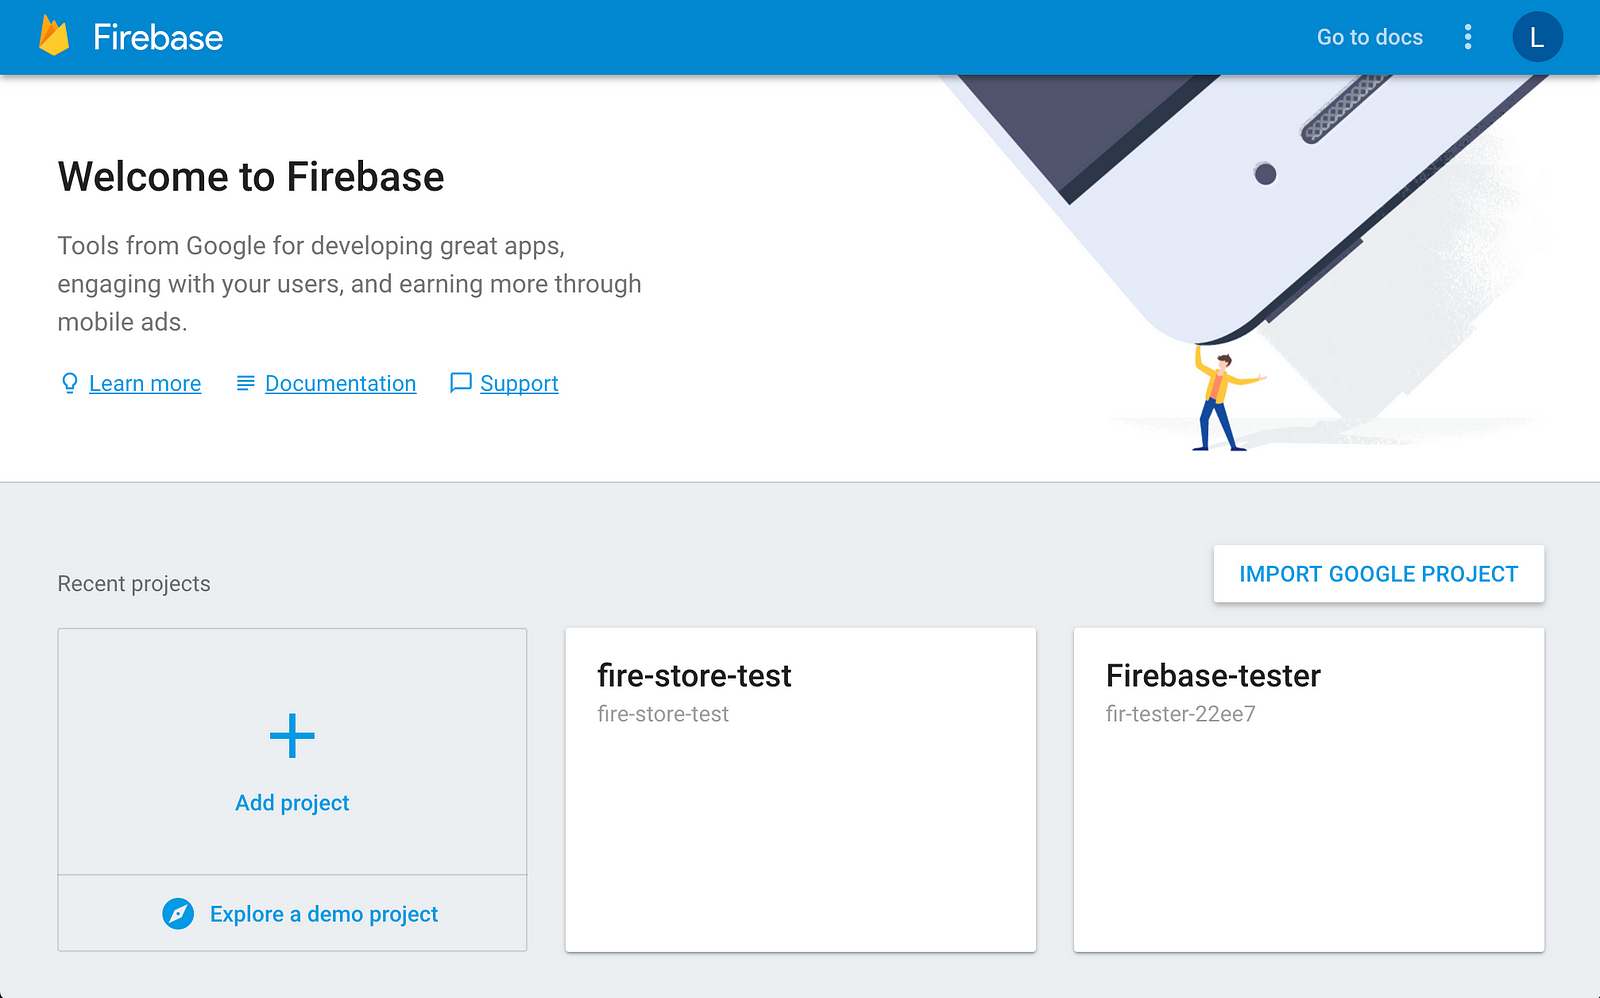
Before going any further, go to Firebase and sign up if you haven’t got an account. Once you do, click “Add Project” and enter a name.
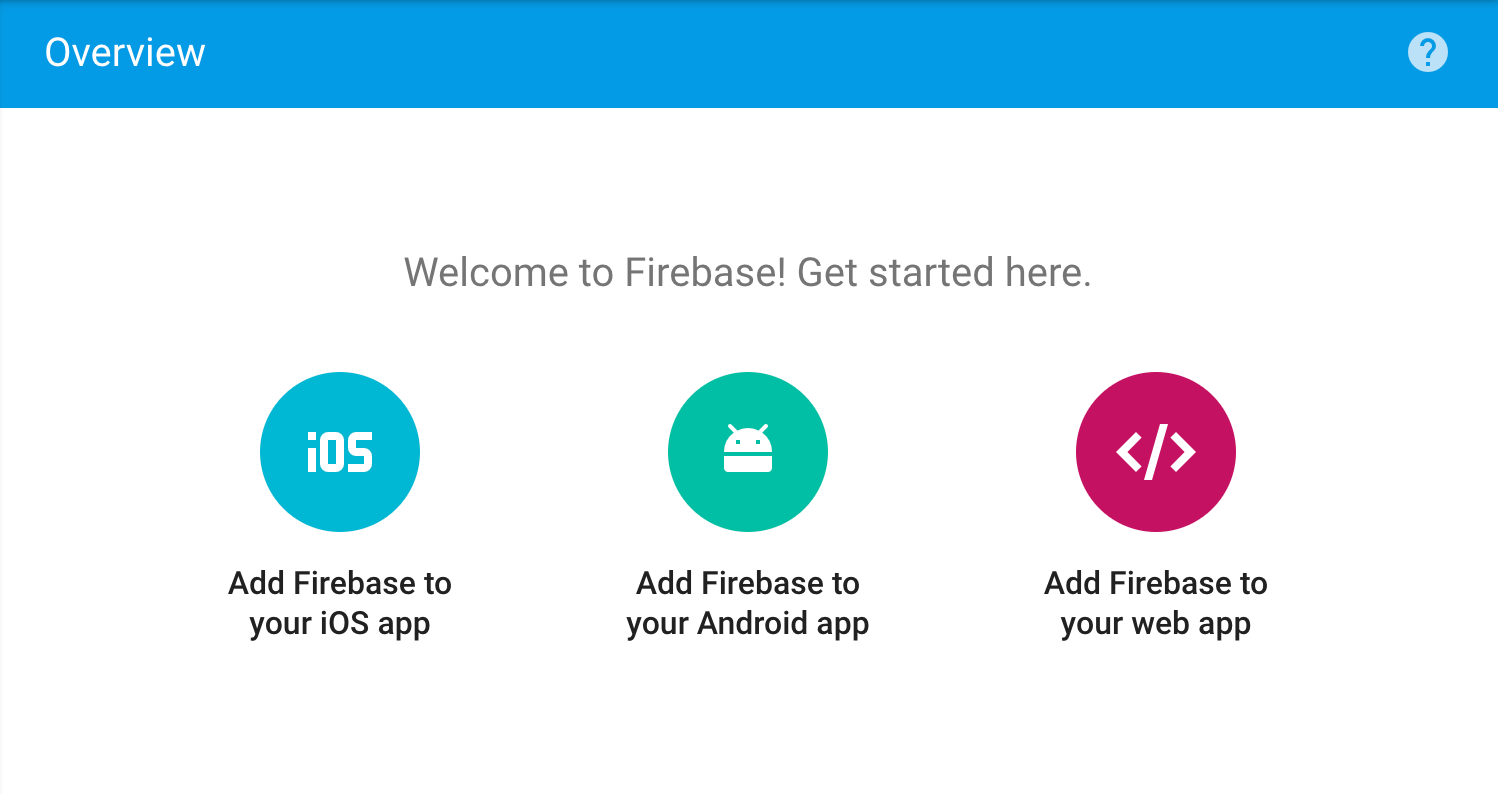
Then click “Add Firebase to your web app”.
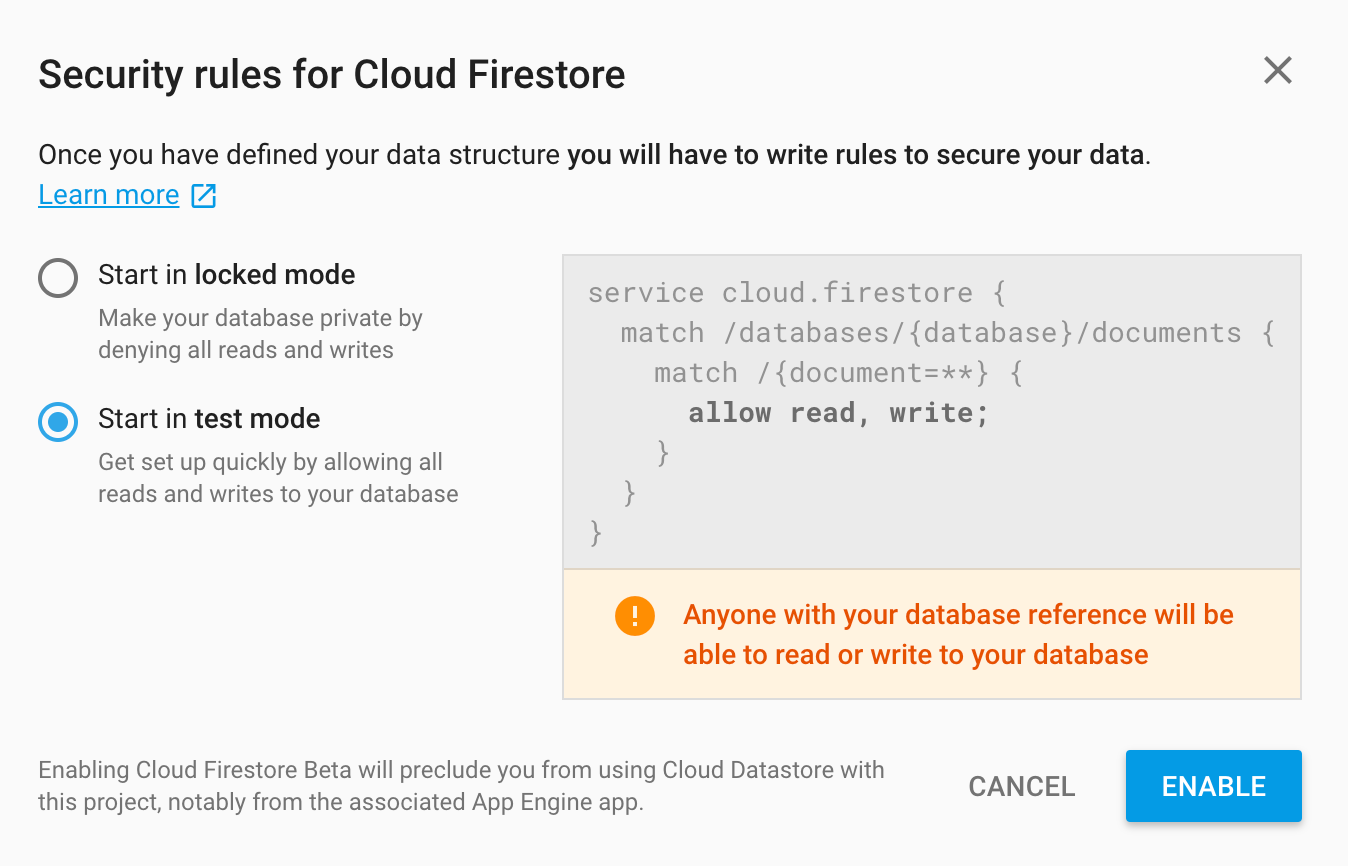
Grab the config object and create a file called config.js under src like below. Select “test mode” - that’ll be fine for learning Firestore. It means your database will be public, so don’t share the link on the internet anywhere.
const config = {
  apiKey: "...",
  authDomain: "...",
  databaseURL: "...",
  projectId: "...",
  storageBucket: "",
  messagingSenderId: "..."
};
export default config
Head back to Firebase, and under the database tab, click “Try Firestore Beta” and “Start in Test Mode”, which will take you to a UI where you view the database as it changes in real time.
Setup Vue Firestore Vuex
Next, let’s set up Vuex Firestore. Create a folder under src called store, and inside index.js. Enter the following:
import Vue from 'vue'
import Vuex from 'vuex'
import 'babel-polyfill'
import Firebase from 'Firebase'
import 'Firebase/firestore'
import config from '../config'
Firebase.initializeApp(config)
Vue.use(Vuex)
  const state = {
  db: Firebase.firestore()
}
export default new Vuex.Store({
  state,
  modules: {}
})
index.js
Next, head over to main.js and import the store, and inject it into the app.
import Vue from 'vue'
import App from './App.vue'
import store from './store'
new Vue({
  el: '#app',
  store,
  render: h => h(App)
})
main.js
Lastly, visit App.vue, delete all the default content, add try console.log on the database to make sure everything is working.
<template>
  <div></div>
</template>
<script>
export default {
name: 'app',
  created () {
    console.log(this.$store.state.db)
  }
}
</script>
<style>
</style>
App.vue
Finally, run the server using npm run dev. If you didn’t make any mistakes, you should see Firestore {__ob__: Observer} in the console! That means Firestore is configured and working.
Writing Seed Data To Firestore

Let’s create some initial data to work with. We can write using the Firestore API method, add. Start by creating a component called Initialize.vue in src. This component will give us an interface to seed the data. The actual creation of data will happen in the Vuex store.
<template>
  <div>
    <button @click="init">Initialize app base state</button>
    <button @click="get">Get</button>
  </div>
</template>
<script>
  export default {
    name: 'InitializeData',
    methods: {
      init () {
        this.$store.dispatch('users/seed')
        this.$store.dispatch('conversations/seed')
      },
      get () {
        // todo
      }
    }
  }
</script>
<style>
</style>
Initialize.vue
We also stubbed a get() method which will get the data later on.
The application will have two Vuex modules: conversations.js and users.js. Messages will be saved in an array in conversations.js. If the application was to get bigger and more complex, I’d make a module for messages.js as well, but it will not be necessary at this stage.
Go ahead and create conversations.js and users.js inside of store.
Users Seed Data
Inside of users.js, add the following:
const state = {
  all: {},
  currentUser: 'mr_a'
}
const mutations = {
}
const actions = {
  seed ({ rootState }) {
    let userRef = rootState.db.collection('users')
    userRef.doc('mr_a').set({
      firstName: 'Andy',
      lastName: 'Andyson'
    })
    userRef.doc('mr_b').set({
      firstName: 'Ben',
      lastName: 'Benson'
    })
    userRef.doc('mr_c').set({
      firstName: 'Cee',
      lastName: 'Ceeson'
    })
  }
}
export default {
  namespaced: true, state, mutations, actions
}
**users.js
state simply declares the state, so Vue can add reactivity for us. currentUser will simulate having someone logged in, and used to set the sender property on messages.
db.collection('users') is part of the Firestore API. It returns a reference to the collection in the Firestore database. If it does not exist, it is created (or will be when you insert a document into it). Read more here: https://firebase.google.com/docs/firestore/data-model.
Firestore provides a set() method to add new data. You must provide a unique identifier. In this case, I’m using what would usually be known a username - mr_a, mr_b and so on. Even if a user was the change their firstName or lastName, the unique identified would remain the same. In the above snippet, I also set currentUser in the state. This will be used later to set a sender field when when sending messages. Easy.
Conversations Seed Data
Let’s see a bit more of the Firestore API by creating some seed data in conversations.js.
import Vue from 'vue'
import uuidv4 from 'uuid/v4'
const state = {
  all: {},
  allIds: [],
  allMsgIds: []
}
const mutations = {

}
const actions = {
  seed ({ rootState }) {
    let convoRef = rootState.db.collection('conversations')
    convoRef.add({
      created: Date.now(),
      users: ['mr_a', 'mr_b'],
      messages: [
        { id: uuidv4(), text: 'Hi there', sender: 'mr_a', created: Date.now() },
        { id: uuidv4(), text: 'Hi to you too!', sender: 'mr_b', created: Date.now() }
      ]
    })
    convoRef.add({
      created: Date.now(),
      users: ['mr_a', 'mr_c'],
      messages: []
    })
  }
}
export default { namespaced: true, state, mutations, actions }
A bit more going on here than the users store. all will hold all the conversations in the application. allIds will be an array of conversation.id. Lastly, allMsgIds will be an array containing all the conversation.message ids. We will use allMsgIds to decide if a message is new or not later on when adding new messages.
There are actually two ways to add data to a collection in Firestore, set() and add(). When using set() you must specify an id for the document. You could make one using something like uuid (which we import at the top of the store). In users, we manually specified one.
Alternatively, we can have Firestore generate a random id for us using add(), which is what is happening above. The messages are nested in the conversation document, however, are Firestore cannot generate an id for us, so we created one using the uuid module. That’s it for setting the seed data up.
Inject the modules to the Vuex store
Now we have some seed data ready to go, head back to index.js and import the conversationsand users modules, and add them the Vuex.Store constructor. Previous code has been omitted for brevity.
import Vue from 'vue'
import Vuex from 'vuex'
...
import users from './users'
import conversations from './conversations'
...
export default new Vuex.Store({
  state,
  modules: {
    users,
    conversations
  }
})
Modify App.vue to import and use the Initialize.vue component:
<template>
  <div>
    <Initialize />
  </div>
</template>
<script>
import Initialize from './Initialize.vue'
export default {
  name: 'app',
  created () {
    console.log(this.$store.state.db)
  },
  components: {
    Initialize
  }
}
</script>
<style>
</style>
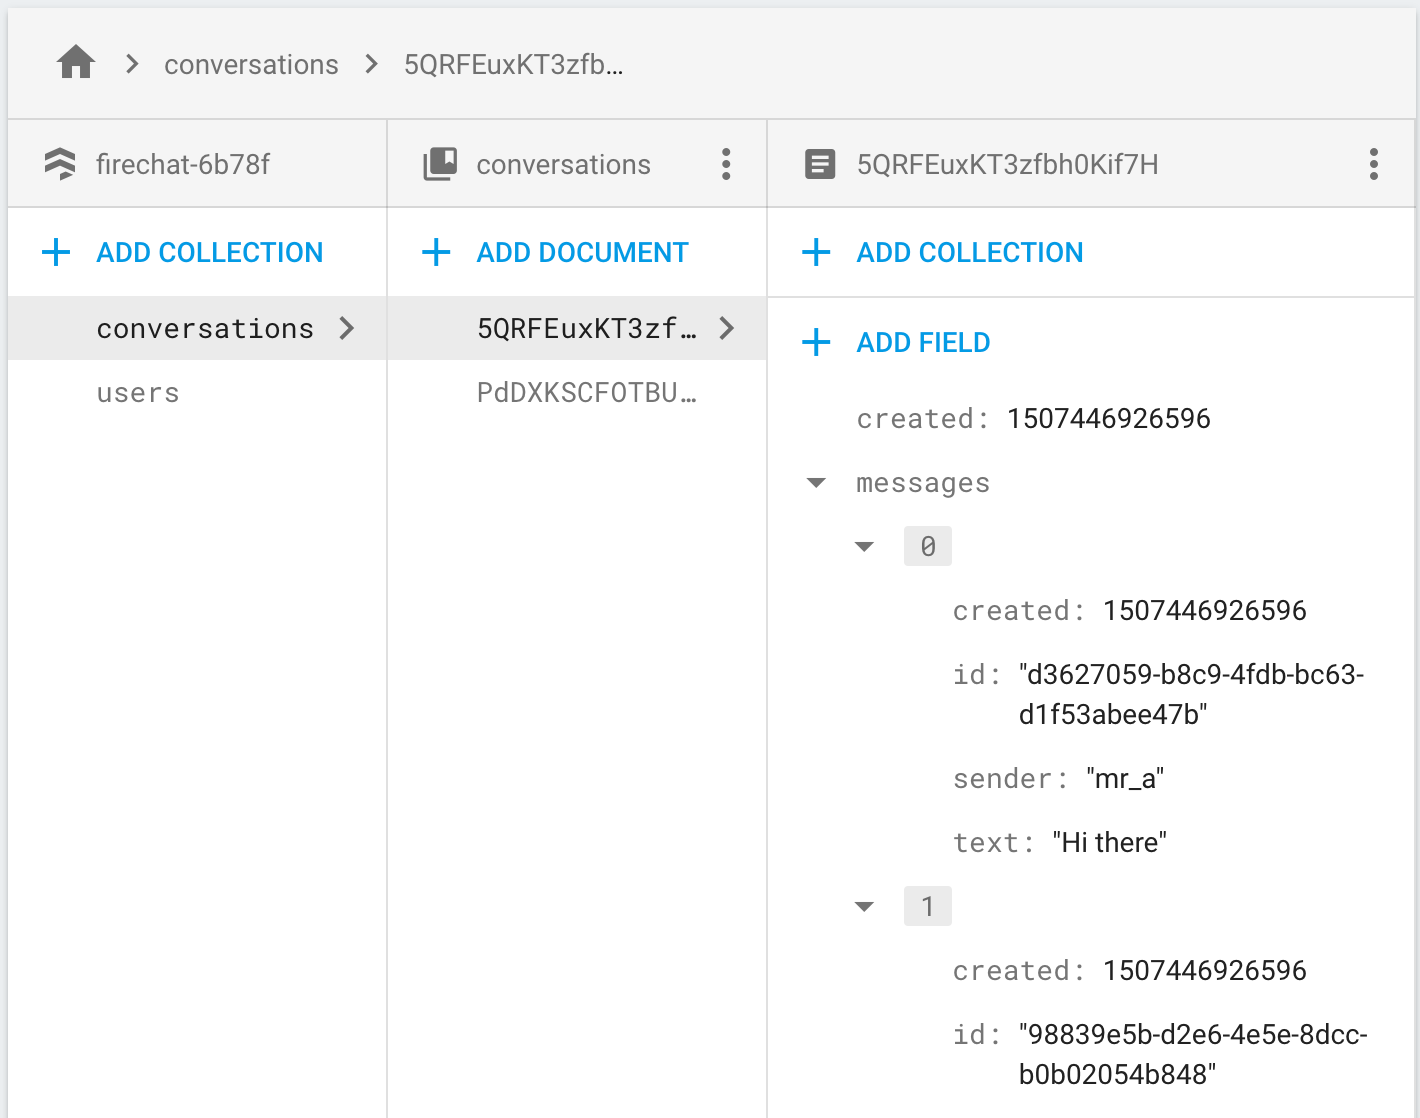
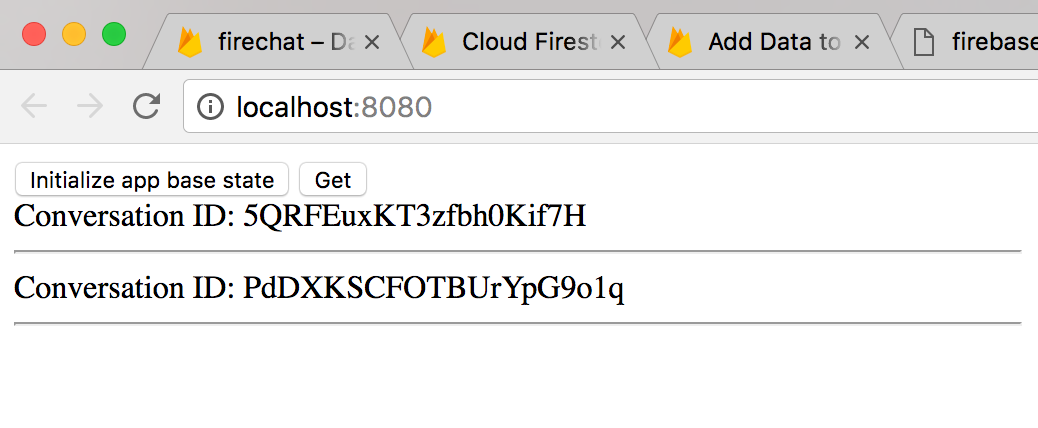
Now try clicking Initialize app base state. The data should be written to Firestore (you may need to refresh the Firestore page to see the new collections).
Fetching Data From Firestore
The next thing to do is display the Firestore data in the Vue app. Head to conversations.js and add a get() method. We will use the ES7 async/await syntax.
actions: {
  // seed () ...
  async get ({ commit, rootState }) {
    let convoRef = rootState.db.collection('conversations')
    let convos = await convoRef.get()
    convos.forEach(conversation => commit('SET_CONVERSATION', { conversation }))
  }
Again, we get a reference to the collection using db.colletion. Calling get() on the collection returns a promise. I don’t check for failure here, but you can do so with a try/catch loop in a real application.
For each conversation, we then commit a mutation which we will make next, with conversation as the payload.
Let’s create the mutation now:
const mutations = {
  SET_CONVERSATION (state, { conversation }) {
    const data = conversation.data()
    state.all = {
      ...state.all,
      [conversation.id]: { users: data.users, created: data.created, messages: [] }
    }
    state.allIds.push(conversation.id)
  }
}
Some interesting stuff here. Firstly, to access the data in a Firestore document, you need to call data() on the object. If you simply do console.log(conversation), you won’t see the data. conversation.id contains the unique id Firestore made for us.
Note that doing state.app[conversation.id] = conversation does not work! It will add the properties to the store, but they will NOT have Vue reactivity, which would prevent us from adding new message down the line. See https://vuejs.org/v2/guide/reactivity.html for more details.
Note that we also do not add the messages (although when we call data() we do have access to them). We’ll see why later on. We also save the conversation.id in the allIds array.
Let’s do the same for users.js. We will also set mr_b as the currentUser.
const state = {
  all: {},
  currentUser: 'mr_b'
}
const mutations = {
  SET_USER (state, { user }) {
    state.all = {...state.all, [user.id]: user.data() }
  }
}
const actions = {
  seed ({ rootState }) {
    let userRef = rootState.db.collection('users')
    userRef.doc('mr_a').set({
      firstName: 'Andy',
      lastName: 'Andyson'
    })
    userRef.doc('mr_b').set({
      firstName: 'Ben',
      lastName: 'Benson'
    })
    userRef.doc('mr_c').set({
      firstName: 'Cee',
      lastName: 'Ceeson'
    })
  },
  async get ({ commit, rootState }) {
    let userRef = rootState.db.collection('users')
    let users = await userRef.get()
    users.forEach(user => commit('SET_USER', { user }))
  }
}
export default {
  namespaced: true, state, mutations, actions
}
That’s it for access the data. Time to create some components to display it.
Creating Components to Display Firestore Data
Now create ConversationContainer.vue and Message.vue inside src, and enter the following. We will start with Message.vue.
<template>
  <div class="message-container">
    <div :class="getPosition">
      {{ message.text }}
    </div>
  </div>
</template>
<script>
  export default {
    name: 'Message',
    props: {
      message: {
        type: Object,
        required: true
      }
    },
    computed: {
      getPosition () {
        if (this.message.sender === this.$store.state.users.currentUser) {
          return 'my message'
        } else {
          return 'message'
        }
      }
    }
  }
</script>
<style scoped>
.my.message {
  text-align: right;
}
.message-container {
  border: 1px solid silver;
}
</style>
Nothing exciting here. A simple check to decide if the message was sent by the current user and to position it accordingly. Let’s move on to ConversationContainer.vue.
<template>
  <div>
    Conversation ID: {{ id }}
    <hr>
    <Message
      v-for="message in conversation.messages"
      :message="message"
      :key="message.created"
    />
  </div>
</template>
<script>
  import Message from './Message.vue'
  import { mapState } from 'vuex'
  export default {
    name: 'ConversationContainer',
    props: {
      conversation: {
        type: Object,
        required: true
      },
      id: {
        type: String,
        required: true
      }
    },
    created () {
      // todo: LOAD MESSAGES
    },
    components: {
      Message
    }
  }
</script>
<style scoped>
</style>
Again, nothing special. Later on in created() we will load all the messages, and listen for new ones. This component will receive a conversations as a prop, which comes from $store.state.conversations.
Now import ConversationContainer.vue in App.vue. Note this is the final implementation for App.vue.
<template>
  <div>
    <Initialize />
    <ConversationContainer
      v-for="id in convoIds"
      :conversation="conversations[id]"
      :id="id"
      :key="id"
    />
  </div>
</template>
<script>
import Initialize from './Initialize.vue'
import ConversationContainer from './ConversationContainer.vue'
import { mapState } from 'vuex'
export default {
  name: 'app',
  components: {
    Initialize,
    ConversationContainer
  },
  computed: {
    ...mapState({
      conversations: state => state.conversations.all,
      convoIds: state => state.conversations.allIds
    })
  },
}
</script>
<style>
</style>
Pretty straightforward — we loop allIds, and pass each conversation as a prop to the ConversationContainer.vue. We can use the id from Firestore as a :key for the v-for loop as a bonus. The Vuex mapState helper function makes it easy to access the state.
Lastly, update Initialize.vue to actually fetch the data (we stubbed get() out earlier, remember?)
methods: {
  // init () ...
  get () {
    this.$store.dispatch('users/get')
    this.$store.dispatch('conversations/get')
  }
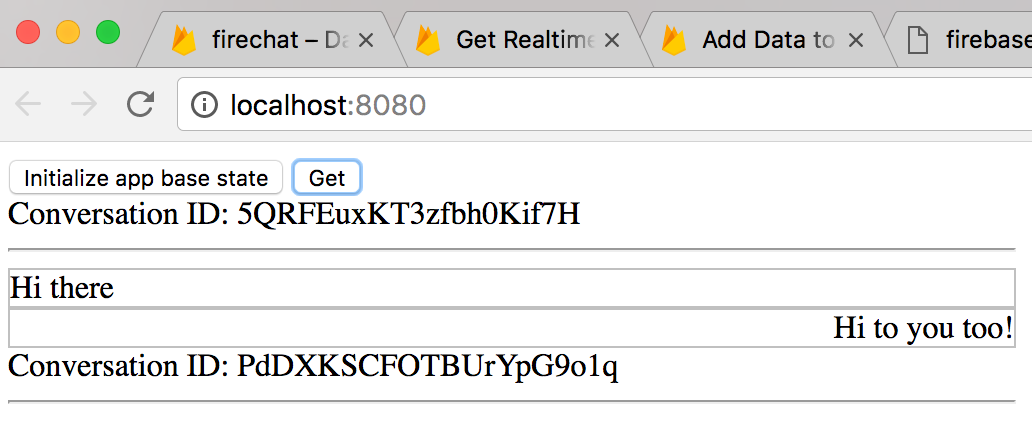
If everything went well, you should be able to click the “GET” button and see the following:
Fetching Messages in Real Time

Finally, the bit we’ve all been waiting for — real-time messaging. In ConversationContainer.vue, update create() to look like the following:
created () {
  this.$store.state.db.collection('conversations').doc(this.id).onSnapshot(convo => {
    let source = convo.metadata.hasPendingWrites ? 'Local' : 'Server'
    console.log(`Source ${source}`)
    // TODO: add messages to store
  })
}
In Firestore, you can listen to a document using the onSnapshot() method. More here: https://Firebase.google.com/docs/firestore/query-data/listen.
Firstly, refresh the Vue application and hit get to query Firestore for the conversations. Check the console. You should see Source: Server printed twice. onSnapshot() triggers immediately, returning the current state of the document. It also will trigger every time the document changes.
This is why we didn’t populate the messages in the conversations.js - module - we want to fetch the conversation once initially, to get the ID and members, but constantly be watching for new messages. We will take advantage of the initial onSnapshot() to get the current state of the conversation, specifically the messages, and then update anytime a new message is created.
Notice the line let source = convo.metadata.hasPendingWrites ? 'Local' : 'Server'. This is due to a feature called latency compensation. Basicially, when you write data, all clients listening to the document will receive a notification, before the data is even sent to Firestore. You could use perhaps use this to show a “member is typing…” notification. If hasPendingWrites is true, the data has not been written yet, and if it’s false, it has.
Now, we need to add the messages to the store. Update created() like so:
created () {
  this.$store.state.db.collection('conversations').doc(this.id).onSnapshot(convo => {
      let source = convo.metadata.hasPendingWrites ? 'Local' : 'Server'
    console.log(`Source: ${source}`)
      if (convo && convo.data()) {
        convo.data().messages.forEach(message => this.$store.commit('conversations/ADD_MESSAGE', {
            conversationId: this.id, message })
        )
      }
  })
}
You access the data in the document returned from onSnapshot() using the data() method. Let’s now write the mutation to add the messages in conversations.js.
const mutations = {
  // SET_CONVERSATION ...
  ADD_MESSAGE (state, { conversationId, message }) {
    if (!state.allMsgIds.includes(message.id)) {
      state.all[conversationId].messages.push(message)
      state.allMsgIds.push(message.id)
    }
  }
}
onSnapshot() returns the entire conversation, including the existing messages. By checking if allMsgIds includes the message.id, and pushing it as such, we can ensure only new message are added to the conversation. Vue’s reactivity will automatically update the UI for us.
That should be enough to display the messages! Try refreshing, grabbing the data and you should see something like this.
Sending A Message In Real Time
Lastly, let’s send a message in real-time. Update ConversationContainer.vue:
<template>
<div>
  Conversation ID: {{ id }}
  <hr>
  <Message
    v-for="message in conversation.messages"
    :message="message"
    :key="message.created"
  />
  <br />
  <input v-model="newMessageText" @keyup.enter="send" placeholder="Type something..." />
</div>
</template>
<script>
import Message from './Message.vue'
import { mapState } from 'vuex'
export default {
  name: 'ConversationContainer',
  data () {
    return {
      newMessageText: ''
    }
  },
  props: {
    // ...
  },
  created () {
    // ...
  },
  methods: {
    send () {
      this.$store.dispatch('conversations/sendMessage', {
        text: this.newMessageText,
        created: Date.now(),
        conversationId: this.id,
        sender: this.$store.state.users.currentUser
      })
    }
  },
  components: {
    Message
  }
}
</script>
Fairly straightforward. Using v-model, we bind to an <input>, and on keyup.enter send the message, passing the conversationId to the commit.
Header over to conversations.js and add the following action:
actions: {
  // get ()
  // seed ()
  sendMessage ({ commit, rootState }, { text, created, sender, conversationId }) {
    const convoRef = rootState.db.collection('conversations').doc(conversationId)
    convoRef.update({
      messages: [...state.all[conversationId].messages, { id: uuidv4(), created, sender, text }]
    })
    .then(res => console.log('Message sent.'))
    .catch(err => console.log('Error', err))
  }
}
Firestore documents are updated using update(), which allows you to update certain fields, without touching the others. Read more here: https://firebase.google.com/docs/firestore/manage-data/update-data.
We simply update the messages property, with all the existing ones, plus the newly sent message. When the Firestore document is updated, onSnapshot() triggers again and adds the message to the conversation.
This should be enough to get the application working real-time! Try opening another browser and send some messages — they should be received real-time in any other clients.

Conclusion and Improvements
Firestore is very easy to get started with, and extremely powerful. Some improvements to this application include:
- Only sending and fetching new messages. At this point, the entire conversation is sent and received. I’m not sure how to do this yet using Firestore. Likely some kind of
Array.pushmethod exists - let me know if you have a good technique for this! - Deleting or editing messages. This would not work in the current application since when adding messages, we check by id — to allow for editing, you would need to check for the id in
allMsgIds, and if thetextwas different. - Creating new conversations. At the moment only two conversations exist, the ones created by
seed(). It would be a good exercise to extend the application to allow for this. - Auth. Vuex Firebase Auth also provides authentication, that you could use with an application like this.
30s ad
☞ Vue.js 2 Essentials: Build Your First Vue App
☞ Vue JS 2: From Beginner to Professional (includes Vuex)
☞ Vue.js Essentials - 3 Course Bundle
☞ Sıfırdan İleri Seviye Vue.JS Eğitimi ve Uygulama Geliştirme
Suggest:
☞ Learn Vue.js from scratch 2018
☞ Vue js Tutorial Zero to Hero || Brief Overview about Vue.js || Learn VueJS 2023 || JS Framework
☞ Create Shopping basket page With Vuejs and Nodejs
☞ Build a Quiz App Using Vue JS | Vue JS Quiz App Demo | Vue JS Project Tutorial | Simplilearn