How To Write Better Code in React

React makes it painless to create interactive UIs. Design simple views for each state in your application, and React will efficiently update and render just the right components when your data changes.
In this post, I will show you a few tips that will help you become a better React Developer. I will cover a range of things from tooling to actual code style, which can help you improve your skill with React. 💪
Let’s Talk about Linting
One thing that’s really important for writing better code is good linting. Because if we have a good set of linting rules set up, your code editor will be able to catch anything that could potentially cause a problem in your code.
But more than just catching problems, your ES Lintsetup will constantly make you aware of React best practices.
import react from 'react';
/* Other imports */

/* Code */

export default class App extends React.Component {
  render() {
    const {userIsLoaded, user} = this.props;
    if (!userIsLoaded) return <Loader />;

    return (
      /* Code */
    )
  }
}
lint.js
Take the code snippet above. Say you want to reference a new property called this.props.hello in your render() function. Your linter will immediately go red and say:
'hello' is missing in props validation (react/prop-types)
Linting will help you be aware of the best practices in React and shape your understanding of the code. Soon, you will start to avoid making mistakes when you write your code.
You can either head over to ESLint and set up a linting utility for JavaScript, or you can use Airbnb’s JavaScript Style Guide. You can also install the React ESLint Package.
Leverage component modularity, reuse and composition
Use tools like Bitto build modular apps faster with reusable components.
Using Bit you can quickly share and organize all your React components, which can then be used and developed in any other project.
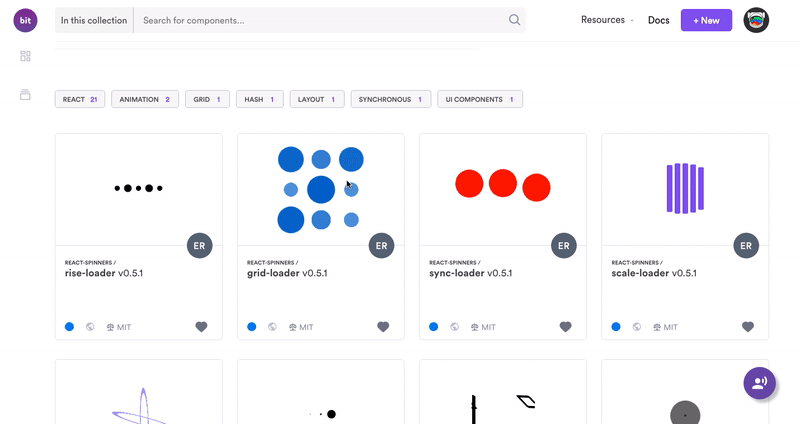
Bit helps you isolate and share components from any project. Then, they become reusable “Lego pieces” you can find, play with and use anywhere.
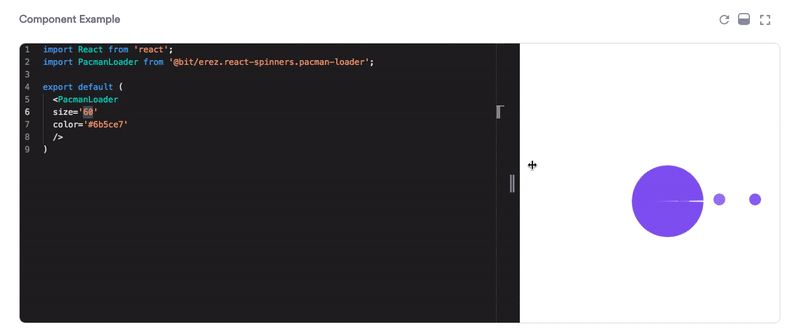
It’s a great platform for turning component reusability into a way to build more applications in less time. Give it a go.
propTypes and defaultProps
In the earlier section, I talked about how my linter acted up when I tried to pass an unvalidated prop.
static propTypes = {
  userIsLoaded: PropTypes.boolean.isRequired,
  user: PropTypes.shape({
    _id: PropTypes.string,
  )}.isRequired,
}
proptypes.js
Here, if we say that the userIsLoaded is not required, then we would need to add this to our code:
static defaultProps = {
 userIsLoaded: false,
}
So anytime we have a PropType that’s used in our component, we need to set a propType for it. As in, we need to tell React that userIsLoaded is always going to be a boolean value.
And again if we say that userIsLoaded is not required then we’re going to need to have a default prop. If it is required, then we don’t have to define a default prop for it. However, the rule also states that you shouldn’t have an ambiguous propTypes like object or array.
This is why we are using shape to validate user, which has another an id inside it, which has a propType of string, and the entire user object is required.
Making sure you have your propTypes and defaultProps set up on every single component that uses props will go a long way.
The moment those props don’t get the data that they are expecting, your error log will let you know that you are either passing in something incorrectly or something that is expecting it is not there, making error finding just way easier especially if you are writing a lot of reusable components. It also makes them a little bit more self-documenting.
Note:
Unlike earlier versions of React, proptypes are no longer included inside React and you will have to add them separately to your project as a dependency.
Know when to make new components
export default class Profile extends PureComponent {
  static propTypes = {
    userIsLoaded: PropTypes.bool,
    user: PropTypes.shape({
      _id: PropTypes.string,
    }).isRequired,
  }

  static defaultProps = {
    userIsLoaded: false,
  }

  render() {
    const { userIsLoaded, user } = this.props;
    if (!userIsLoaded) return <Loaded />;
    return (
      <div>
        <div className="two-col">
          <section>
            <MyOrders userId={user.id} />
            <My Downloads userId={user._id} />
          </section>
          <aside>
            <MySubscriptions user={user} />
            <MyVotes user={user} />
          </aside>
        </div>
        <div className="one-col">
          {isRole('affiliate', user={user._id} &&
            <MyAffiliateInfo userId={user._id} />
          }
        </div>
      </div>
    )
  }
}
profile.js
Here I have a component called Profile. I have other components like MyOrder and MyDownloads inside this component. Now I could have written all these components inline here since I am just pulling the data from the same place (user), Turning all these smaller components into a one giant component.
While there aren’t any hard and fast rules on when to move your code into a component, ask yourself:
- Is your code’s functionality becoming unwieldy?
- Does it represent its own thing?
- Are you going to reuse your code?
If any of these question’s answer is yes, then you need to move your code into a component.
Keep in mind that the last thing anyone wants to see in your code is a giant 200–300 line component full of crazy bells and whistles.
Component vs PureComponent vs Stateless Functional Component
It is very important for a React developer to know when to use a Component, PureComponent, and a Stateless Functional Component in your code.
You might have noticed in the above code snippet that instead of declaring Profile as a Component, I have instead called it as a PureComponent.
First, let’s check out a stateless functional component.
Stateless Functional Component
const Billboard = () => (
  <ZoneBlack>
    <Heading>React</Heading>
    <div className="billboard_product">
      <Link className="billboard_product-image" to="/">
        <img alt="#" src="#">
      </Link>
      <div className="billboard_product-details">
        <h3 className="sub">React</h3>
        <p>Lorem Ipsum</p>
      </div>
    </div>
  </ZoneBlack>
);
stateless.js
Stateless functional components are one of the most common types of components in your arsenal. They provide us with a nice and concise way to create components that are not using any kind of state, refs, or lifecycle methods.
The idea with a stateless functional component is that it is state-less and just a function. So what’s great about this is that you are defining your component as a constant function that returns some data.
In simple words, stateless functional components are just functions that return JSX.
Update: React’s latest version has brought us React hooks, which will let us state, effects and refs in functional components without needing to convert them into class components.
PureComponents
Usually, when a component gets a new prop into it, React will re-render that component. But sometimes, a component gets new props that haven’t really changed, but React will still trigger a re-render.
Using PureComponent will help you prevent this wasted re-render. For instance, if a prop is a string or boolean and it changes, a PureComponent is going to recognize that, but if a property within an object is changing, a PureComponent is not going to trigger a re-render.
So how will you know when React is triggering an unnecessary re-render? You can check out this amazing React package called Why Did You Update. This package will notify you in the console when a potentially unnecessary re-render occurs.
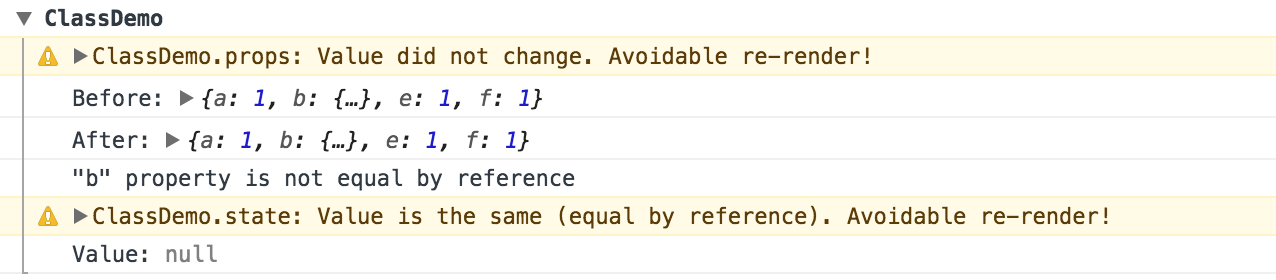
Once you have recognized an unnecessary re-render, you can use a PureComponent rather than a Component to prevent things from having an unnecessary re-render.
Use React Dev Tools
If you are serious about becoming a pro React Developer, then using React Dev Tools should be commonplace practice in your development process.
If you have used React, there is a good chance that your console has yelled at you to use React Dev Tools.
React Dev Tools are available for all major browsers such as Chrome and Firefox.
React Dev Tools give you access to the entire structure of your React app and allow you to see all the props and state that are being used in the app.
React Dev Tools is an excellent way to explore our React components and helps diagnose any issues in your app.
Use Inline Conditional Statements
This opinion might ruffle a few feathers but I have found that using Inline-Conditional Statements considerably cleans up my React code.
Take a look at this code snippet:
<div className="one-col">
  {isRole('affiliate', user._id) &&
    <MyAffiliateInfo userId={user._id} />
  }
</div>
conditional.js
Here I have a basic function called that checks if a person is an “affiliate”, followed by a component called <MyAffiliateInfo/>.
What’s great about this is that:
- I didn’t have to write a separate function.
- I didn’t have to write another “if” statement in my render function.
- I didn’t have to create a “link” to somewhere else in the component.
Writing inline-conditional statements is quite simple. You begin by writing you conditional statement. You could say true and it will always show the <MyAffiliateInfo /> component.
Next we link this conditional statement with <MyAffiliateInfo /> using &&. This way, the component will only be rendered when the conditional statement returns true.
Use Snippet Libraries whenever possible
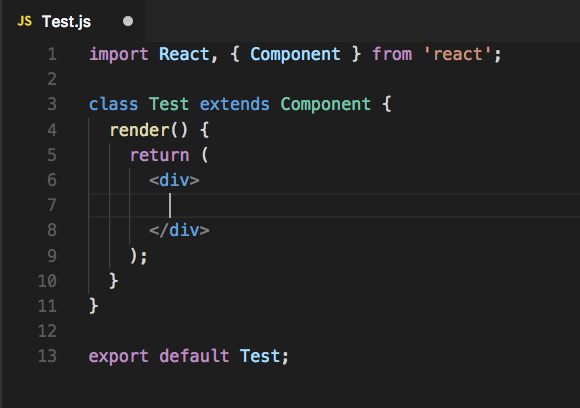
Open up a code editor (I use VS Code), and create a .js file.
Inside this file when you type rc, you will see something like this:
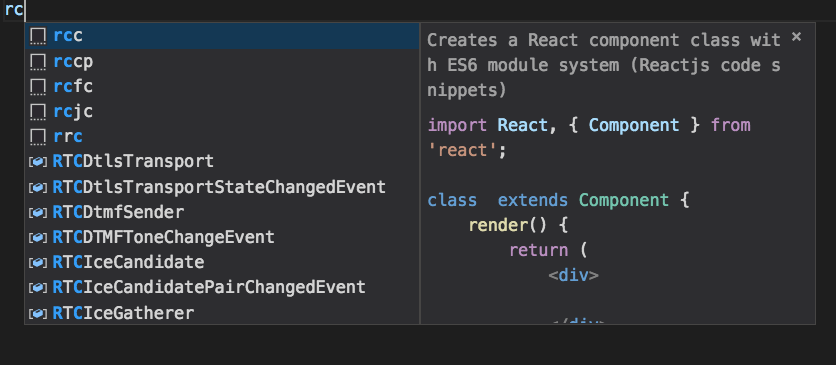
Hitting enter, you will instantly get this:
What’s great about these code snippets is that not only do they help you potentially save bugs but they also help you identify the latest and greatest syntax.
There are many different snippet libraries that can be installed in your code editor. The one I use for VS Code is called ES7 React/Redux/React-Native/JS Snippets.
React Internals — Learn how React works
React Internals is a five-part series that helped me understand the very basics of React, and eventually helped me become a better React Developer!
If you are having issues with something that you might not have understood fully, or if you understand how React works, then React Internals will help you understand the When and How to do things right in React.
This is especially helpful to those who have an idea but don’t quite know where to execute their code.
Understanding the basics of how React works will help you become a better React developer.
Quick Recap
- Get some good linting. Use ES Lint, Airbnb’s JavaScript Style Guide, and ESLint React Plugin.
- Use propTypes and defaultProps.
- Know when to make new components.
- Know when to write a Component, PureComponent, and a Stateless Functional Component.
- Use React Dev Tools.
- Use inline conditional statements in your code.
- Use Snippet Libraries to save a ton of time that is usually wasted on boilerplate code.
- Learn how React works with React Internals.
- Use tools like Bit / StoryBook to improve your component development workflow
Learn more
☞ Master ReactJS: Learn React JS from Scratch
☞ Learn ReactJS: Code Like A Facebook Developer
☞ ReactJS Course: Learn JavaScript Library Used by Facebook&IG
☞ React: Learn ReactJS Fundamentals for Front-End Developers
Suggest:
☞ JavaScript for React Developers | Mosh
☞ Getting Closure on React Hooks
☞ Web Development Tutorial - JavaScript, HTML, CSS
☞ Javascript Project Tutorial: Budget App
☞ JavaScript Programming Tutorial Full Course for Beginners
☞ E-Commerce JavaScript Tutorial - Shopping Cart from Scratch