How I built a web app with Vue, Vuetify and Axios
The user will be able to search for movies. The API will retrieve movies with all the search details. When a user clicks on a movie, it will give more details of each movie. It’s a fairly simple App, but it will explain the use case of calling the API from the Vue.js App.
Contents
- Why Axios?
- Why Vuetify?
- A brief about the movie API
- Calling and testing API and Test.
- Create an App
- Requirement and structure of the App
- Add Vuetify to the Project
- Add vue-router to the project
- Add axios to the project
- Remove the currently scaffolded component
- Create LatestMovies component
- Implement Movie Component
- Display the ratings
- Add Search Movie component
- An issue with search movie and how we can rectify it
- Add a warning message if there is no search data in the API
- Creating a central file for axios/refactoring
- Wrapping Up and source code
1. Why Axios?
In Vue.js App, we can display the data from an external API. This can be done by vue-resource and axios. Axios is a 3rd part library and it is a popular one. Here is the official link for using Axios with Vue.js.
The important point to be noted here is that in the official docs there are no details about installing axios to the Vue.js app. We will cover this in Section 9: Add axios to the project.
2. Why Vuetify?
Vuetify is a material design framework built on top of Vue.js. It has nice UI components and which can be readily available to use on Vue.js.
3. A brief about the movie API
The omdbapi is an open and free movie database API which will provide the movie details and images too. The main drawback is that most images are not very clear, but it will do the trick. Also API support is there.
In order to use this API, first of all, need to signup and they will provide an API key sent to you via mail. This can be used for each query result.
Passing key and also the special string is needed. s stands for search when passing s=”Indiana”, API will retrieve all data contains Indiana. Also, i stands for a movie with imbd id will be returned, so only one is returned since it is unique. We are using “s” and “i” here for the demo.
4. Calling and testing API and Test
In order to check what we will receive when calling the omdbapi is by testing with postman tool or any API test mechanism. Here I am using the postman for this.
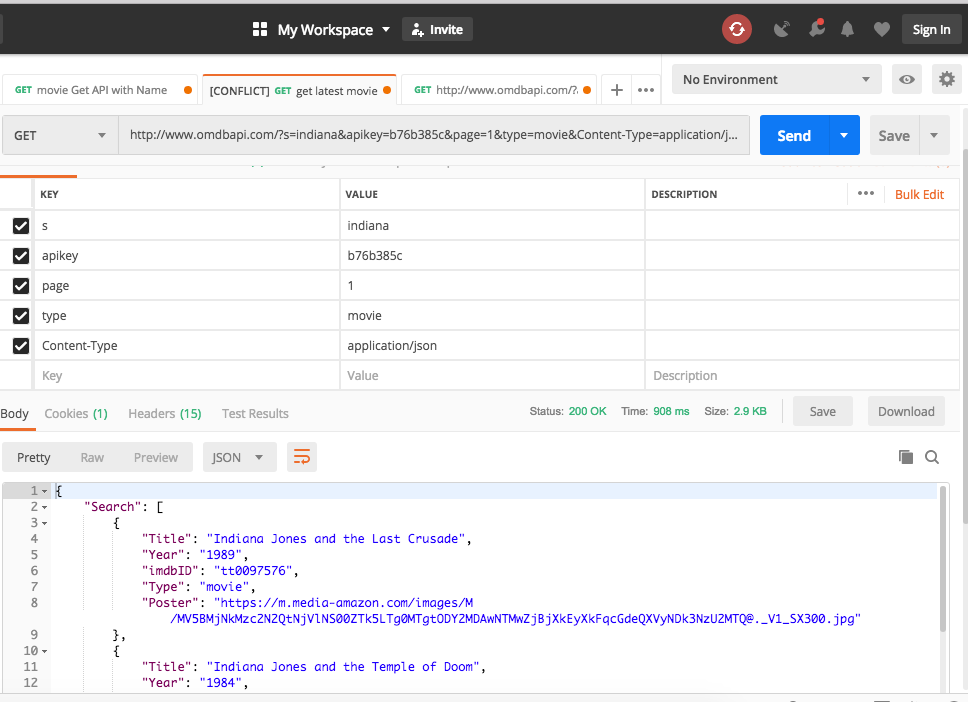
As you see in the image, need to pass the apikey=XXXX and the s=”movie-name”
So the URL becomes
http://www.omdbapi.com/?s=movie-name&apikey=XXXX&page=1&type=movie&Content-Type=application/json
Awesome, we are good, now we can proceed to create an app and work on the axios as well.
5. Create an App
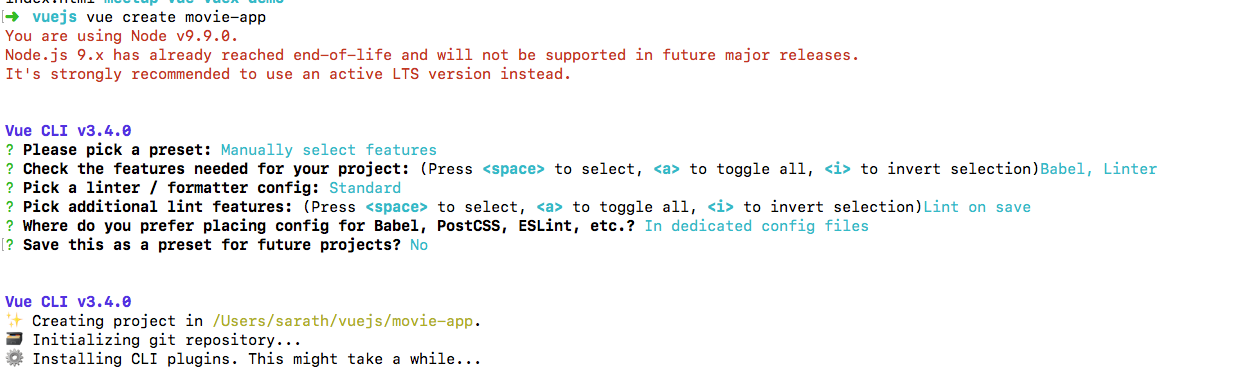
Create a Vue js application is done by a simple command
vue create movie-app
movie-app is our app name.
6. Requirement and structure of the App
The structure of the app have 3 components.
- LatestMovie component.
- Movie Component.
- SearchMovie component.
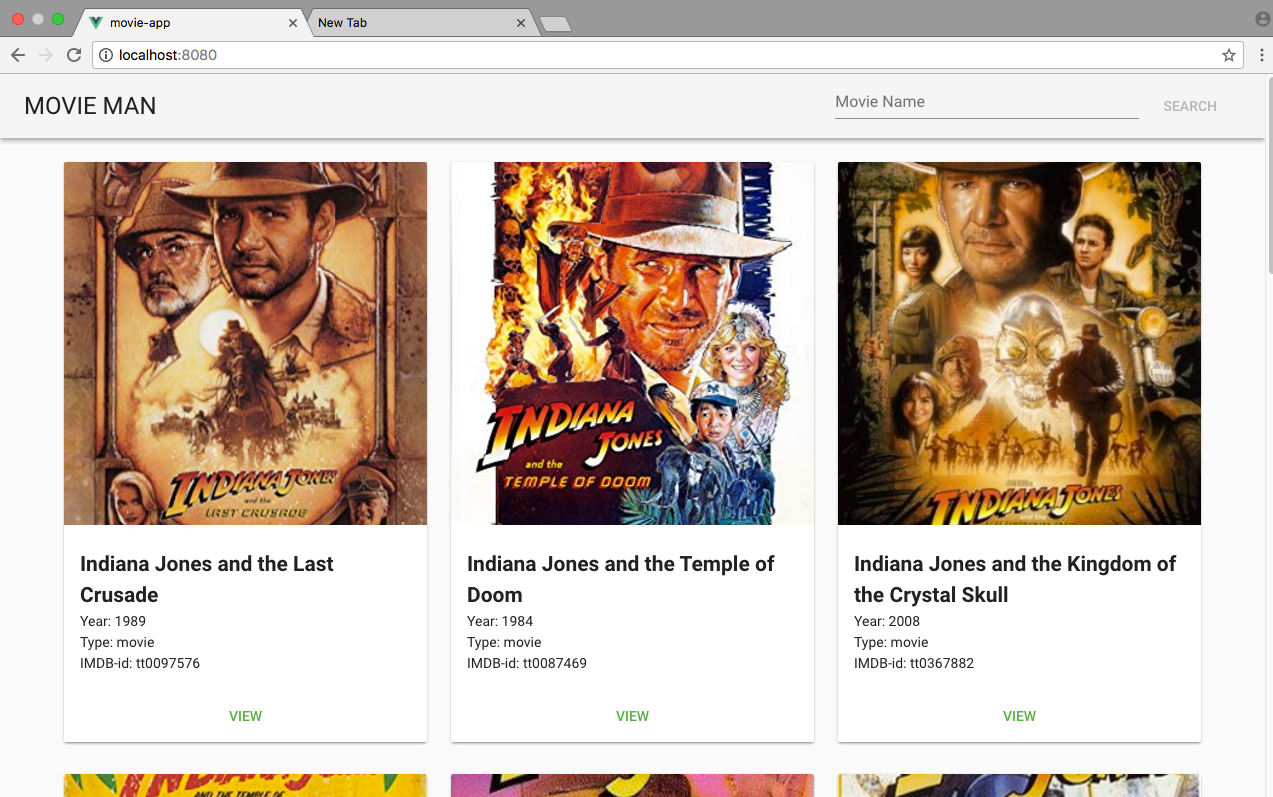
LatestMovie component will have the current home page and I will display the movies related to my favorite movie “indiana”
On clicking on each movie, will display details of every single movie, Which can be done by using the Movie component.
Provided an option to search and display those movies, which can be handled by SearchMovie component.
7. Add Vuetify to the Project
As already discussed, we are using the Vuetify for the desgin of the App. Need to do some groundwork for that. on the terminal, type
vue add vuetify
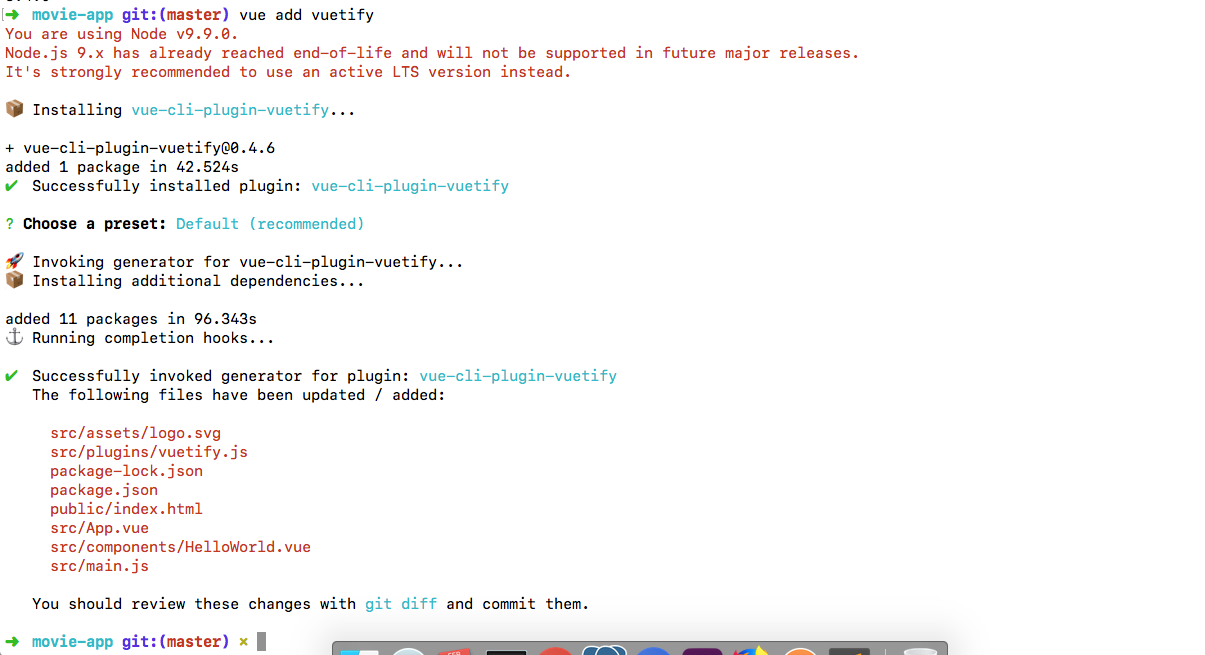
After installation, our front end will look like this:
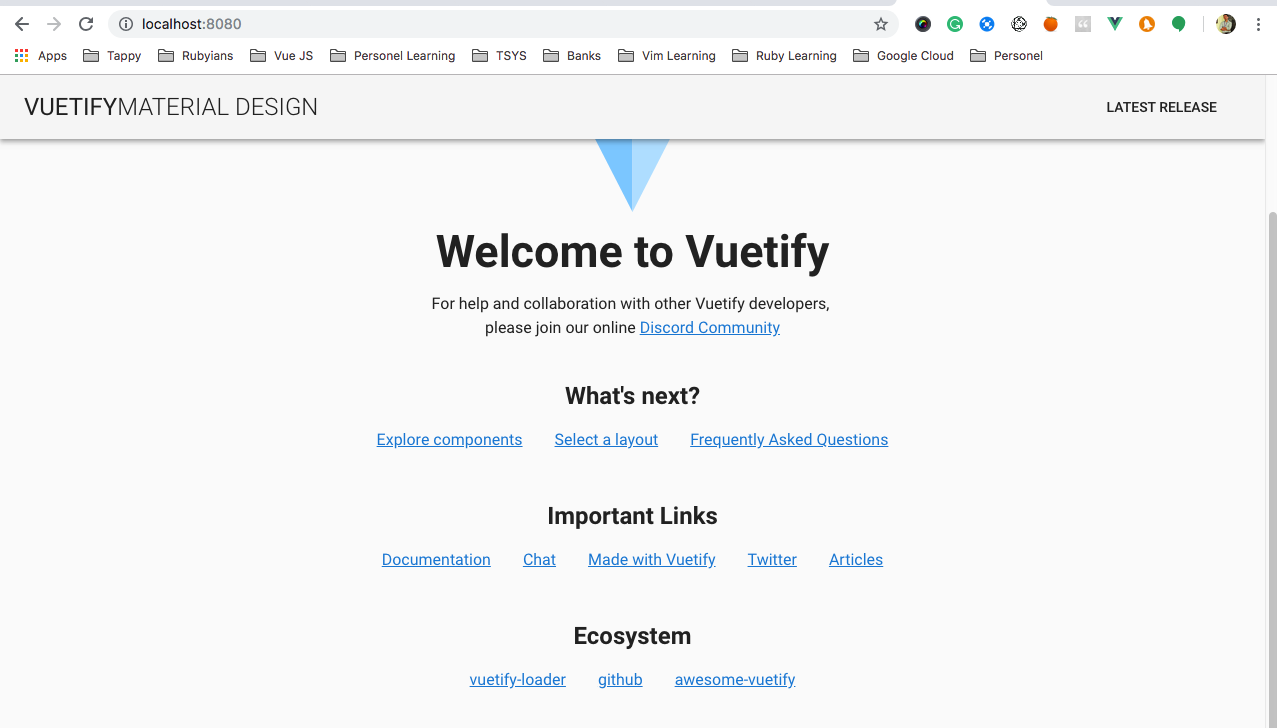
Awesome right, they provide a nav bar also. Then will proceed.
8. Add vue-router to the project
Will explain why we needed the vue-router, it will do the routing functionalities and component switching without hassle. Installing the vue-router is by
npm install vue-router

now, need to link the router to the application and create a routes file.
- Create a router file
- Add content to the router file
- Link the router to the app
1.Create a router file
I am following a pattern by which create a folder called router in the src path and in that, will create an index.js file

2. Add content to the router file
So far, we created a router/index.js file now need to import the Vue instance and vue-router to that file also, need to export the default router file.
Each router path will have 3 components: path, name, component.
import Vue from 'vue'
import VueRouter from 'vue-router'
Vue.use(VueRouter)
export default new VueRouter({
  routes: [
    {
    }
  ]
})
3. Link the router to the app
First, need to import the router from the path, and use that in the Vue instance. All these are done in the src/main.js file
import router from ‘./router’
Current main.js file will look like this:
import Vue from 'vue'
import './plugins/vuetify'
import App from './App.vue'
import router from './router'
Vue.config.productionTip = false
new Vue({
  render: h => h(App),
  router
}).$mount('#app')
9. Add axios to the project
Axios is our point of contact to call the API services in this app. Now we need to install axios to our project.
npm install axios --save
10. Remove the currently scaffolded component
By default, we are having a component in place, will remove that and will create the components we needed.
HelloWorld.vue is the default component, will remove that from our app.
11. Create LatestMovie component
Need to do some steps here
- Create the LatestMovie.vue.
- Add the axios to the LatestMovie component.
- Link the router to LatestMovie.
- Add a progress bar for LatestMovie.
- Create the LatestMovie.vue.
Create a file called LatestMovie.vue in components folder.
2. Add the axios to the LatestMovie component.
Here, we are using the mounted() life cycle for this, added the code to get the result from the omdbapi with the indiana movie data.
mounted () {
  axios
    .get('http://www.omdbapi.com/?s=mummy&apikey=XXXXX&page=1&type=movie&Content-Type=application/json')
    .then(response => {
      this.wholeResponse = response.data.Search
    })
    .catch(error => {
      console.log(error)
    })
}
3. Link the router to LatestMovie.
Now, we need to link the LatestMovie to the router file.
in the src/router/index.js:
import LatestMovie from '@/components/LatestMovie'
add the links to the router/index.js:
export default new VueRouter({
  routes: [
   {
      path: '/',
      name: 'LatestMovie',
      component: LatestMovie
    }
  ]
})
4. Add a progress bar for LatestMovie
If the API will take time to retrieve, we will need to display a progress bar. This can be achieved by using the “ <v-progress-circular” from vuetify.
Created a data property which will be set to true initially, then after the API response will be set to false.
Also another data property called wholeResponse will take care of the data.
So totally our LatestMovie.vue becomes:
<template>
<v-container v-if="loading">
    <div class="text-xs-center">
      <v-progress-circular
        indeterminate
        :size="150"
        :width="8"
        color="green">
      </v-progress-circular>
    </div>
  </v-container>
<v-container v-else grid-list-xl>
    <v-layout wrap>
      <v-flex xs4
        v-for="(item, index) in wholeResponse"
        :key="index"
        mb-2>
        <v-card>
          <v-img
            :src="item.Poster"
            aspect-ratio="1"
          ></v-img>
<v-card-title primary-title>
            <div>
              <h2>{{item.Title}}</h2>
              <div>Year: {{item.Year}}</div>
              <div>Type: {{item.Type}}</div>
              <div>IMDB-id: {{item.imdbID}}</div>
            </div>
          </v-card-title>
<v-card-actions class="justify-center">
            <v-btn flat
              color="green"
              @click="singleMovie(item.imdbID)"
              >View</v-btn>
          </v-card-actions>
</v-card>
      </v-flex>
  </v-layout>
  </v-container>
</template>
<script>
import axios from 'axios'
export default {
  data () {
    return {
      wholeResponse: [],
      loading: true
    }
  },
  mounted () {
  axios
    .get('http://www.omdbapi.com/?s=indiana&apikey=XXXX&page=1&type=movie&Content-Type=application/json')
    .then(response => {
      this.wholeResponse = response.data.Search
      this.loading = false
    })
    .catch(error => {
      console.log(error)
    })
  }
}
</script>
<style lang="stylus" scoped>
  .v-progress-circular
    margin: 1rem
</style>
Now, add the router-view to the App.vue to display the component:
<router-view></router-view>
12. Implement Movie Component
Now, it is the time for the single movie part. This can be achieved by using the Movie.vue file.
- Add the Movie.vue file
- Add the router
- Add the mode
- Pass the props in a router.
- Pass the props in latest component.
- Work on the props data in the movie component.
Add the Movie.vue file
Add the file in components/Movie.vue
Add the router
Register the Movie.vue to the router/index.js file
import Movie from '@/components/Movie'
Add the mode
There is “#” is there in the URL, we can remove those using the
mode: history
In the router/index.js file.
Pass the props in a router.
Create a path for the Movie.vue component, using the below code in the router/index.js
{
      path: '/movie/:id',
      name: 'Movie',
      props: true,
      component: Movie
    },
We are giving props: true because we are passing the imdb_id to the Movie.vue component then that value is used to call the API for that single movie.
Pass the props in latest component
Now up on clicking on the view in the LatestMovie, will call the method which will, in turn, pass the imdb_id as a props to the Movie.vue.
<v-btn round
              color="green"
              @click="singleMovie(item.imdbID)"
              >View</v-btn>
and the singleMovie method is
methods: {
    singleMovie (id) {
      this.$router.push('/movie/' + id)
    }
  }
Work on the props data in the movie component
Now, the data is passed from the LatestMovie. That value is received as prop in the Movie.vue component. This value can be used by this.id
Also, added a data property called singleMovie to handle the response.
The code in the Movie.vue becomes,
<template>
  <v-container>
    <v-layout row wrap>
      <v-flex xs12>
        <h2>welcome to single movie component</h2>
          <div>{{singleMovie}}</div>
      </v-flex>
    </v-layout>
  </v-container>
</template>
<script>
import axios from 'axios'
export default {
  props: ['id'],
  data () {
    return {
      singleMovie: ''
    }
  },
  mounted () {
    axios
      .get('http://www.omdbapi.com/?apikey=b76b385c&i=XXXXX&Content-Type=application/json')
      .then(response => {
        this.singleMovie = response.data
      })
      .catch(error => {
        console.log(error)
      })
  }
}
</script>
<style>
</style>
13. Display the ratings
The omdbapi will provide us the current ratings for the movie. We will display that value in the table,
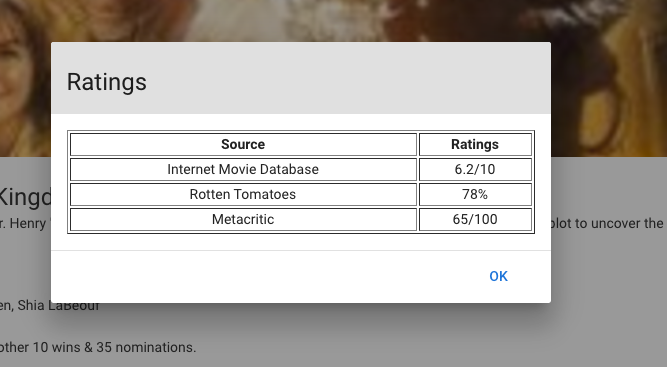
For that, will display using a modal, which will be invoked on clicking the view rating button.
<template>
<v-layout row wrap>
      <v-flex xs12>
        <div class="text-xs-center">
        <v-dialog
          v-model="dialog"
          width="500">
          <v-btn
            slot="activator"
            color="green"
            dark>
            View Ratings
          </v-btn>
          <v-card>
            <v-card-title
              class="headline grey lighten-2"
              primary-title
            >
              Ratings
            </v-card-title>
            <v-card-text>
              <table style="width:100%" border="1" >
                <tr>
                  <th>Source</th>
                  <th>Ratings</th>
                </tr>
                <tr v-for="(rating,index) in this.ratings" :key="index">
                  <td align="center">{{ratings[index].Source}}</td>
                  <td align="center">{{ratings[index].Value}}</td>
                </tr>
              </table>
            </v-card-text>
            <v-divider></v-divider>
            <v-card-actions>
              <v-spacer></v-spacer>
              <v-btn
                color="primary"
                flat
                @click="dialog = false"
              >
                OK
              </v-btn>
            </v-card-actions>
          </v-card>
        </v-dialog>
      </div>
      </v-flex>
    </v-layout>
  </template>
We are iterating a data value called ratings. This data property is from a response from API ie r_esponse.data.Ratings._
14. Add Search Movie component
For this, we need to create the following:
- Create a SearchMovie.vue file
- Create a text field in the App.vue.
- On clicking the search button, will pass the data from the text field to the SearchMovie.vue file as prop.
- In SearchMovie.vue file, we will receive the value and call the API to get the data.
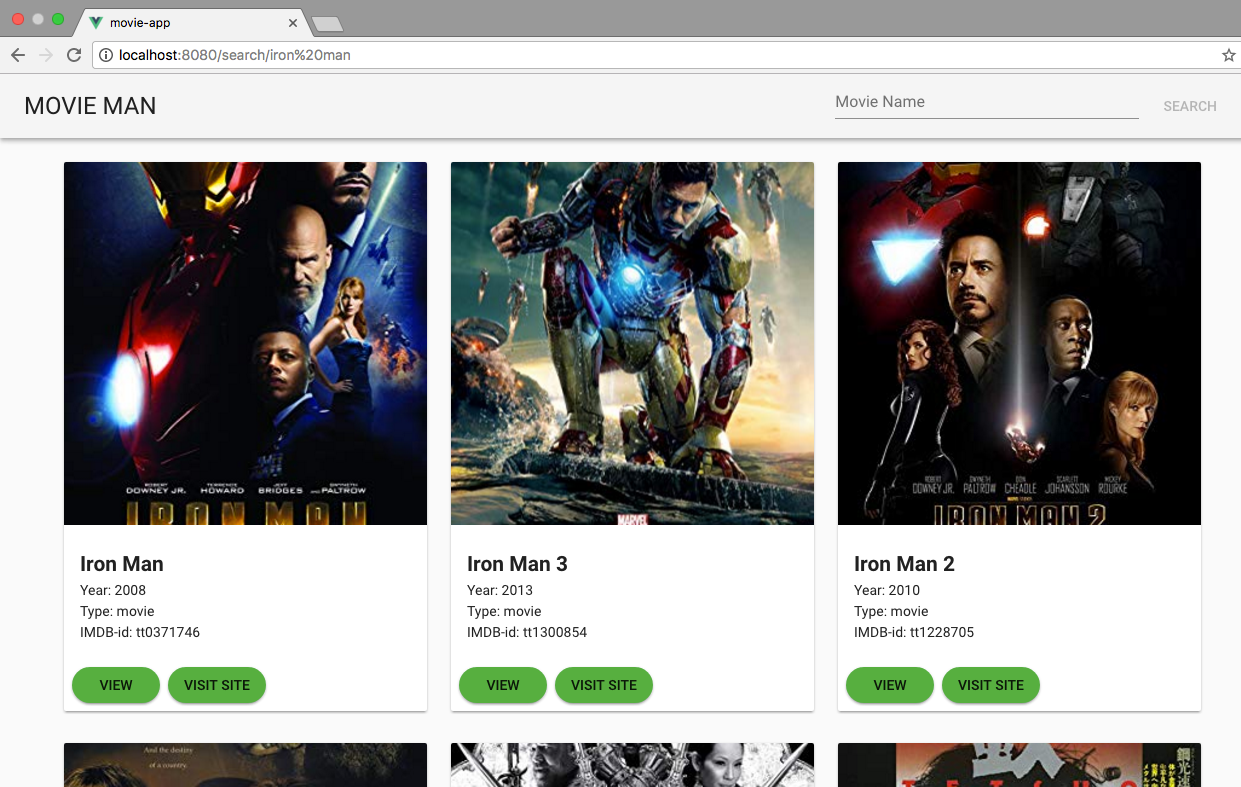
15. An issue with search movie and how we can rectify it
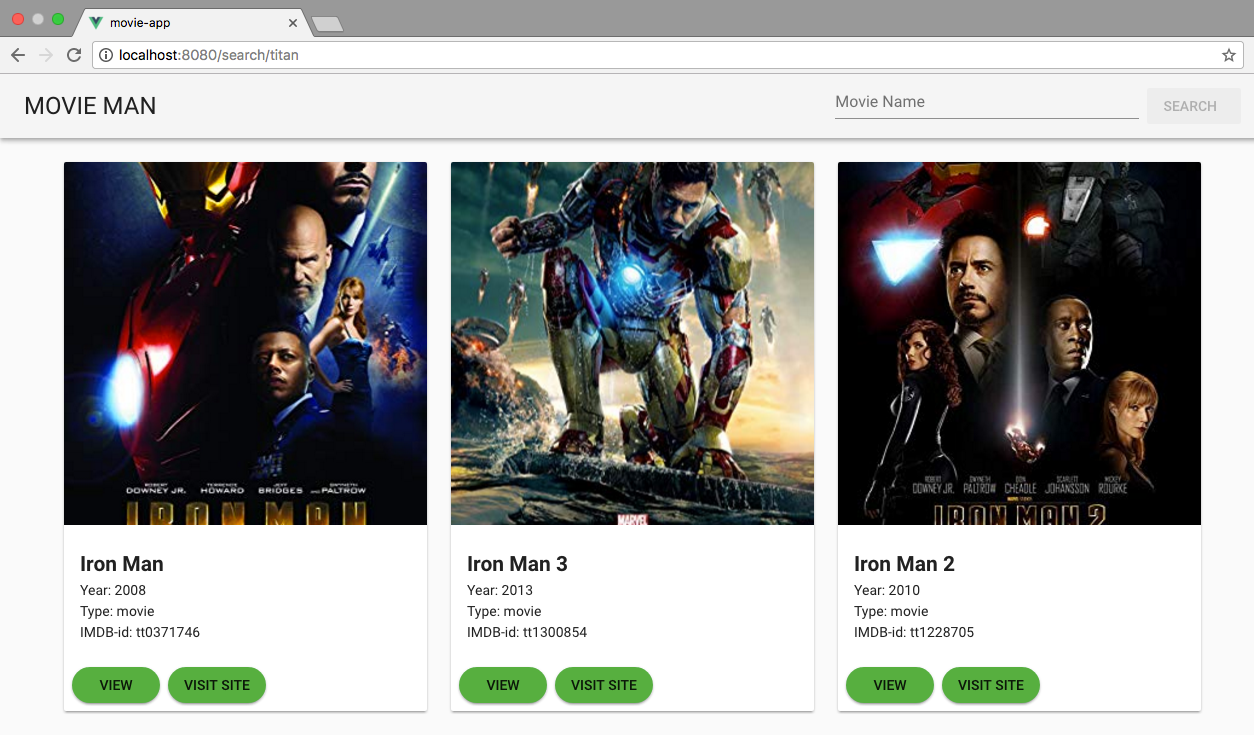
Currently mounted lifecycle hook is called only one time, when we search for one time, it displays the data, ie when searched with iron man, it shows the data. but After searching with “titan”, It shows the same data. This can be fixed by using the watch property on the props of the data called name(from the App.vue) and updated the mounted property as a method. As a result, the system will call 2 times, ie when the first loaded by the mounted lifecycle hook and again search will be handled by the watcher action for the props(name) value.
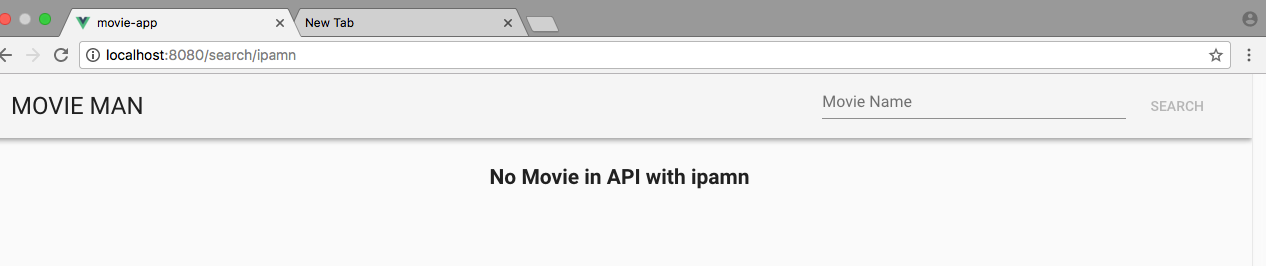
16. Add a warning message if there is no search data in the API
Suppose, when we are calling for the API with invalid movie or movie that is not available in our omdbapi . In that case, need to display a message.
We are creating a data property by default which is false, when searched data is not returning anything, will set as true and it will display the message.
commit link for the code change
17. Creating a central file for axios/refactoring
Still, our axios and API calling codes are scattered everywhere in the component. It will good if we place those all in a single place like services in angular.
For that
- Create a folder named services in src/ and create a file MovieApi.js
- Import the axios in the main.js
- Create a default URL in the main.js
- Export the MovieApi.js file
- Import the MovieApi.js in the components.
- Remove the axios code from the components and place in the MovieApi.js file.
- Call the appropriate methods from components.
commit link for the code change
18. Wrapping Up and source code
Our final output will be this:
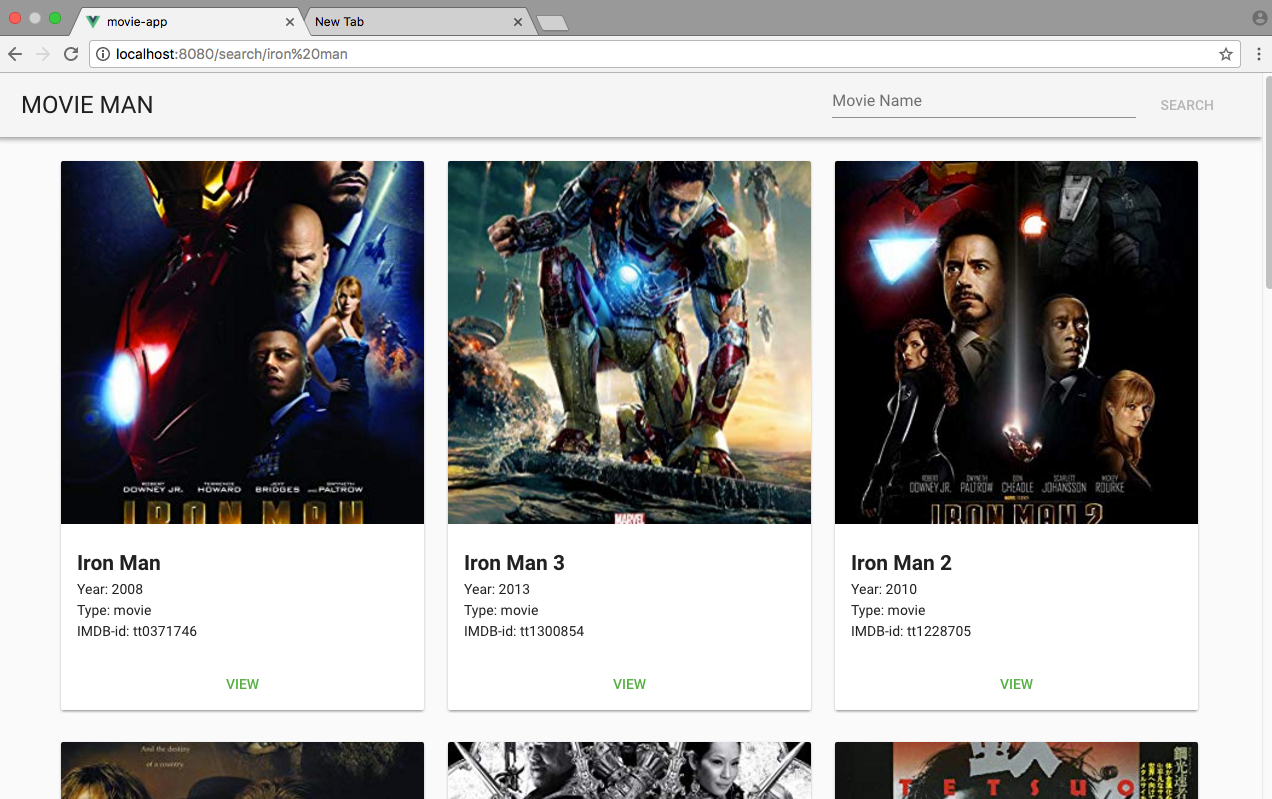

And there we have it!
I hope you have enjoyed following along. Please leave claps and comments if you liked the content and would like to discuss further!
Recommended Courses:
☞ Vuejs 2 + Vuex + Firebase + Cloud Firestore
☞ Building Applications with VueJs, Vuex, VueRouter, and Nuxt
☞ Ethereum and Solidity: Build Dapp with VueJS
☞ Learn Web Development Using VueJS
Suggest:
☞ Web Development Tutorial - JavaScript, HTML, CSS
☞ Javascript Project Tutorial: Budget App
☞ JavaScript Programming Tutorial Full Course for Beginners
☞ E-Commerce JavaScript Tutorial - Shopping Cart from Scratch